Christine de Beer - effortless floral craftsman
Bubble raft to float flowers
- 3 January 2012
- click to send Christine a smile
- and more
Flowers naturally float in water. They just don’t always naturally float on water. For that they sometimes need a bit of help.
If you want to float really delicate floral material see the Transparent ripple Tutorial below
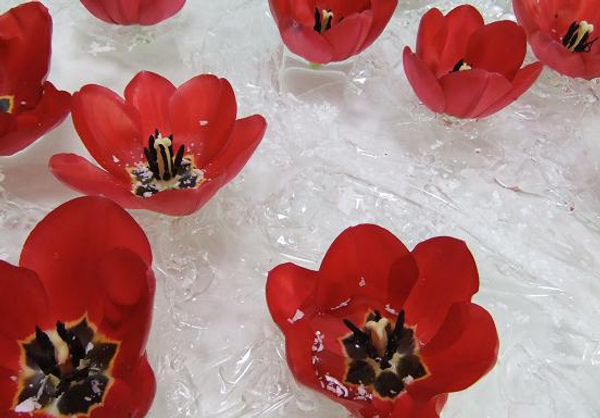
Water slowly seeps in between the petals to pool and weigh down the bloom.
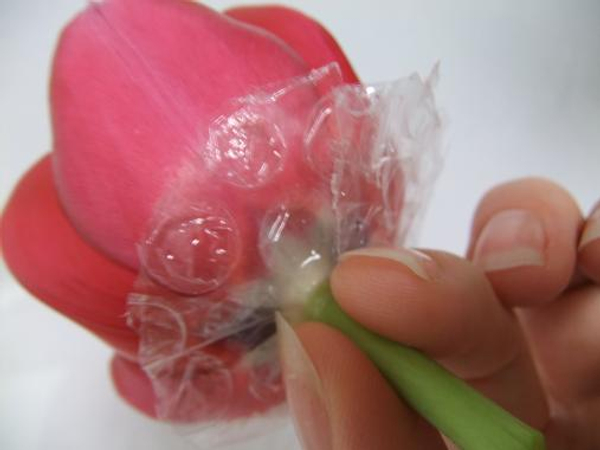
Cut the bubble raft to fit like a skirt around the flower base
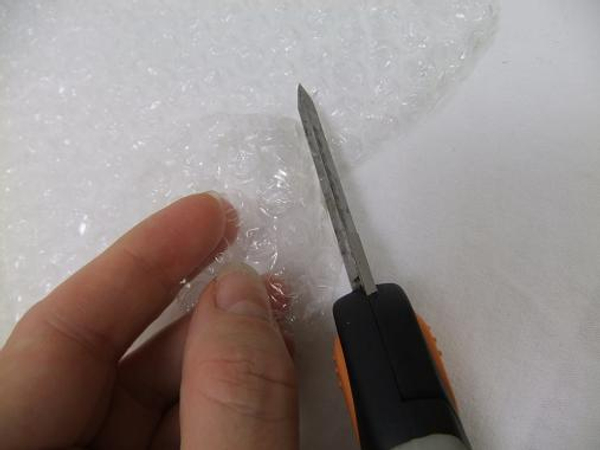
Cut a disk out of bubble wrap. Cut it just slightly smaller than the petals for flat based flowers.
Fold the wrap and cut a hole for the stem to fit through.
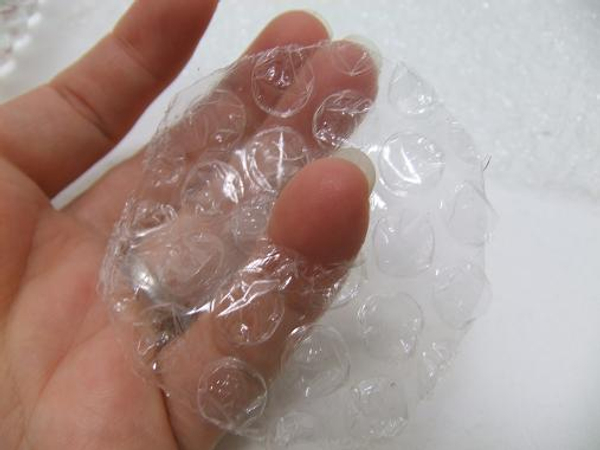
Also remember: the heavier the flower head the larger the bubble raft. In the water the bubble wrap becomes almost invisible
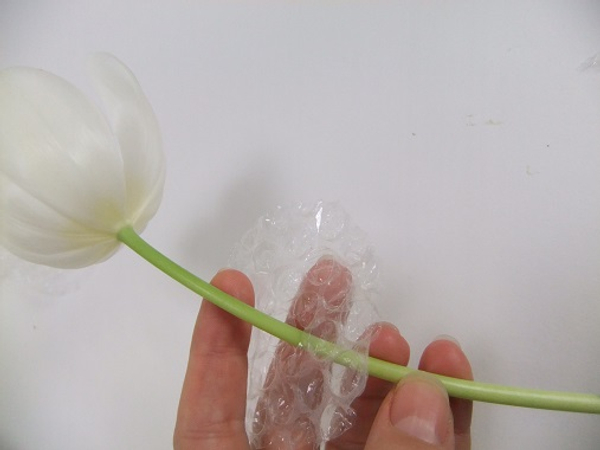
Simply slip the stem through the hole
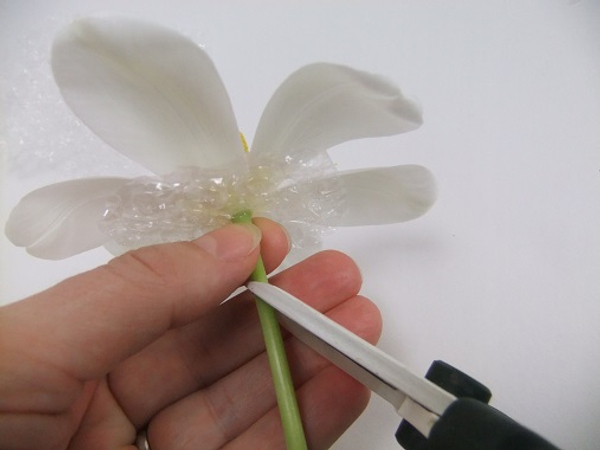
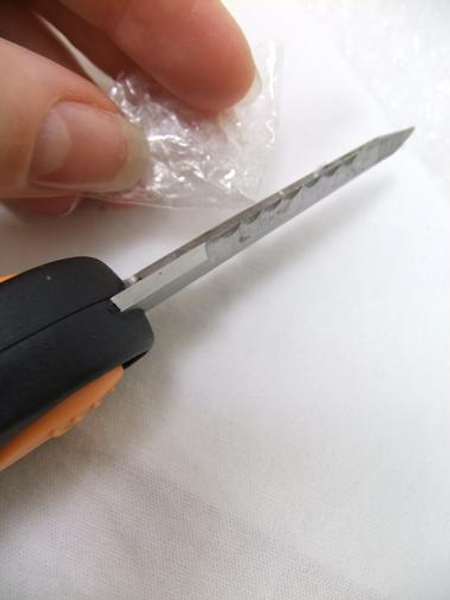
Cut the stem as short as required
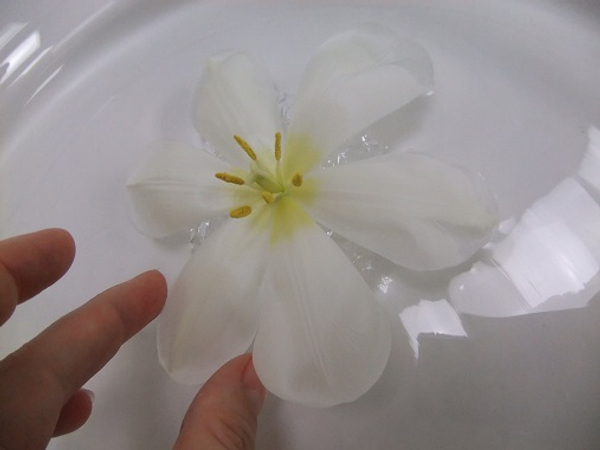
And set it in water to float
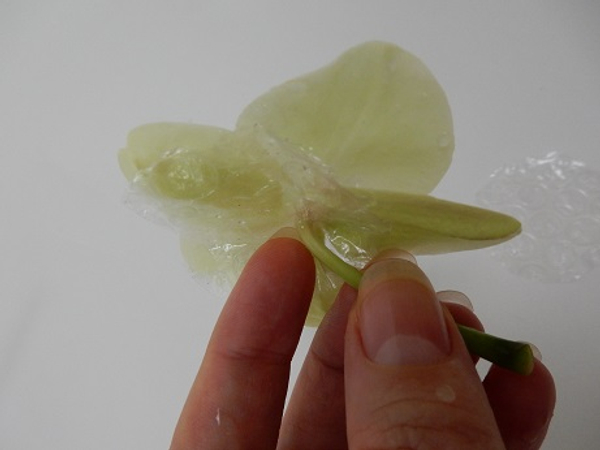
Even flat petalled orchids float better with a bubble skirt
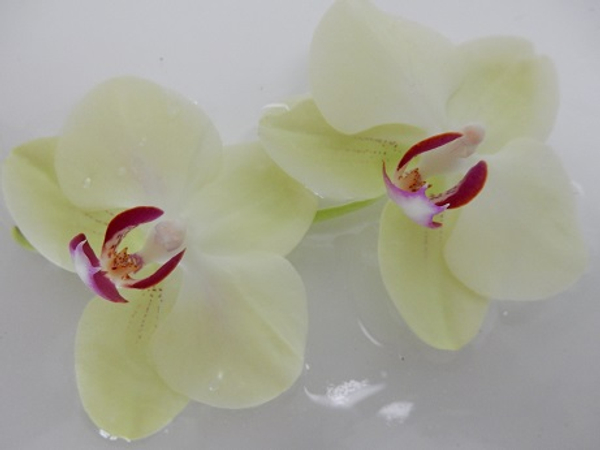
And keeps the water from slowly sinking the bloom.
Press the stem all the way through so that the bubble skirt support the petals
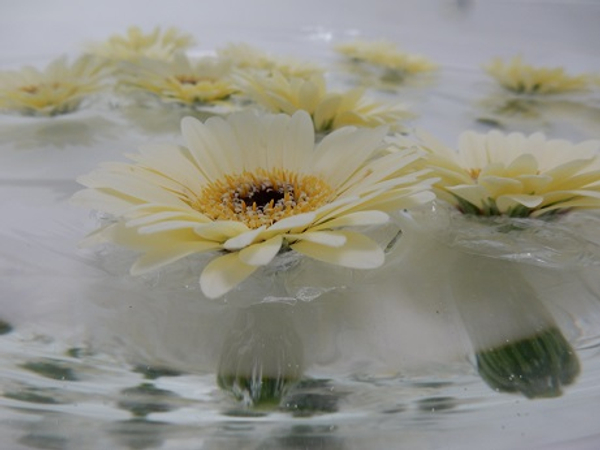
And float the flowers
Sign up for my weekly newsletter
Every week I add a new design with related tutorials. Be sure to subscribe to receive an email notification with design inspiration.
Tutorials
Tulips continue to grow after being cut. Sometimes when you make a very small design or for competition or bridal work you want to minimize growth. The best way to do this is to...
When suspending items under water it is convenient to add a tiny magnet so that you can reposition it if the water distorts the lines of your design
Give new life to an old vase by turning and balancing it on it's side. It's actually easier than it looks... and it looks super impressive!
Add a leaf to a large-ish vase to create a small puddle of water for your short flower stem to rest in.
Flowers naturally float and you will need some kind of sinker to keep them suspended under water.
Create a barely there armature with sturdy end of season vines.
Hide the water source in a rolled leaf
Fold a single blade of grass or slender leaf around a small container to stand your flower in position
Hana-Kubari is an Ikebana flower mechanic. Only natural materials such as pebbles, sticks and branches can be seen to support the flowers. Traditionally no twine or wire, nails,...
Here is a trick to make sure your tulips will condition thoroughly
Tulips continue to grow as they open. This means you not only have to be mindful of their proportions as they are now... but also as they will be once open.
Favourite Flowers
Tulip
Cymbidium, Boat Orchid
Phalaenopsis, Moth orchid
Transvaal Daisy, Gerbera Daisy, Germini
Related Designs
Is it better to go Cold Twinkle Turkey and embrace the minimalist living room or rather ease into it?
This is my article that I wrote for the Valentine's Design Issue of Canadian Florist Magazine
To celebrate the 6th year anniversary of My Creative Workbook I am looking at the most popular Tutorial I have done to date:
Create a grid to rest some plant material so that it floats and some with their stems to rest in the water below
Create a subtle contrast by floating or anchoring some of your design elements.
The third design I did for my book launch demonstration looking at aspects that influences my effortless style of designing.
I left the grass to mature so that the tips mirror the sun bleached yellow of the orchids.
A submerged design... perfect for summertime designing... and enjoying!
A mindful summer craft using banana leaves to create a floating arrangement.
Ooooh! Am I excited to show you this design. It is an ordinary fishbowl vase... balanced on it's side.
This is one of my best known and still my go-to core techniques for floating flowers.
That good old double vase trick... but this time I deliberately added a bubble between the two layers to create a third circle in the design.
One of my trusty tried and tested techniques. When the going gets hot... float your flowers!
It's Tulip Season! Perfect for that "it's still winter ... but is that something green I see...?" mood designs.
Softest Wisteria colour to cool things down on an unexpectedly warm day.
This week we look at the design featured in the Flower Guide Chapter at the very end of my book