Christine de Beer - effortless floral craftsman
Clumps of chocolate kisses on a crafted silver bush Christmas Tree
- 10 December 2025
- and more
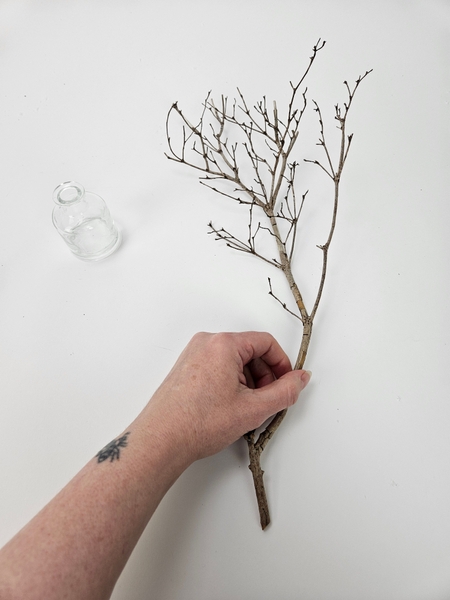
The magic trick of floral design inspiration is knowing how to look at a simple twig...
... and recognizing its inner Christmas tree-ness-ness potential.
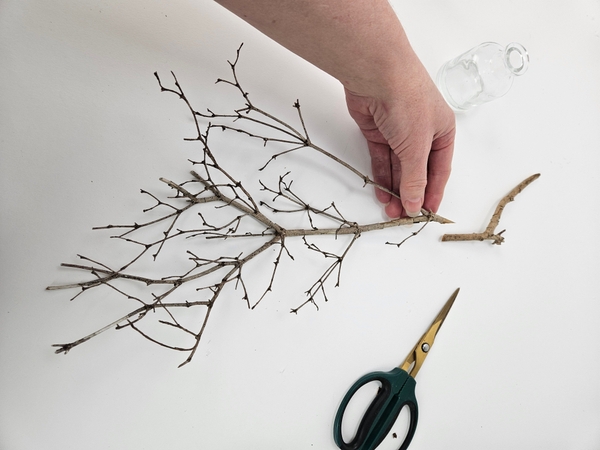
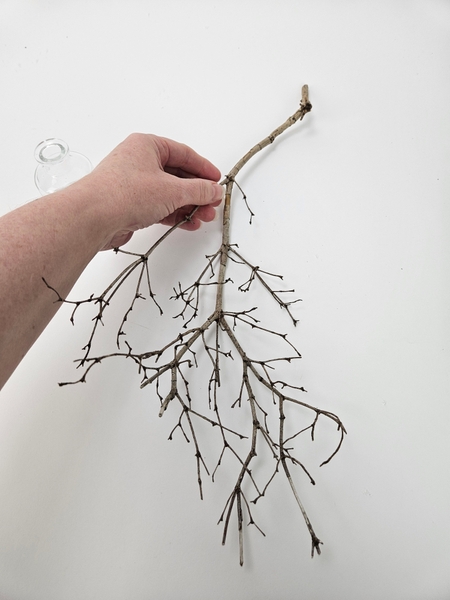
Cut a dry branch at an angle at the cut stem end...
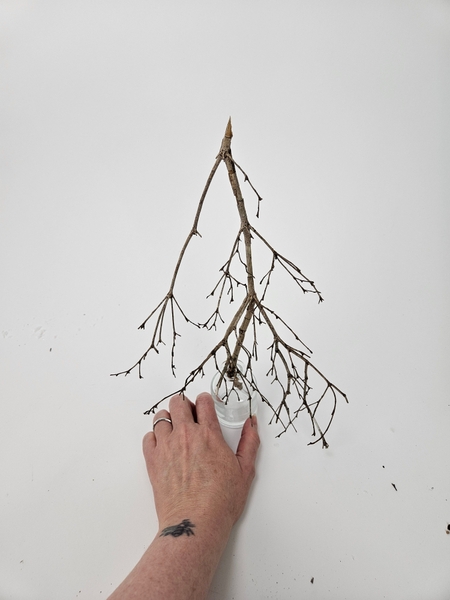
Trim away the side branched at the thinner tip end of the dried branch so that it fits neatly into a bud vase.
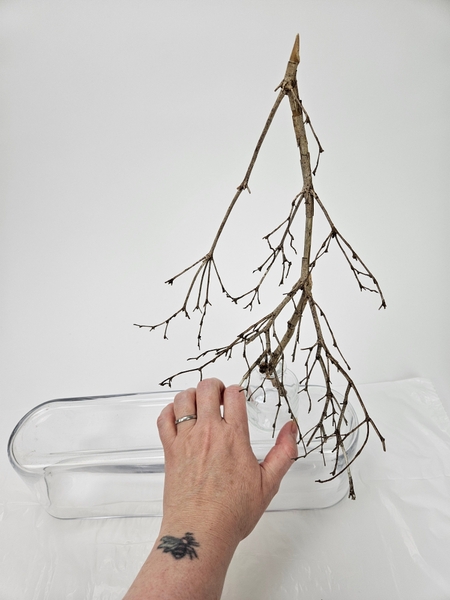
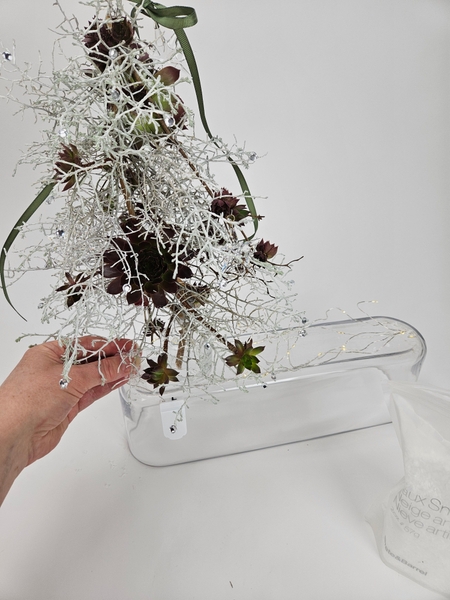
Place the bud vase on a display surface. I am displaying my table top tree on an upturned glass container...
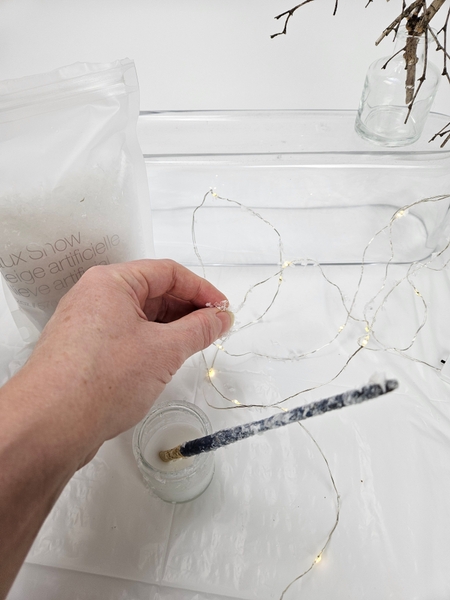
... because I want my winter white design to stand in twinkling snow. Simply paint the wire on a fairy light with wood glue and sprinkle on artificial snow. You can follow the exact same technique that I showed for how to add snow onto twigs. See the Tutorial below.
You can (of course!) also add the light to glow from inside the container if you prefer. See the Tutorial below.

Secure the battery pack to the back of the design so that it is easy to control.
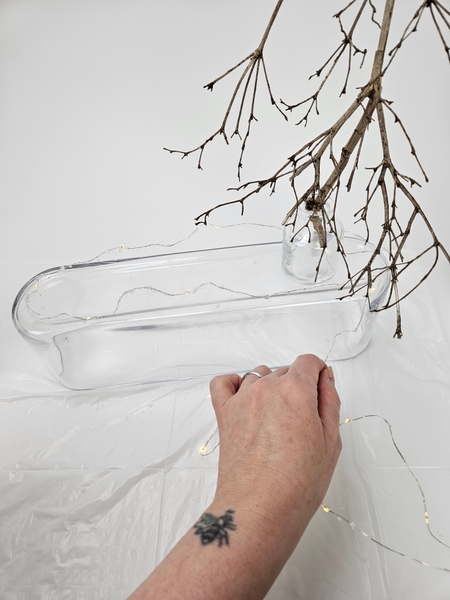
Wrap and secure the snow covered fairy lights to the display container.
Design note: Do not sprinkle loose snow to cover the lights yet. It is so much easier to clean up if you have a smooth surface to simply wipe clean.

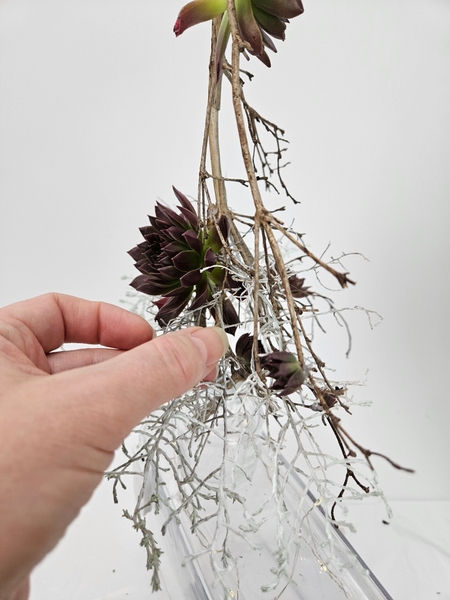
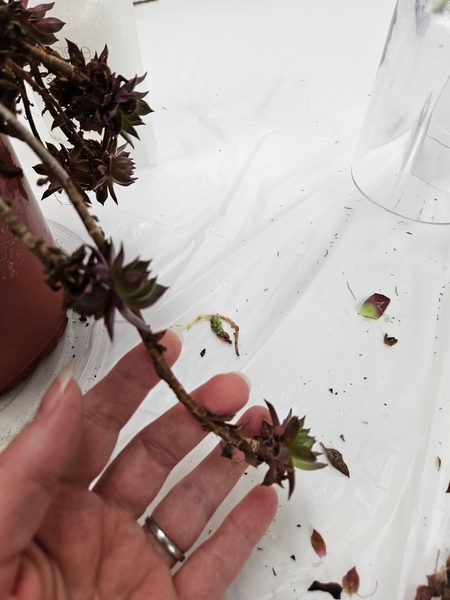
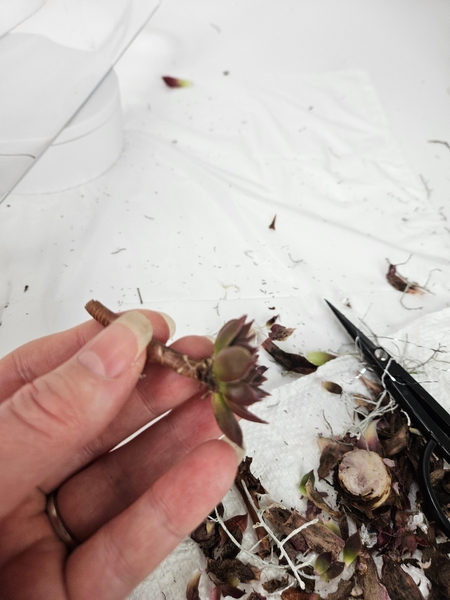
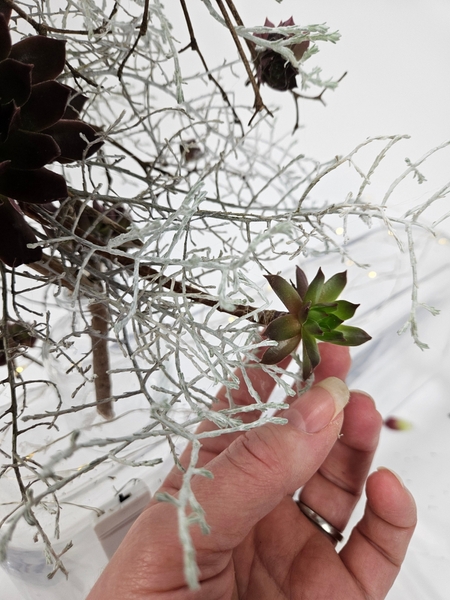
Snip a few Sempervivum 'Chick Charms Chocolate Kiss' succulents from a plant and groom them so that you can glue it into the design.
For this design I am using the grooming techniques for both gluing succulents and wiring succulent even though I am gluing in both.
Book readers turn to page 105 of my book where I show you in detail how to groom succulents so that you can glue and wire them into a design. This is a great way to allow the succulents to callus over if you want to propagate your overgrown plant.
For more information about my book: The Effortless Floral Craftsman

Glue in the first succulents. These will create depth and you will peak through the branches to notice them.
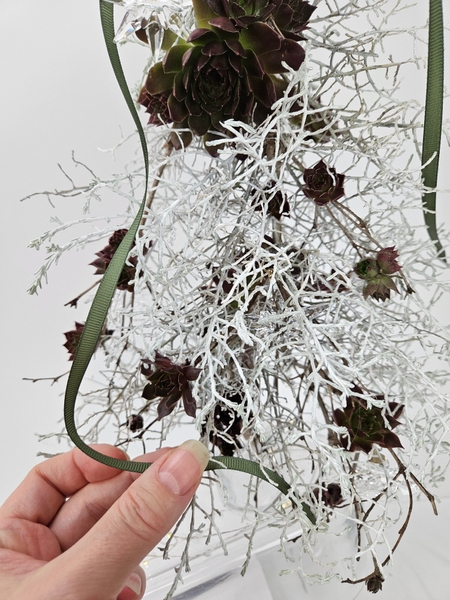
The next layer is gorgeous Calocephalus brownii (silver bush) stem branches, glued in upside down to look like a sweeping winter white Christmas tree.
Every Wednesday morning (Vancouver time), I send out a design note as an early glimpse at the newest Design and a few notes that I picked up creating the Tutorial that might be useful to you. This week, I wanted to give you a closer look at where to cut the Silver bush stems from the branch to give you the most natural “I grew this way” placement into the structure.
If you’re new here, you can sign up below this post. And if you’ve been receiving these notes for some time, I hope they feel like a welcome break in your busy week.
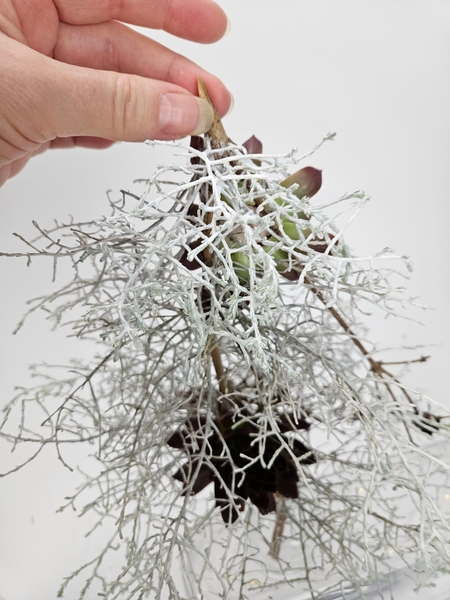
Follow the Christmas tree shape using the twig as a guide. Make sure to conceal the cut ends of the larger succulents with delicate silver bush branches.
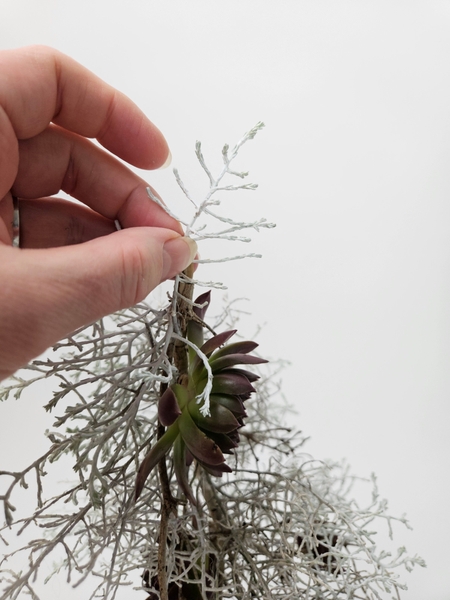
With a few sprigs at the top to soften the twig-topper.

Glue in a few more Sempervivum 'Chick Charms Chocolate Kiss' to the twig armature (the silver bush will not be able to carry the weight) to create the next layer on your tree.
Use the runners as the final layer of succulents.
Simply groom the runners as you would when wiring succulents to add them into a design...
And glue the cut end of the long runners to sweep into the delicate silver bush Christmas tree. The long runner will easily carry the weight of the succulent.

Curl a few wire hooks and add the Swarovski crystals to dangle from the Christmas tree design.
See the Tutorial below for detailed instructions on how to wire in crystal snowflakes... or baubles. Whatever you want to use to accessorize your tree.
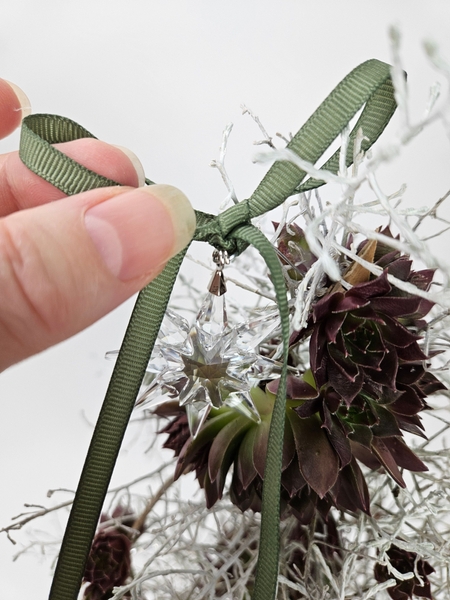
Add in a ribbon (right on trend for 2025... a ribbon tree topper!) as a the Christmas tree topper.
Cut the ribbon tails short or allow them to dangle... whatever you prefer. I like my ribbons to look a bit windblown and not overly styled so I allow it to tangle a bit...
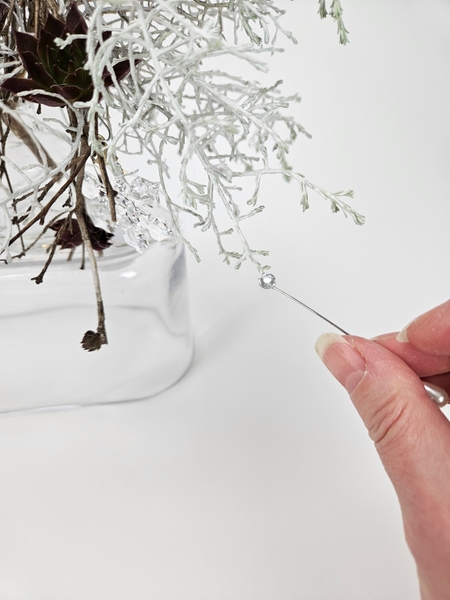
And would it really be my Christmas tree without a generous sparkling of dew drop crystals?
See the Tutorial below for detailed instructions on how and why I add these with a pin.
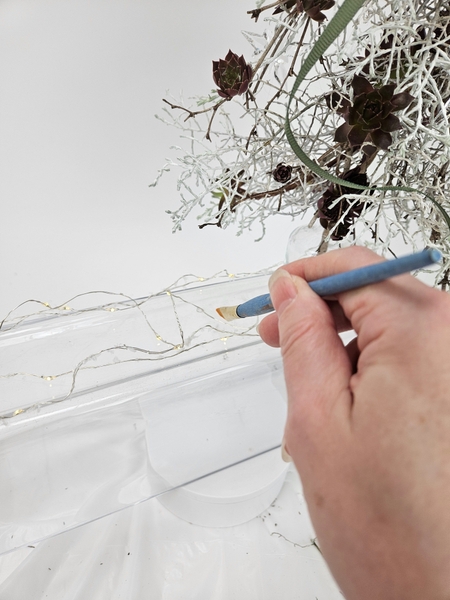
Clean up the display surface below the Christmas tree with a brush and make sure the lights are still secured where you want them...
And sprinkle a dusting of snow onto the display surface...

... and a dusting of snow to settle on the succulents to finish it off.
Sign up for my weekly newsletter
Every week I add a new design with related tutorials. Be sure to subscribe to receive an email notification with design inspiration.


