My Creative Workbook

Christine de Beer - effortless floral craftsman

Velvet Magnolia Leaf Christmas Tree

Place a magnolia leaf on a flat working surface.jpg

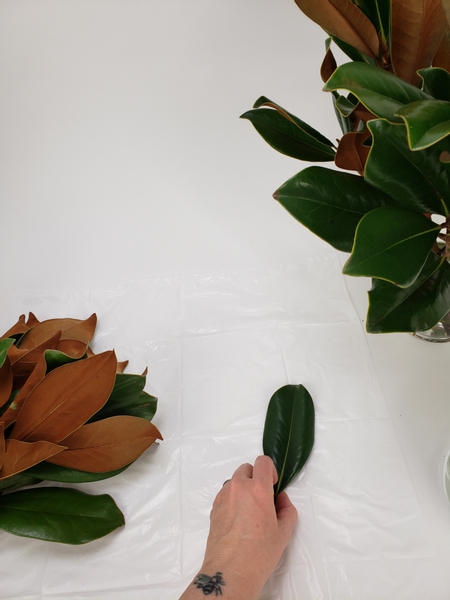
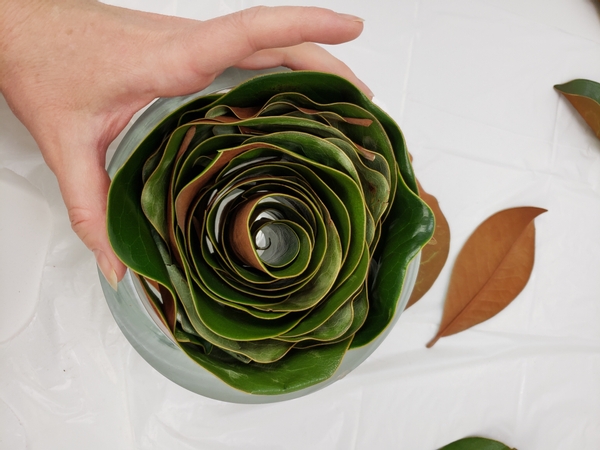
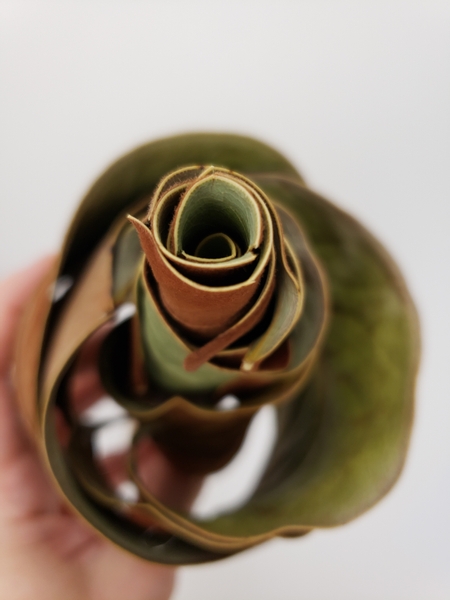
Place a magnolia leaf on a flat working surface... I placed mine fuzzy side down and stem tip facing up.

Place a skewer on the tip of the leaf and start to roll it.

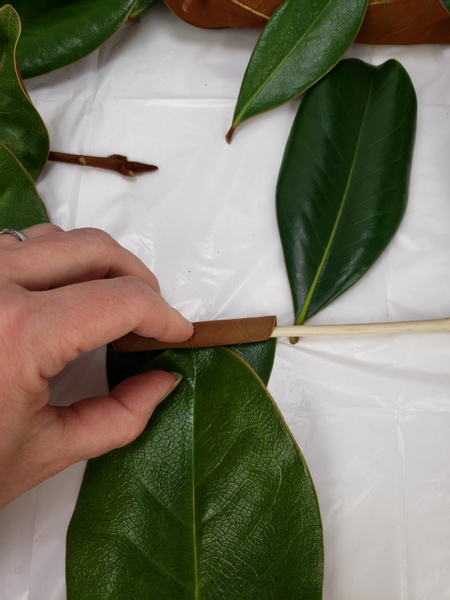
Place a skewer on the tip of the leaf and start to roll it....

When about half of the leaf is rolled up place the next leaf and continue to roll.jpg

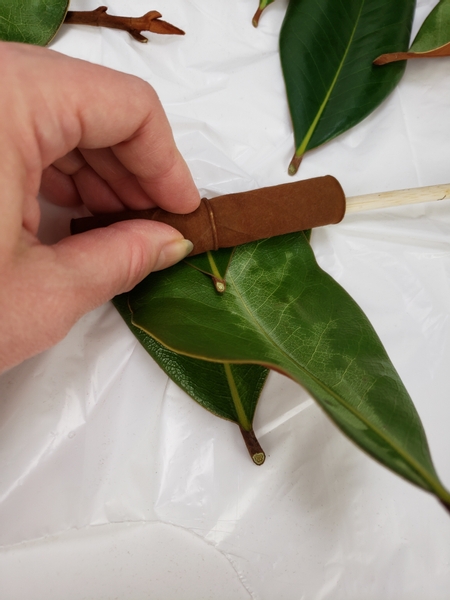
When about half of the leaf is rolled up place the next leaf and continue to roll...

Add a bit of volume to the design

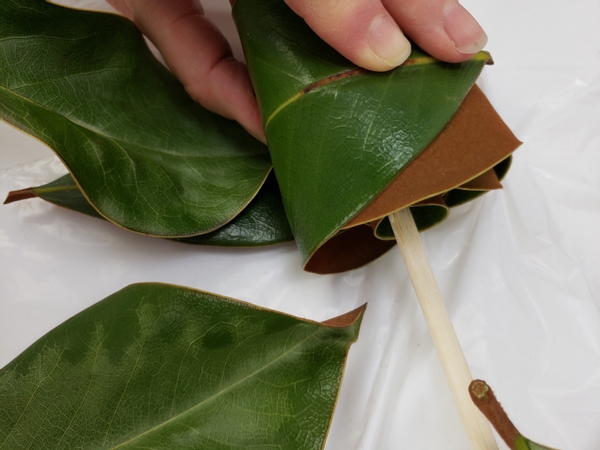
To keep the roll from just rolling flat I added a bit of volume to the design to create a ruffled rose petal effect that will give you the perfect pockets to fill with flowers once you glue the leaves into a tree.

Keep the roll on the working surface and add another leaf

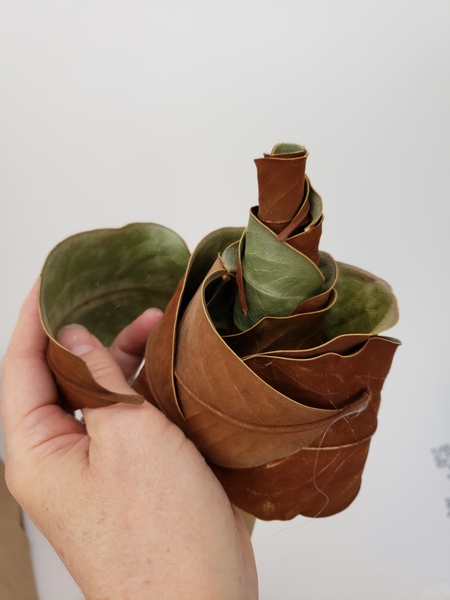
Keep the roll on the working surface to help you keep it all together and add another leaf...

To create a large leaf roll

... until you have a large enough leaf roll to design with.

Slip the leaf roll into a display vase

Slip the Magnolia leaf roll into a display vase.

And let it settle to fill the vase

And let the Magnolia leaves settle to fill the vase to dry.

It looks so pretty as it... if you want to enjoy the leaf rose while waiting for the leaves to dry into shape I have a fun design Tutorial for you below. Simply add a few berries...

Lift the dried leaf rose out of the vase

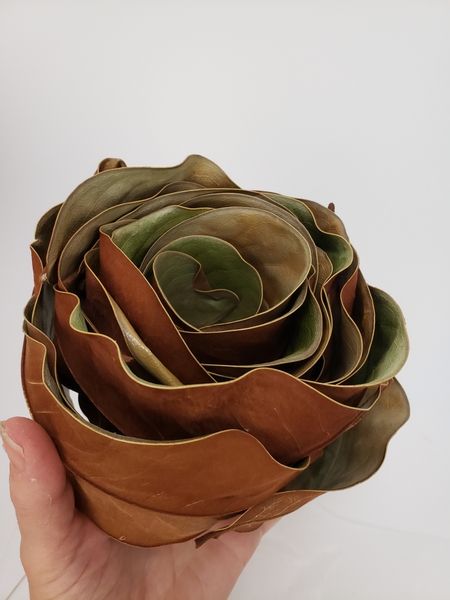
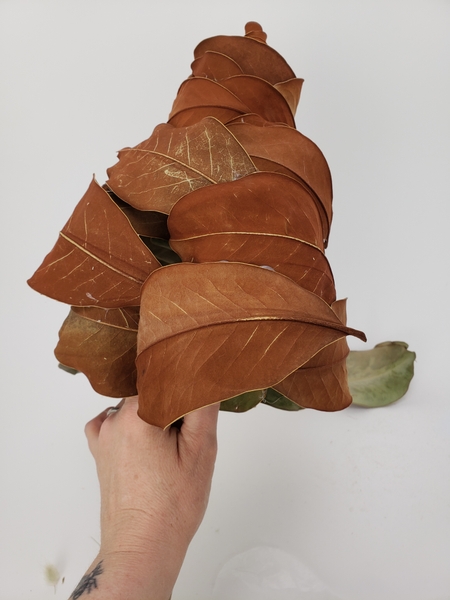
Lift the dried leaf rose out of the vase...

Glue the inner most curled leaves on top of a paper tube

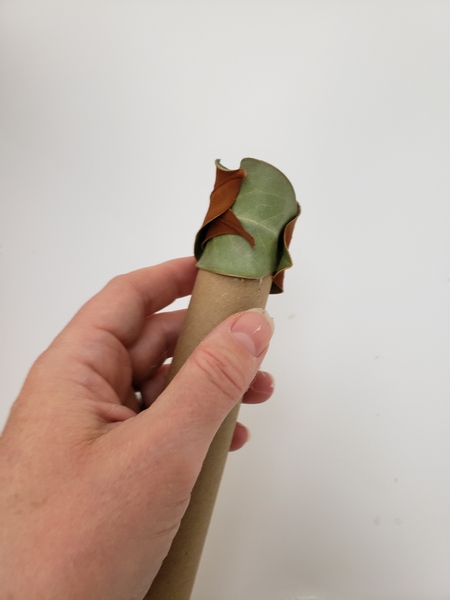
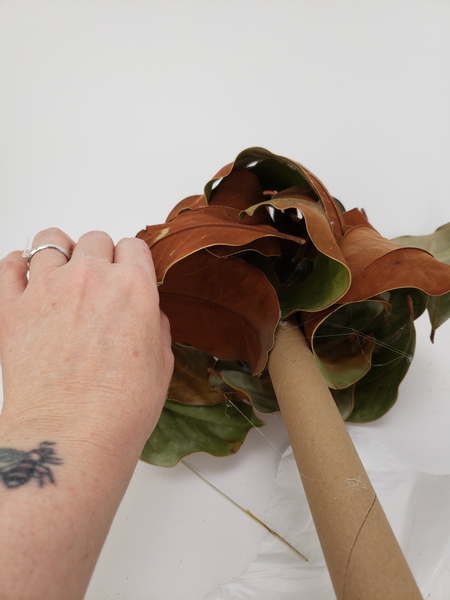
Glue the inner most curled leaves on top of a sturdy paper tube.

Lift out the next set of curled leaves and glue it just below the first

Lift out the next set of curled leaves and glue it with hot glue just below the first.

Move down the tube and glue in leaves

Move down the tube and glue in leaves.

Alternate leaving gaps to the sides

Alternate leaving gaps to the sides to give the tree that Christmas tree shape.

Keep the dried leaf shape and neatly together as possible

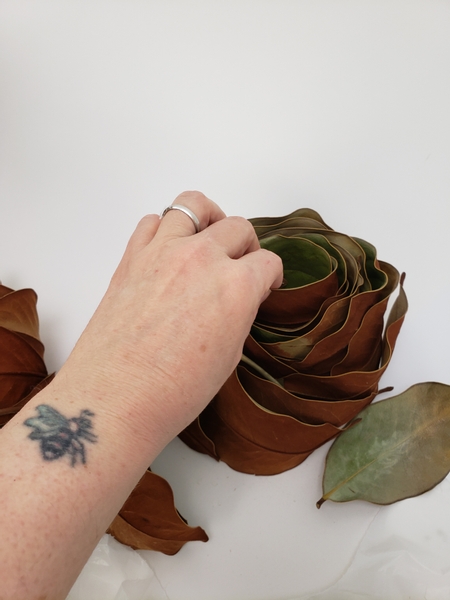
Design Note: If the leaf shape comes undone it is going to be difficult to put it back together. Keep the dried leaf shape and neatly together as possible by working from the inside out. Simply lift the innermost few leaves and glue it into the tree shape.

Have a look from all sides so that you widen the tree shape all the way around

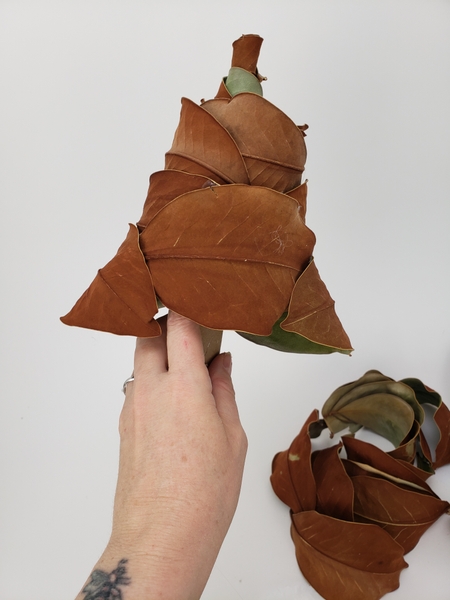
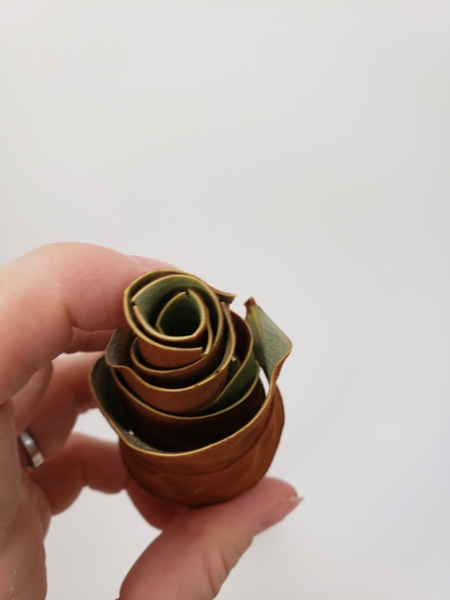
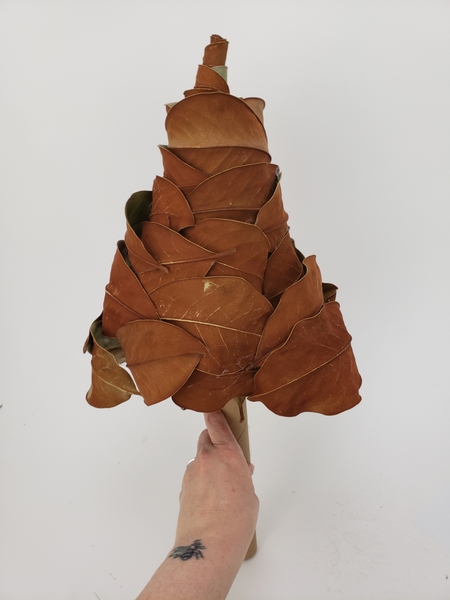
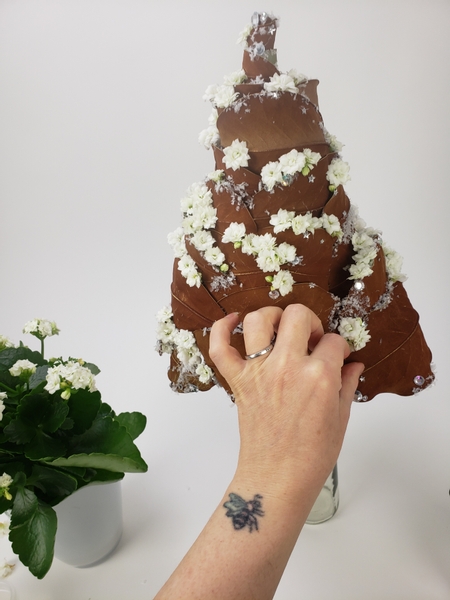
Hold up your leaves and have a look from all sides so that you widen the tree shape all the way around

Tack the leaves in to lightly sit around the edge of the leaf tree

Glue the leaves in to lightly sit around the edge of the leaf tree so that you craft a light and neat shape.

This week in our email I show you closely what I mean with "glue lightly". If you are not yet receiving my Wednesday morning (Vancouver time) email you can sign up below this post. I send out the email to you the moment the design is ready to view. Each week with a bit of a closer look at something that I found interesting about the design. This is also a great way for us to connect. Oh yes... I answer all the emails. So if you have a question or a comment or want to say hi, I would love to hear from you.

Once you have the basic shape set the tree down on your working surface and add leaves to cover the bottom

Once you have the basic shape set the tree down on your working surface and add leaves to cover the bottom so that it looks finished off if you look up into it.

Strictly not necessary, I know but the tree stands tall and you will be tempted to view it from below. This tiny added touch makes it pretty from all angles.

If you are also the kind of designer who likes to do a bit more than you have to... you will enjoy my book. Turn to page 369 for a bit more details.

For more information about my book: The Effortless Floral Craftsman

Now for the fun part to decorate our magnolia tree

Now for the fun part... to decorate our magnolia tree.

Set the tree on a display container

Set the tree on a display container to make it easier to work on. I found it fits perfectly into the opening of a glass bottle. But I will show you more about that in a moment.

If you are using the container below for display as well cover it to keep it clean

Things are going to get messy for a moment so if you are using the container below for display as well cover it to keep it clean.

Paint the edges of the magnolia leaves with thinned wood glue

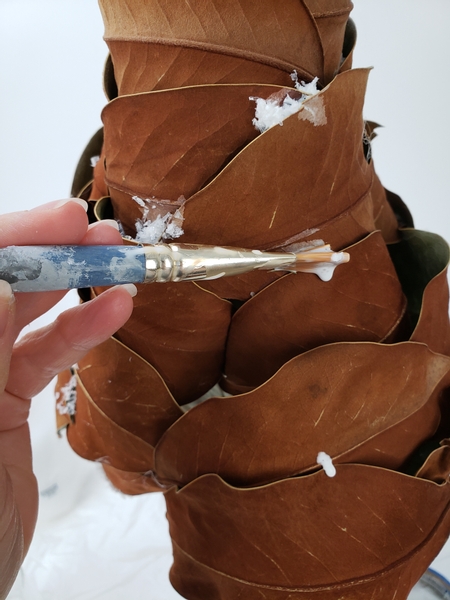
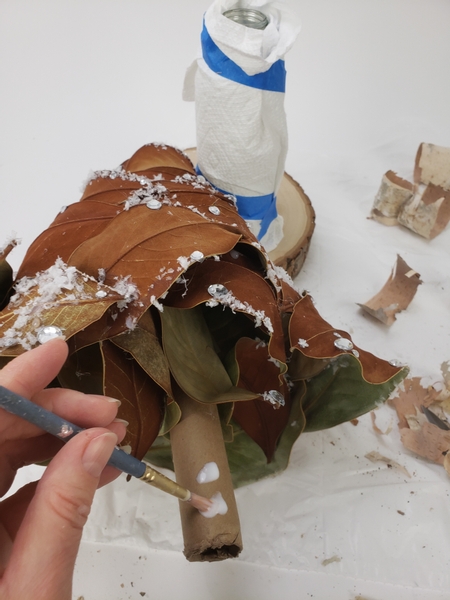
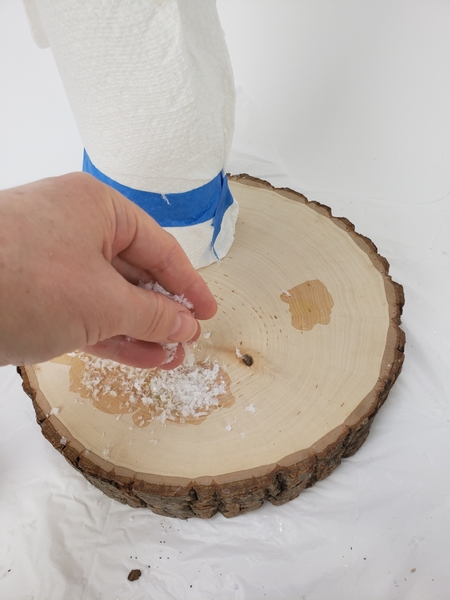
First we add a dusting of snow. Paint the edges of the magnolia leaves with thinned wood glue...

And sprinkle artificial snow on the wet glue

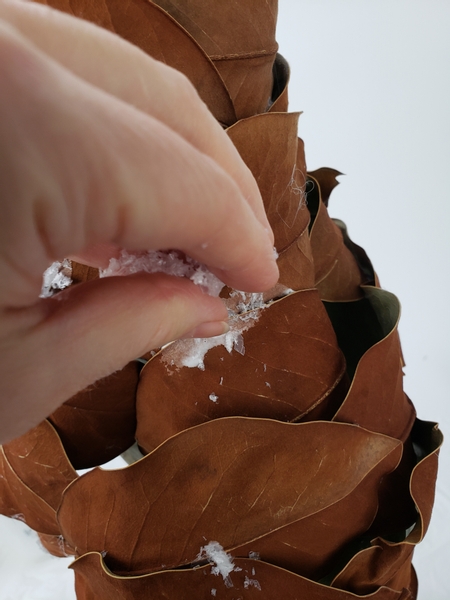
And sprinkle artificial snow to stick on the wet glue.

See the Tutorial below for more detailed instructions on how to add artificial snow.

Set the tree aside for the glue and snow to dry

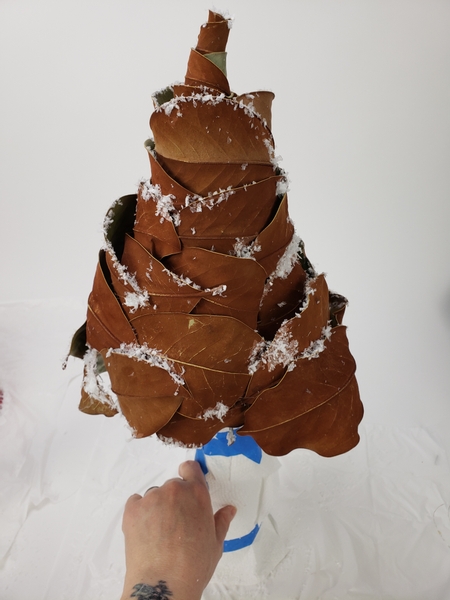
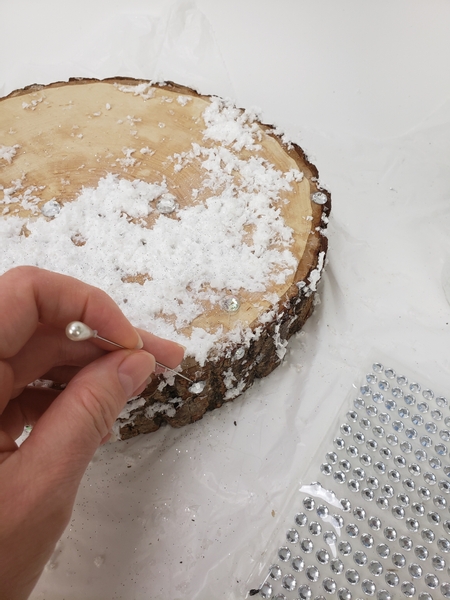
Set the tree aside for the glue and snow to dry.

Once dry enough I am adding in my stars and dew drop crystals

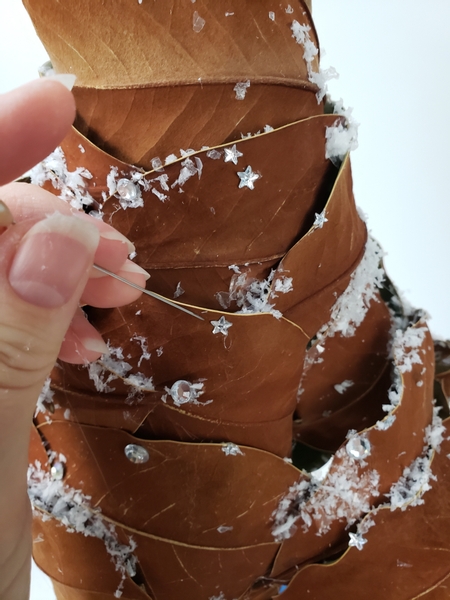
Once dry enough I am adding in my stars and dew drop crystals.

You can find a Tutorial below for more detailed instructions on how I add my crystals. You will notice that I am adding only a section of the tiny star crystals. I am also adding long strands of star fairy lights and created a panel of tiny starts to sit behind it on the tree. Again... it's those tiny details, right?

Strip some bark from a branch

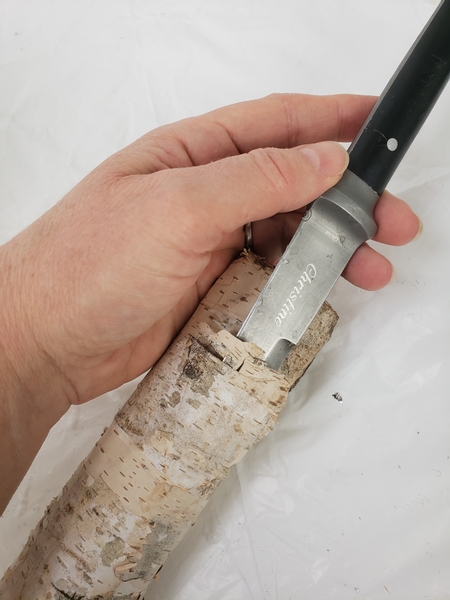
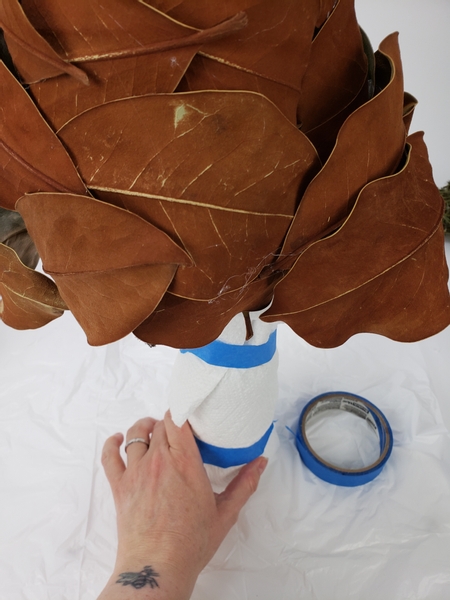
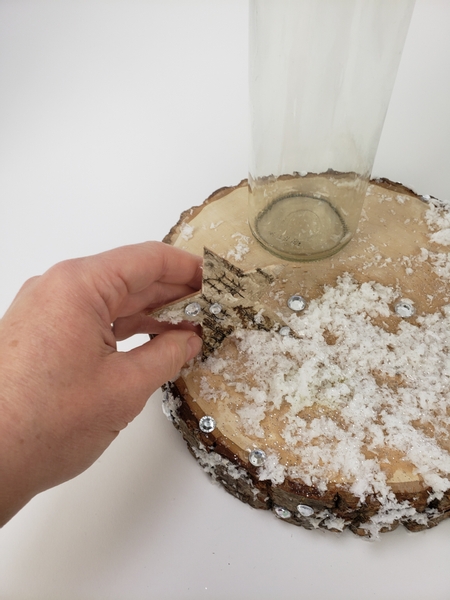
Strip some bark from a branch with your knife...

Paint the cardboard tube with wood glue

Paint the cardboard tube with wood glue...

And smooth the birch bark over the cardboard

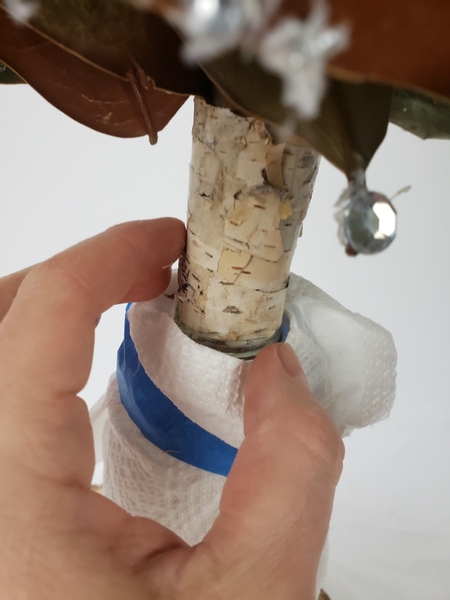
And smooth the birch bark over the cardboard.

You can also create a veneer with different types of bark. See the Tutorials below. But make sure whatever you use will be thin enough so that the tree can still fit in the display vase or bottle.

Place your display bottle on a tray or wooden log and paint with glue

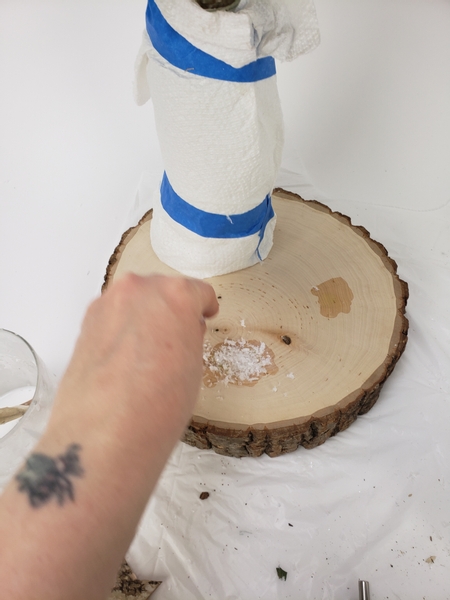
Place your display bottle on a tray or wooden log and paint with glue and sprinkle with artificial snow...

Sprinkle the log with artificial snow

Build up the snow surface so that you have a puffy amount of snow top create a pretty scene below the tree.

Once you have a good amount of snow stuck to the base add a few dew drip crystals

Once you have a good amount of snow stuck to the base add a few dew drip crystals.

Glue Kalanchoe flowers into the gaps

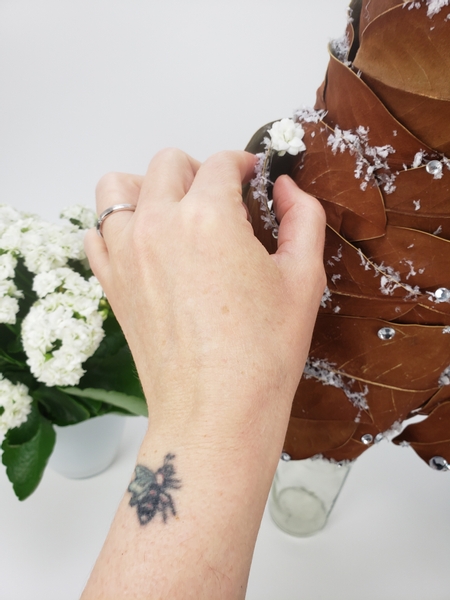
Glue Kalanchoe flowers into the gaps...

And add in a few of the succulent flower buds to finish off the design

And add in a few of the succulent flower buds to finish off the floral clusters.

Remove the cover from the display container and set it on the base

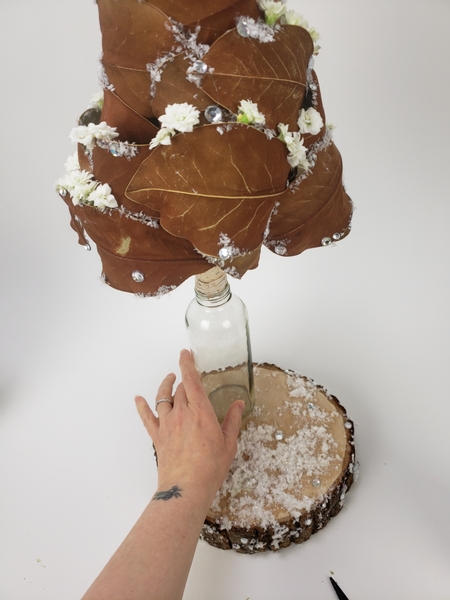
Remove the cover from the display container and set it on the base...

Glue in a few strands of tillandsia

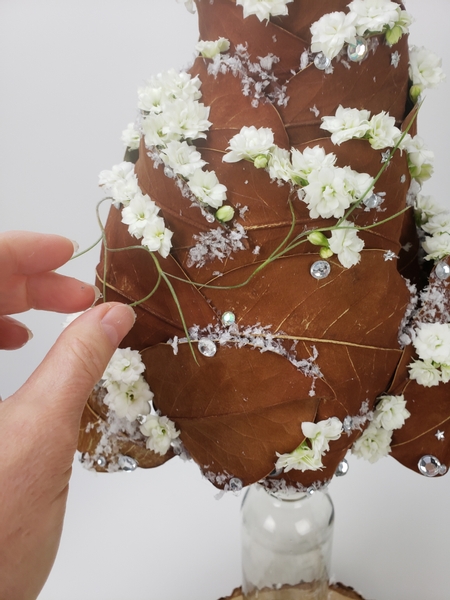
Glue in a few strands of tillandsia...

My next step is to add a few star details

My last step is to add a few star details... See the Tutorial below for detailed instructions.

Every week I add a new design with related tutorials. Be sure to subscribe to receive an email notification with design inspiration.

Tutorials

16 November 2022 Magnolia Rose Bowl with the brightest Holly berries and Kalanchoe flowers

Long lasting berries, magnolia leaves and succulent (kalanchoe) flowers that can remain without any water or maintenance for... well... all the way to Christmas!

20 December 2023 Starlight Garland

Fold a continues strand of stars on a wire fairy light strand.

8 July 2015 Using a pin to place tiny dew drop crystals

It's sometimes difficult to place a tiny crystal or bead exactly where you want it.

20 December 2017 Twinkle and Pine Christmas Star

Use a cardboard shape to craft a simple wire Christmas star

14 December 2016 Bark and Cotton Candy Cane

Cover a cardboard shape in cotton and bark to create a floral armature

14 December 2022 Sparkle Spool and Velvet Magnolia Table Top Christmas Tree

A pretty way to warm up your living space with the luxurious velvet texture you find on the underside of Magnolia leaves.

19 December 2018 Sparkling Eucalyptus Tabletop Christmas tree

Craft an ethereal Christmas tree from Eucalyptus leaves, twigs and sparkling snow flake crystals.

4 December 2019 Eucalyptus collar for a snow-covered Christmas candle

Not only will your home smell wonderful while crafting this design you will also have a ethereal and long lasting design to enjoy.

21 December 2016 Bark Christmas Stocking

Cover a wire frame to create a Christmas stocking armature

28 December 2016 A bark strip and fluffed cotton disk wreath

Cover a wreath frame with bark strips and fluffed out cotton

18 November 2020 Foam free and flameless cardboard and bark yule log

Using all those cardboard boxes to craft a bark covered "log" design for getting a head start on Christmas decorating.

28 December 2016 Adding snow to twigs

Glue artificial snow to twigs

13 December 2017 Long lasting bark and Kalanchoe sleigh

Kalanchoe flowers last weeks without a water source and is the perfect way to dress up a bark and silver bell sleigh

Favourite Flowers

Kalanchoe

Christmas Kalanchoe, Kalanchöe or Kalanchoë

Related Designs

20 December 2023 A Very Merry Dark chocolate Velvet Texture of Yore, Tall and Trendy Christmas Cheer

Tall and velvety Christmas tree... with a starlight garland

22 January 2013 It's High Time for Tea: from craft to art, taking a delicious floral journey with veneer techniques

This was my second two designs for my It's High Time for Tea Floral Craft and Art Demonstration at The Capilano Flower Arranging Club meeting.

20 December 2017 A Very Merry Christmas Star

A wire Christmas star with a secret plan to hide the twinkle

14 December 2016 A Candy(cane) Cotton Christmas

A floral cotton candy cane

14 December 2022 Joyf'ly

Table top Christmas tree with a fairy light twig trunk.

19 December 2018 Oh Florist-tree

Craft an Eucalyptus Christmas tree

4 December 2019 A Very Merry eucalyptus-collar-candle Christmas!

An easy and naturally fragrant winter white candle decoration to bring nature into your house this Christmas.

21 December 2016 A Gleaming Cotton Christmas

Glue bark to a wire frame to create a Christmas stocking armature

28 December 2016 A Jingle Cotton Christmas

Cover a wreath frame with bark and cotton for a textured Christmas wreath design

18 November 2020 Have yourself a Merry Cellulose Fibre Christmas: Yule log

...ok not really that fancy- it’s made from paper pulp. A cardboard box Yule log… really. In the spirit of 2020- I am inspired by the endless stream of cardboard boxes being...

13 December 2023 A Very Merry Naked Tree and Woodland Woodsy and Oversized Flowers Trendy Christmas Cheer

From now to a bit after New Year's Eve I will show you my take on the trends for Christmas 2023. This week I am continuing with a garland bowl and a cone and twig reindeer.

13 December 2017 Just hear those sleigh bells jingling

Craft a bark sleigh that will last for weeks.