Christine de Beer - effortless floral craftsman
Knot a vine wreath and ripped grass bug net
- 28 June 2023
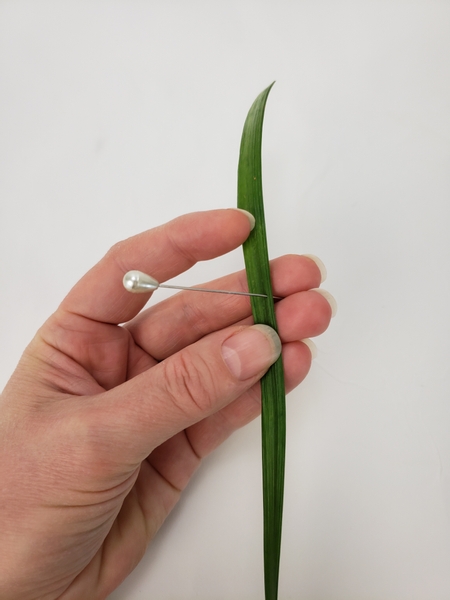
Use a corsage pin to rip grass into sections.
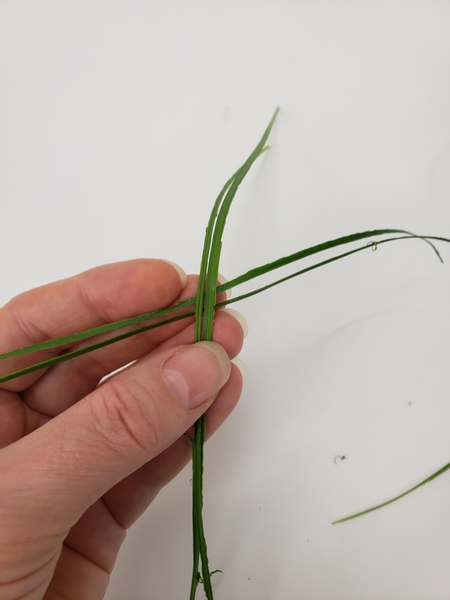
Cross over four ripped grass sections.
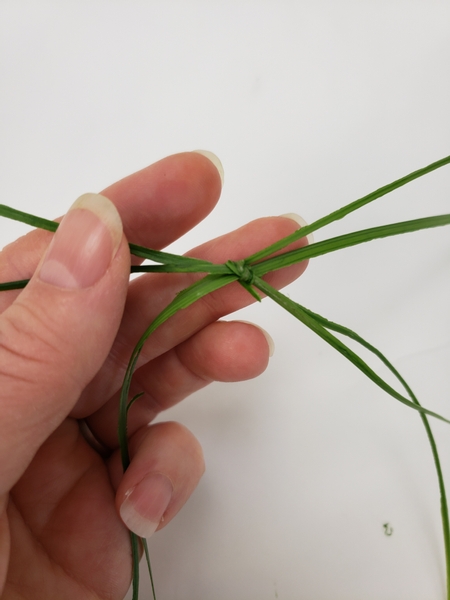
Knot the grass in the middle.
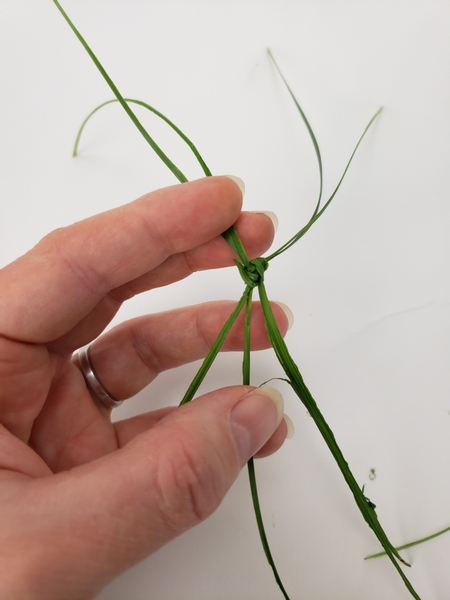
Split the grass into new pairs...
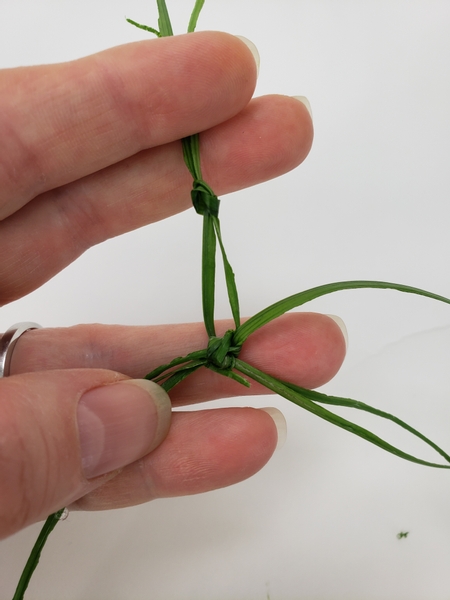
And knot the new grass pairs about a finger width down the grass section.
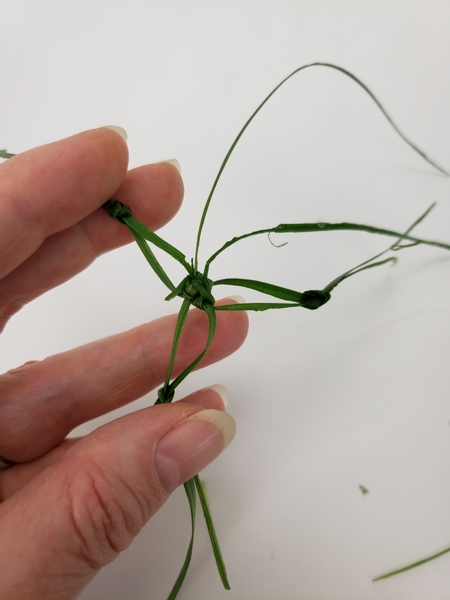
Split the next new pair and give it a knot...
Move all the way around and knot the grass into pairs.
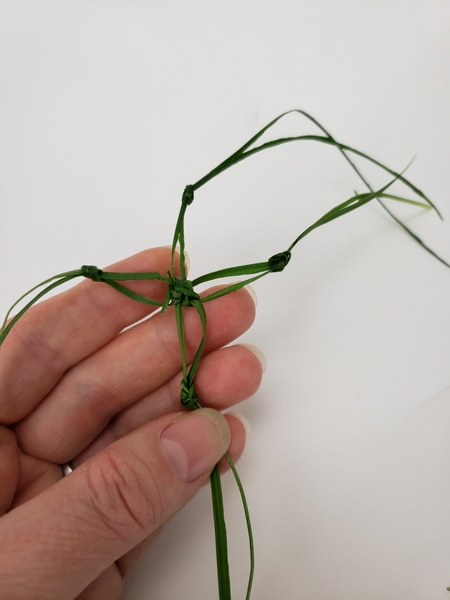
Split the grass again and knot new pairs above the previous knots.
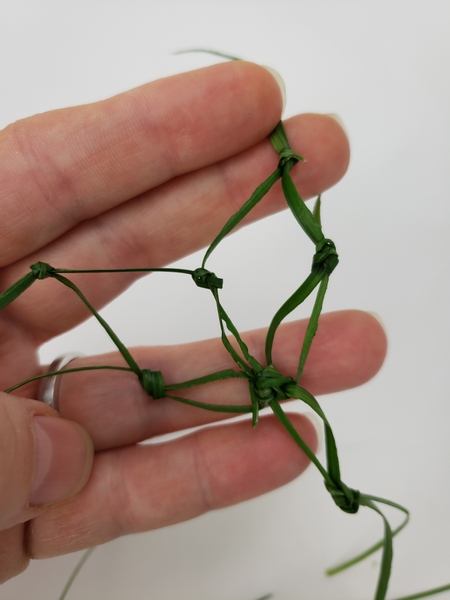
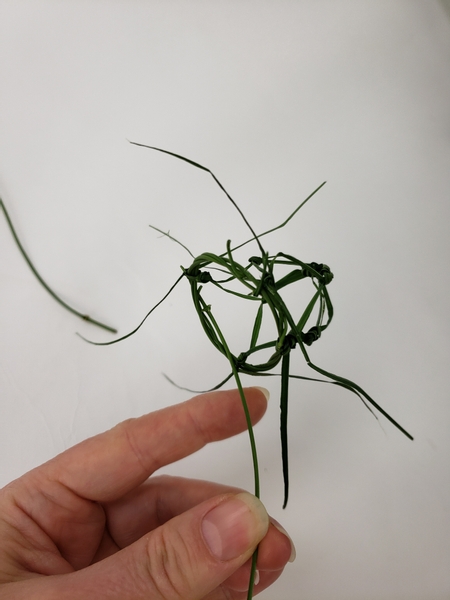
Move all the way around to knot and shape the net pairing the ripped grass with a knot.
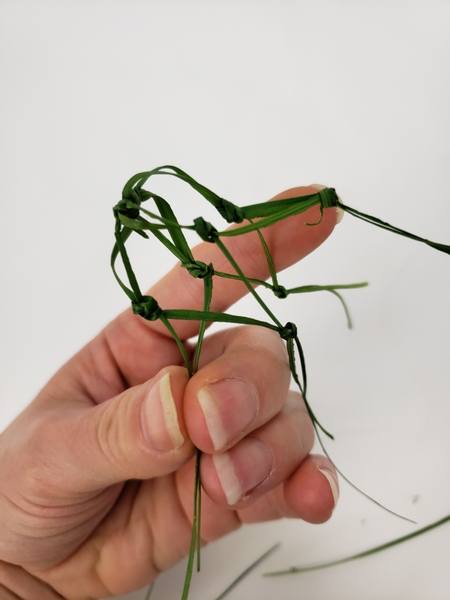
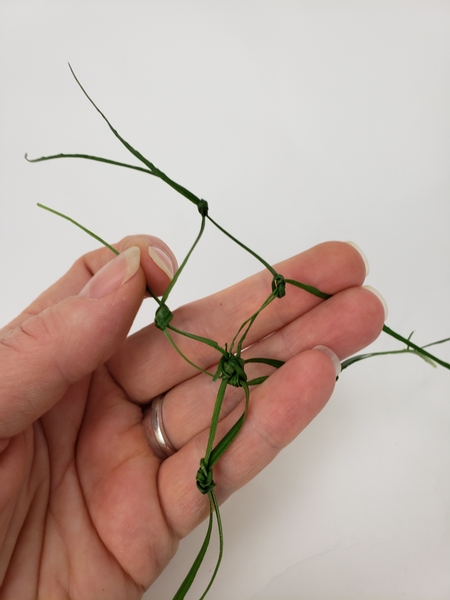
Knot the last pair to close the side of the basket of the net.
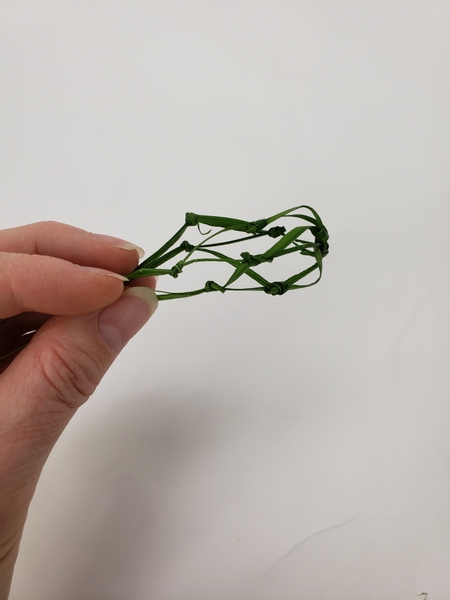
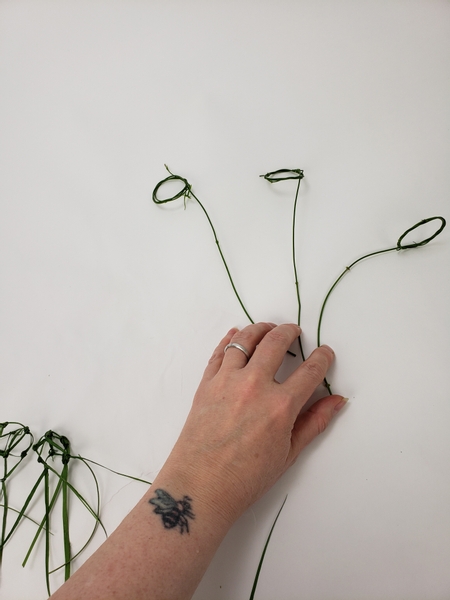
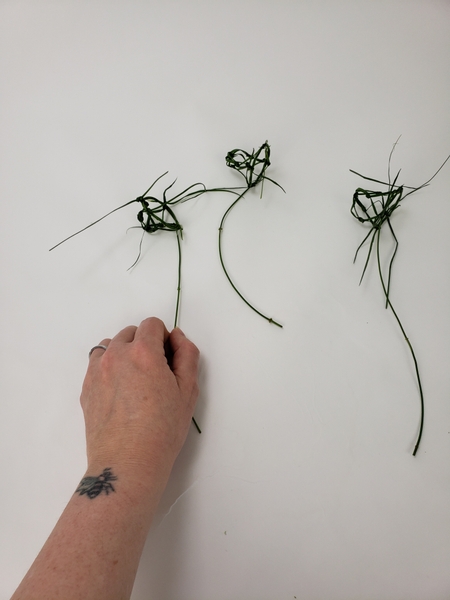
Gather the ripped grass together to attach to the wreath vine handle
Design note: make the basket and the handle while the plant material is still fresh and pliable. Once the grass dries the shape of the net will be set.
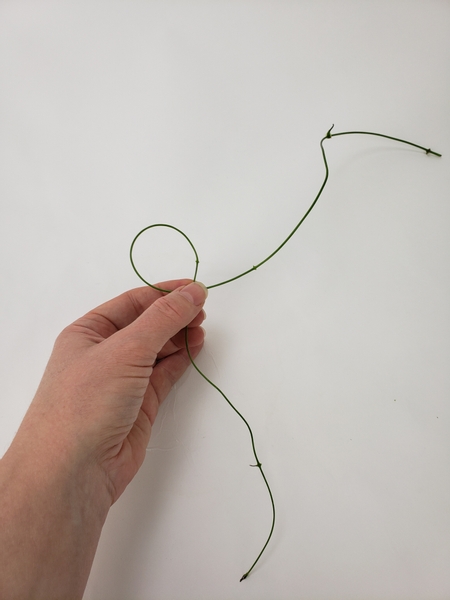
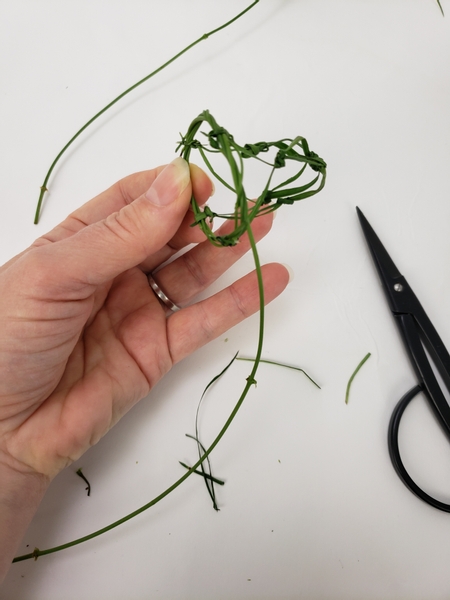
Curve a vine into the round size you want the opening of the net to be.
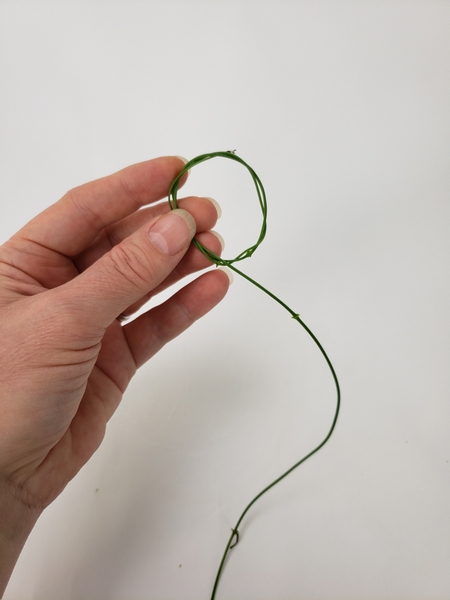
Weave a wreath using the more pliable vine tip to secure the wreath opening.
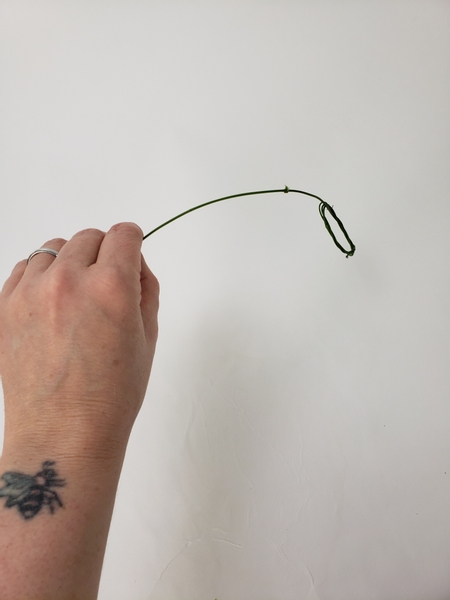
Adjust the length of the handle by weaving in the cut end of the vine through the wreath.
Book readers turn to page 284 where I show you more about manipulating stems and weaving it into small design details.
For more information about my book: The Effortless Floral Craftsman
Each net-wreath sits slightly different on the vine. This gives it a more natural look when styling the design... but it is also harder to get it just right for the look of your design. I do like the more organic look that the woven stems give to the nets. It is a bug net, after all. I wanted the design to look like it was created outside to catch... inspect... and release these curiously shiny bug that we spotted. Maybe on our Canada Day picnic? Made right there between the flowers, the grasses and the loveliest crystal bugs (more about those in the rest of the Tutorial)
I also needed a way to adjust the nets slightly to set them into a more pleasing position once done. You can manipulate the stems slightly to make them less bendy and more upright. See the Tutorial below. And you can also adjust the net. I wanted to show you how to do that in more detail so I added the picture to our email for this week. As always you are welcome to reply to the email if you have any questions or comments... or to say hi. The sign up is below this post if you are not yet receiving your Wednesday morning (Vancouver time) email from me.

Split the pair of grass open at a knot and tie it over the wreath part of the handle.
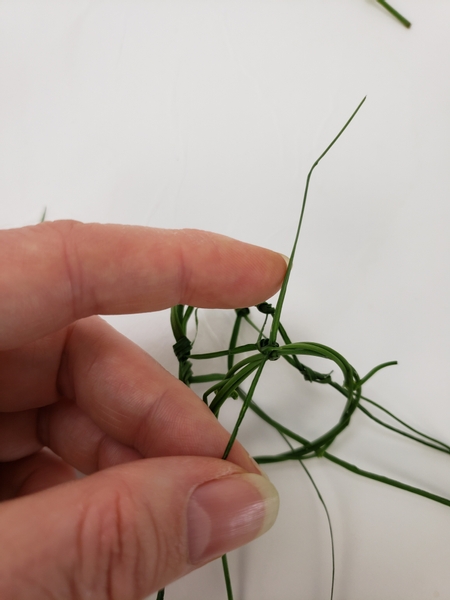
Secure the grass net to the wreath handle with a double knot.
Flair the rest of the net open and space the pairs out to fit around the wreath handle.
Knot the nets to the wreath handles.
Snip away all the dangling bits of grass to tidy up the net.
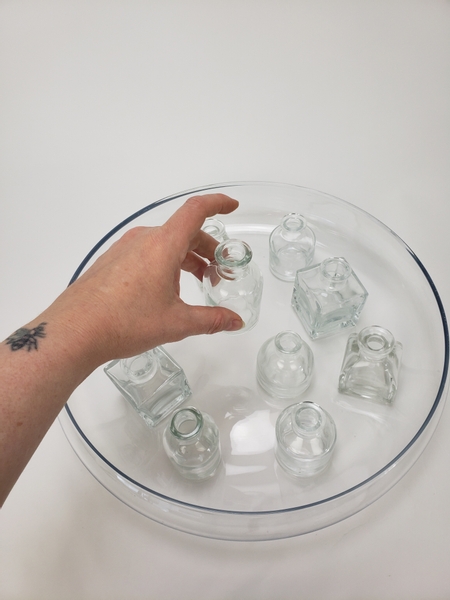
Place a collection of bud vases on your design surface. I am using a glass bowl as a tray to transfer the glass vases to our Canada Day lunch table. But you can also display the vases like this.
Book readers turn to page 194 where I tell you about all kinds of creative water sources. Basically any water tight container (I even have a tip for you on how to make things that are not water tight to begin with... watertight) can be used to display your cut flowers. Tiny perfume bottles looks amazing as a contrast for wild field flowers.
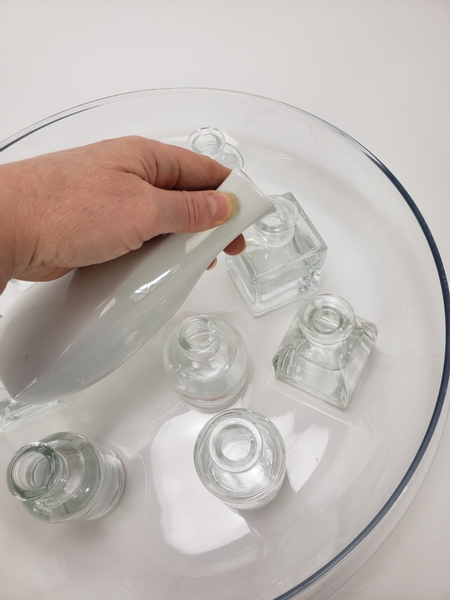
Add water to the tiny vases so that your flowers can remain hydrated even on a hot summer's day.
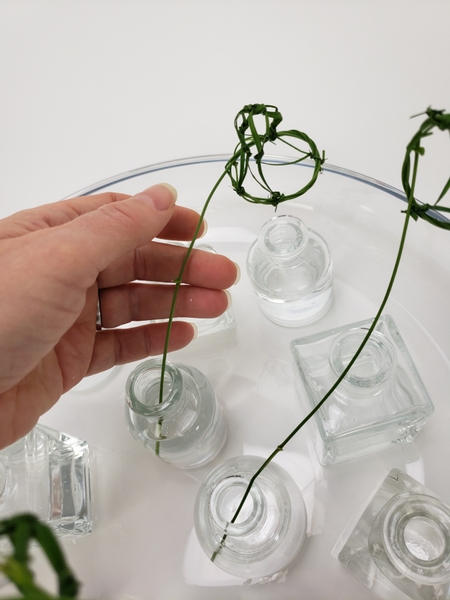
Place the bug nets in the vases.
If you find one leans "all wrong" you can adjust it now... see this week's email.
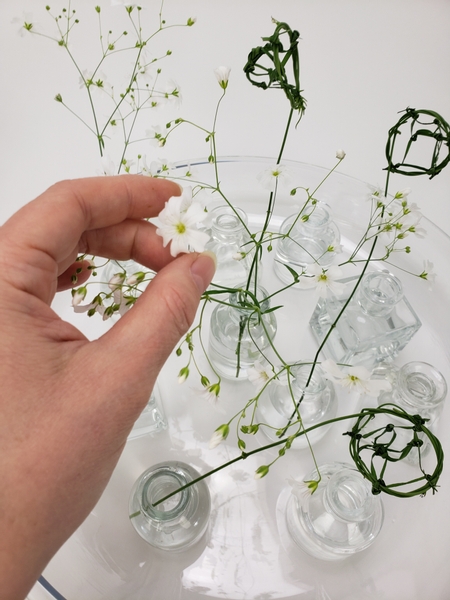
Add in the cut flowers... I grew the Baby's breath stems in my balcony garden. They look as delicate as a puffy cloud but last forever!
And add a few grasses...

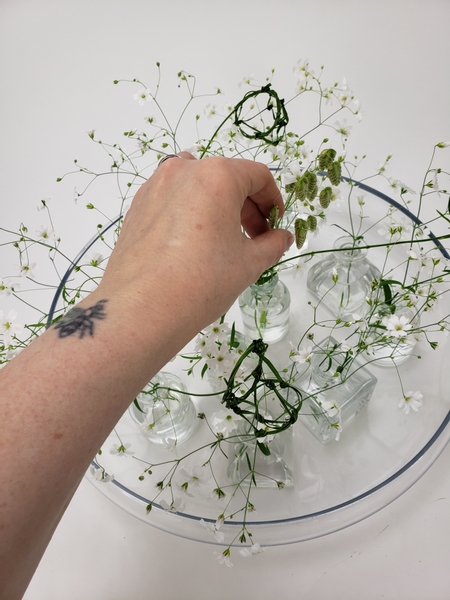
And finish the design with those shiny bugs I mentioned earlier.
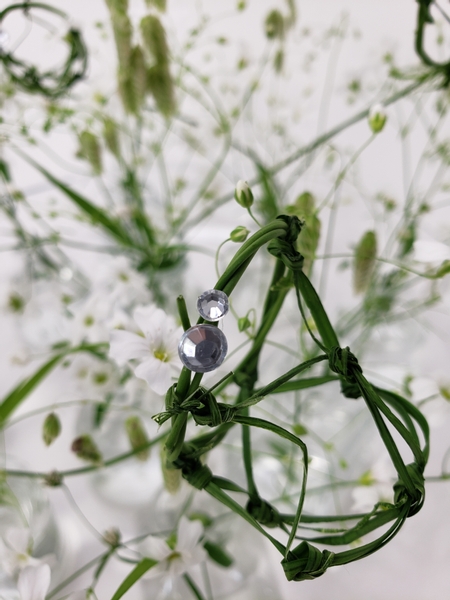
Simply place a smaller dew drop crystal just above a bigger one (bug body and bug head) to hint at a few bugs frolicking in the design. You can find the Tutorial for placing crystals with a pin below this post.
Sign up for my weekly newsletter
Every week I add a new design with related tutorials. Be sure to subscribe to receive an email notification with design inspiration.


 be mistaken for Spring sprouts\"")


