Christine de Beer - effortless floral craftsman
Barely there twig layer support to allow all the autumn colours to shine and glow
- 5 November 2025
For my transparent design I am using a glass container with a wide opening. Wipe the clean container before pouring in water to make sure it is dust free and sparkling clean.
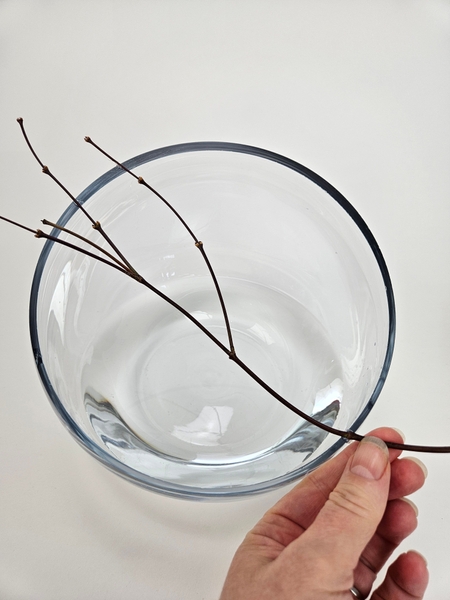
Glue a forked branched twig over the container to act as a grid to support your autumn plant material.
I use hot glue whenever I secure plant material to containers because it is really easy to clean (simply soak it in water, it pops right off) and I can melt down the glue to re use in a glue pot (great for achieving those zero waste design room goals!)
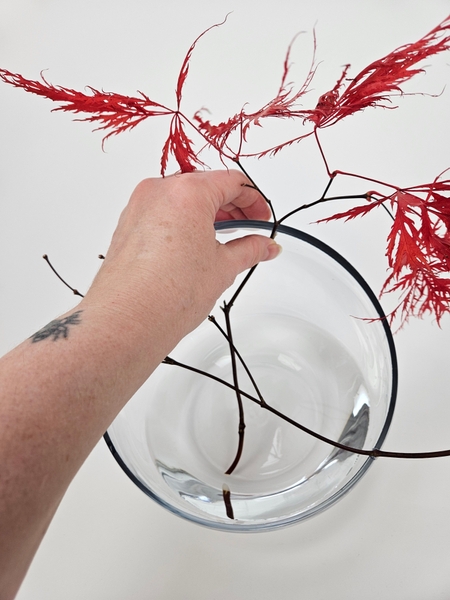
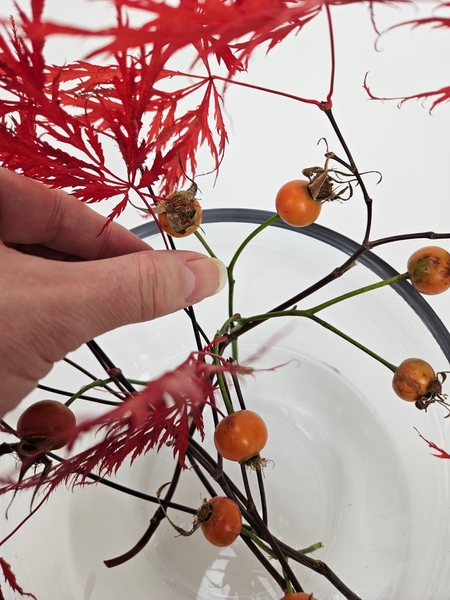
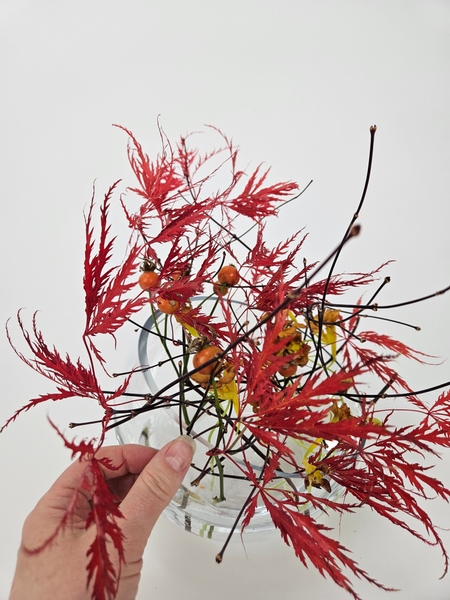
Use the glued in twigs to prop up some Japanese Maple Autumn leaf twigs into position.
Carefully insert the twigs so that they create a gentle layer of autumn colour in the opening of the container.
Design note: only remove the leaves that are damaged before starting the design to make sure you have enough leaves left for your display. Nature will help you design as some of the autumn leaves naturally drop as you design.
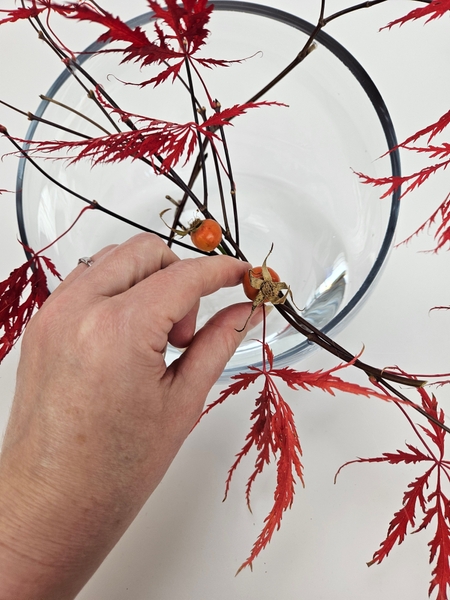
Place a few rose hips in the gaps to stand upright between the twigs.
Clean the water as you add layers. It will get more difficult to pick out any debris as you build up the layers. I use a brush (see the Tutorial below for detailed instructions) to pick up even the tiniest of debris.
The bits of broken plant material cling to the bristles of the brush without having to chase tiny bits around in the water. Dry bristles works best so wipe the brush between sweeps.
Keeping the water sparkling clean is always important to keep your display fresh for longer but in transparent designs the water is a layer and can help you highlight your focal point.
Each Wednesday morning (Vancouver time), I send out a design note as an early glimpse at the newest Design and a few notes that I picked up creating the Tutorial that might be useful to you. This week, I show you how I create a "lean in closer" to highlight my mechanics in a way that will intrigue designers like us. If you’re new here, you can sign up below this post. And if you’ve been receiving these notes for some time, I hope they feel like a welcome break in your busy week, one worth sharing with your flower friends who value mastery and the quiet joy of floral design.
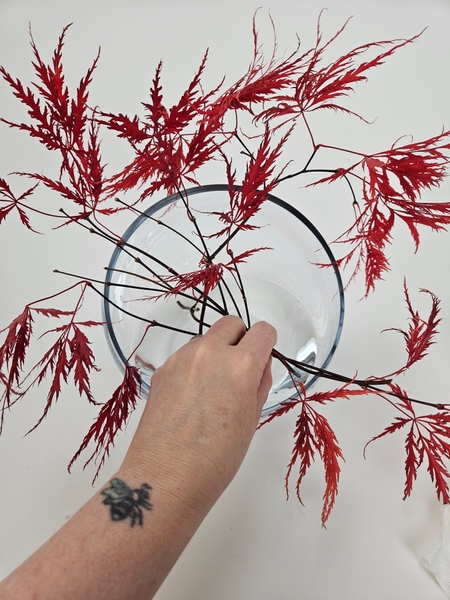
Build up the autumn display in layers so that all the design details are firmly kept in position.
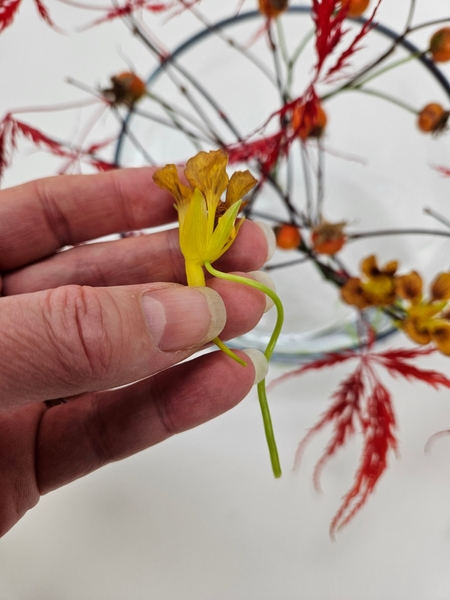
I am using nasturtiums as they are opening from flower bud to pre anthesis and anthesis stage so that they slowly open as the design mature. This way the calyz is firm and I can use it as a hook to position the flower.
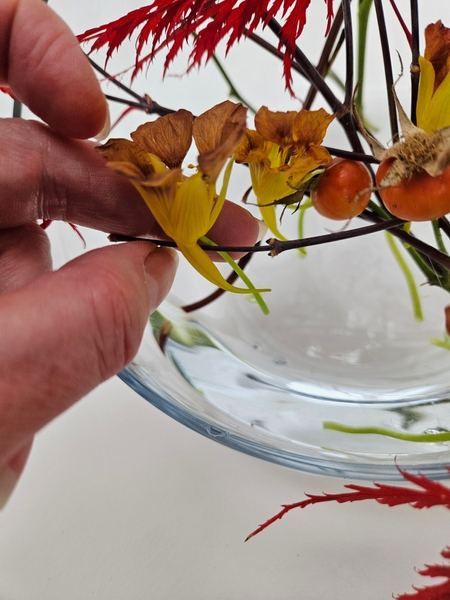
The calyx is the tougher part of the flower (its purpose is to protect and provide structural support to the flower bud) and on a nasturtium one sepal is modified into a long, narrow and often curved nectar spur. The sturdiness of this spur is ideal to position the flower. Hook the flower over the twig so that the spur and the flower stem pinch over the twig, keeping it in position.
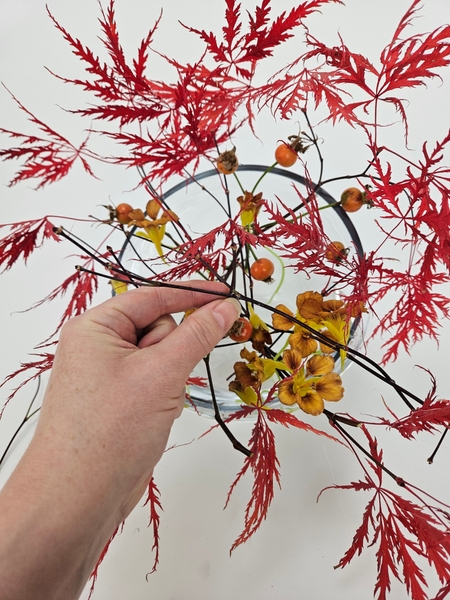
Glue in more twigs to the outside of the container to float into the display. This creates both a light layer that hovers above and can also help you position some of the heavier design details.
I don't really treat my containers as vases to design in. For me a design container is a see-through armature that also holds water. Book readers turn to page 138 for more details on how to design both outside and inside a container.
For more information about my book: The Effortless Floral Craftsman
Turn your display and add twigs to frame the leaves all the way around the container.
Extend the twigs down the side of the container to create a light and airy display. The design elements should layer in a clear and transparent way that makes you forget that there is a glass layer in between.
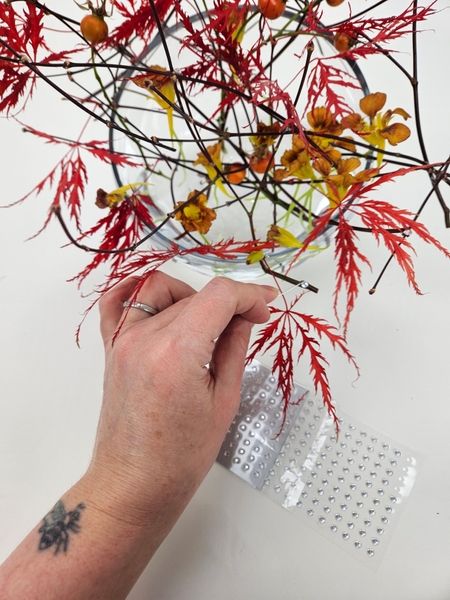
Add a few dew drop crystals to add sparkle to the red twigs.
Sign up for my weekly newsletter
Every week I add a new design with related tutorials. Be sure to subscribe to receive an email notification with design inspiration.


