My Creative Workbook

Christine de Beer - effortless floral craftsman

On the edge grid for a decorative twig and reed armature

Usually when assembling a grid design I strongly believe in making sure everything you add is connected in three places. This creates an impossibly delicate looking armature that can carry even the heaviest of floral material. Just for reference, I will link a few design examples under this week’s design to show you exactly what I mean.

However, in this week’s design that trick is not possible because at most the reeds can be secured in two places ... which means it would simply collapse under the weight of the heavier material. To overcome that:

Place stripped willow twigs over a flat container

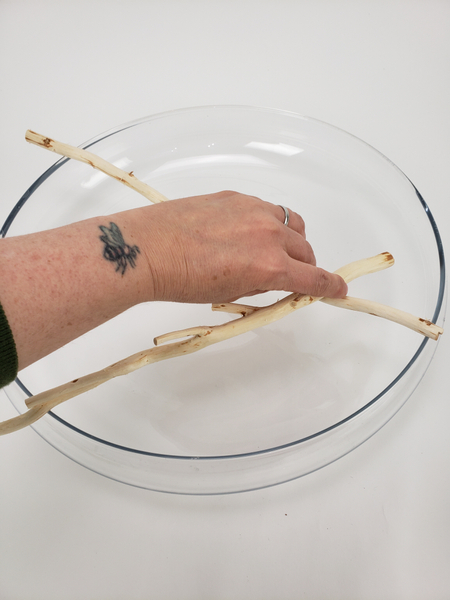
Place stripped willow twigs over a flat container...

If you want to strip the bark from the twigs have a look at the Tutorial below for the How-to.

As you build up the willow grid secure the twigs with hot glue

As you build up the willow grid secure the twigs with hot glue.

Create a wide spaced grid that divides the container surface into blocks

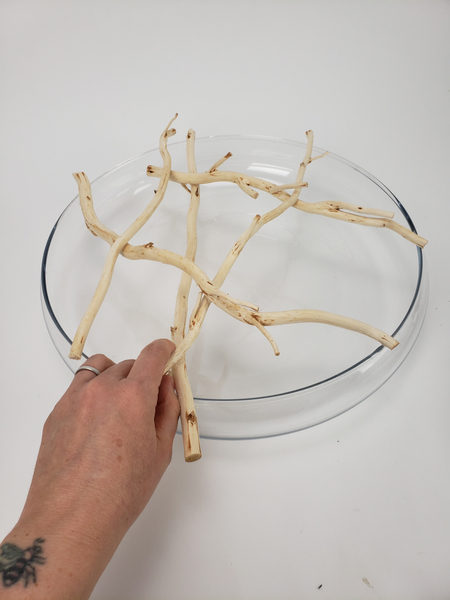
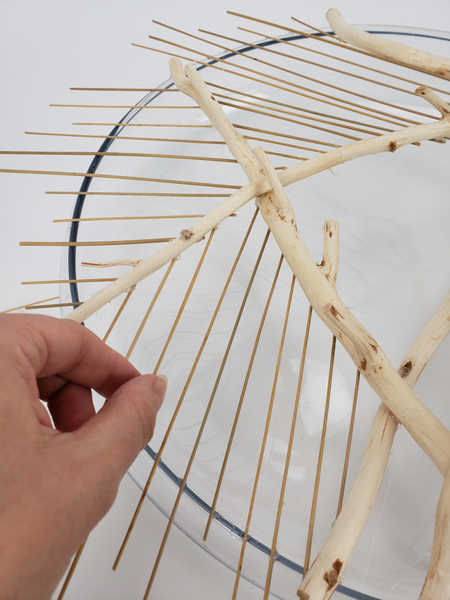
Create a wide spaced grid that divides the container surface into blocks...

Measure a reed to extend from one twig to another

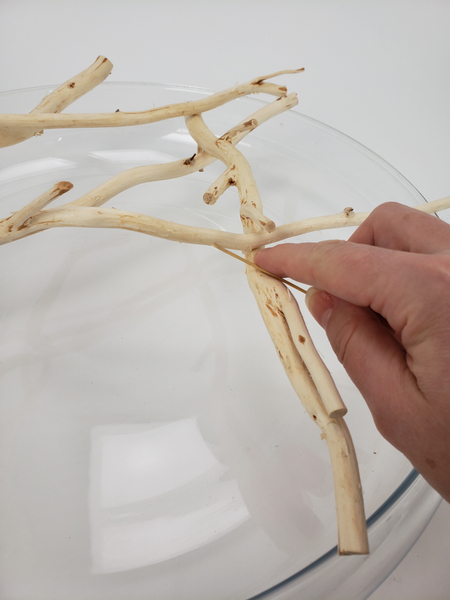
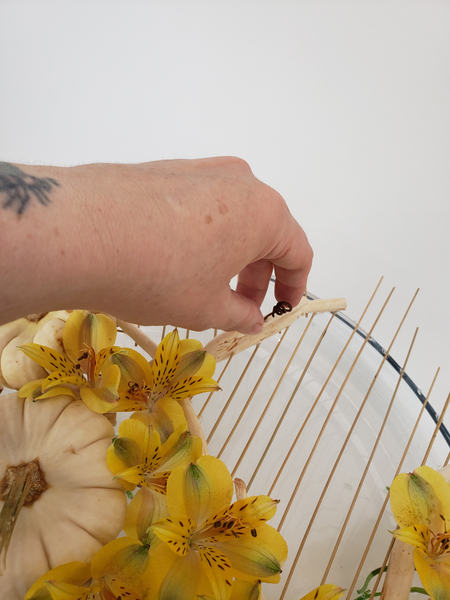
Measure a reed to extend from one twig to another.

Glue the reeds to fill the gaps between the willow twigs extending out

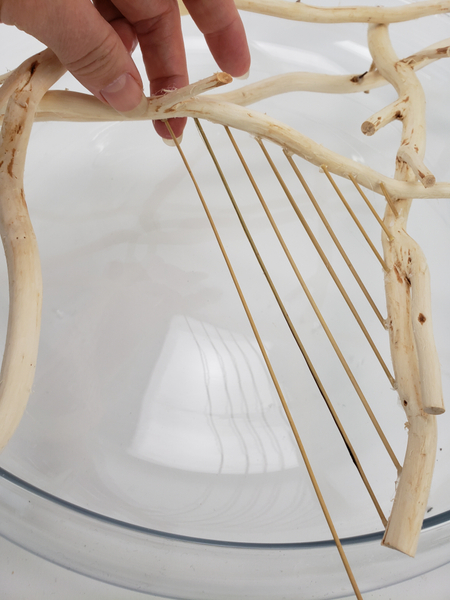
Glue the reeds to fill the gaps between the willow twigs, extending out.

For my design I let the reeds extend beyond the edge of the container

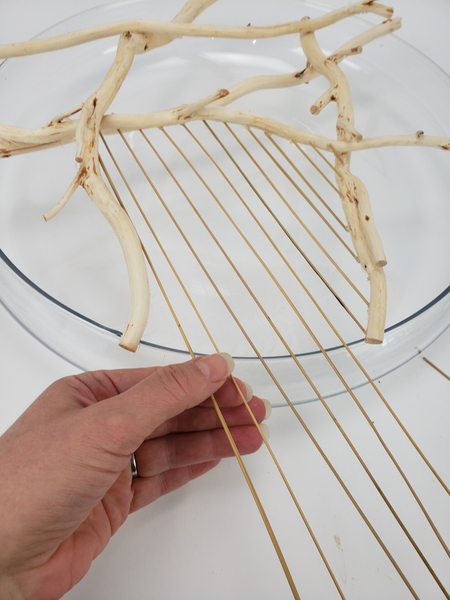
For my design I let the reeds extend beyond the edge of the container... but you can cut it short if you prefer.

Fill in the next gap between the twigs.

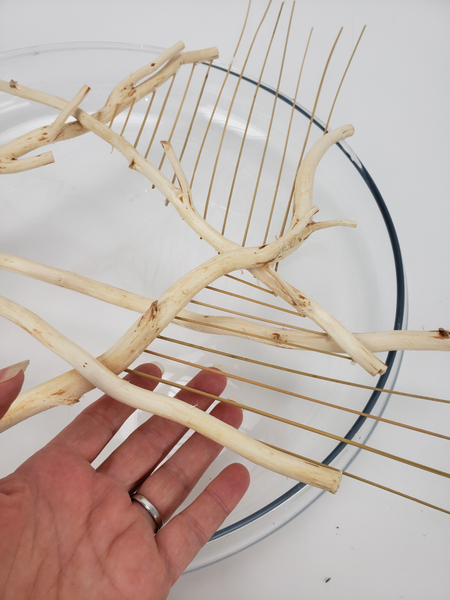
Fill in the next gap between the twigs. Either follow the line created by the previous reeds or create a new pattern by extending the twigs in another direction, like I did.

Turn the container again and fill the next gap

Turn the container again and fill the next gap...

Placing the reeds at twists in the twigs can get a bit difficult

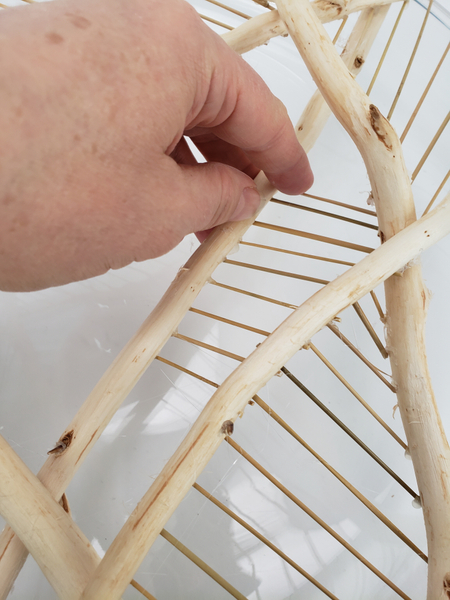
Placing the reeds at twists in the twigs can get a bit tricky... especially if you need to twist your fingers into small gaps because the surfaces next to the spot you are working in has already been filled in... add to this that the reed is getting smaller as you place it between the twigs... and you have drops of melted glue on both ends...

Of course I have a tip for you about that! This week in my newsletter email I show you how I position even the tiniest of twig without it getting smeared with glue or me burned. If you are not yet subscribed, I send out one email every Wednesday to let you know when the new design is ready for you to explore. I also include an exclusive tip each week... something about this specific design that I want to explain or highlight in more detail. These tips are only available in the newsletter email. The sign up button is below the Tutorial.

The decorative reed armature is ready to design with

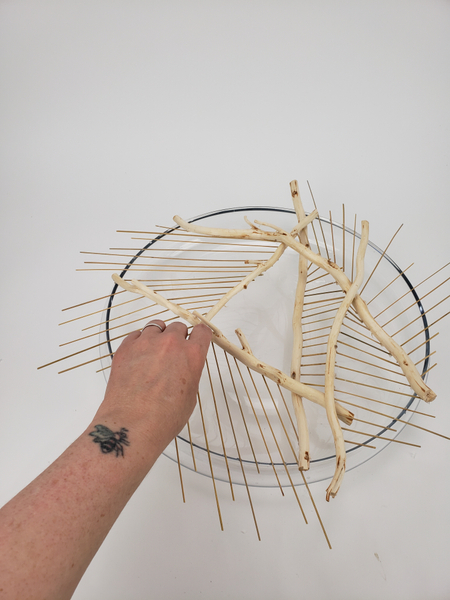
The decorative reed armature is ready to design with.

The armature is still rather delicate... place the heavier material strategically...

Rest the flowers so that it is kept in place between the twigs

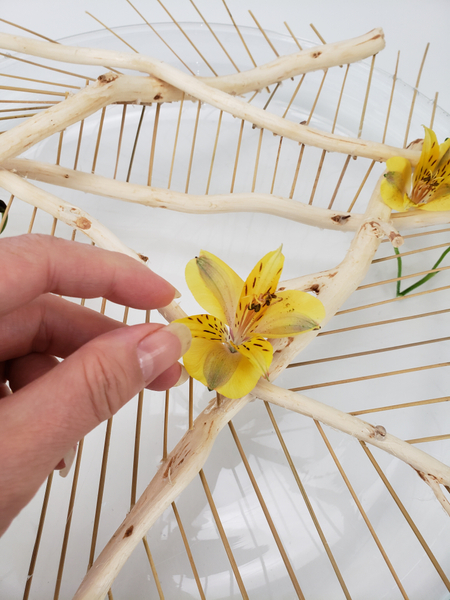
Rest the flowers so that it is kept in place between the twigs...

Place the heavier material where three connections just happen to be.

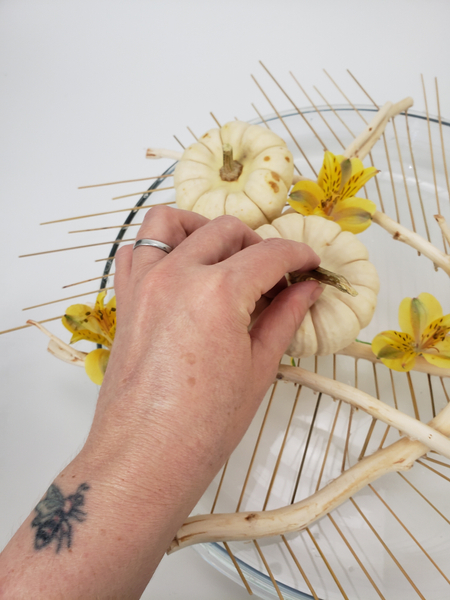
Place the heavier material where three connections just happen to be. For instance the rim of the glass container where it connects with a reed and a twig. A fork in the twigs where it connects with some reeds.

The secret is to balance the floral details right on the edge of the sturdier connections.

Place the flowers so that they support each other

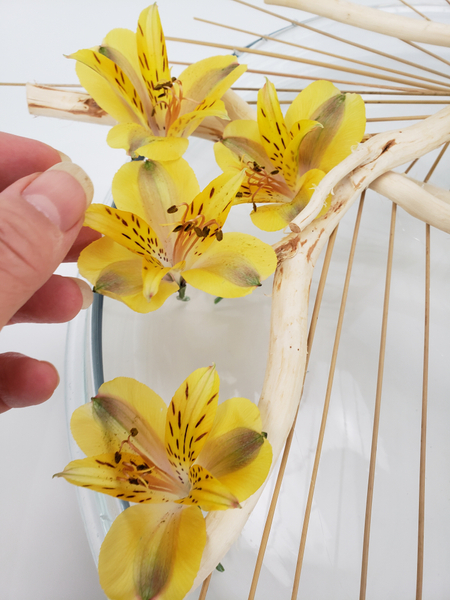
Do the same with the flowers. Carefully inspect the finished armature for places where you have three connection points to place your floral details so that the entire floral armature is as secure as possible without spoiling the illusion of it being delicate.

Add in a few decorative tendrils

Add in a few decorative tendrils...

And finish the design with a few decorative dew drop beads

And finish the design with a few decorative dew drop crystals.

See the Tutorial below for more detailed instructions on how to add decorative crystals to a delicate design without damaging or bruising the floral material.

Every week I add a new design with related tutorials. Be sure to subscribe to receive an email notification with design inspiration.

Tutorials

8 June 2016 Stripping bark from willow sticks

Strip the green bark from the stems to expose the smooth wood

24 July 2012 Blow away hot glue strands

When you glue a structure with hot glue there are always a few stray strands of glue stuck all over the design. Blow it away with a hairdryer.

24 July 2012 Stacked Twig Roundabout

This is a great way to use all those bits of twigs and sticks in your design room to make a floral armature

2 October 2019 Cross hatch Twig Armature

Add a bit of shadow and dimension to a flat armature by using the sketch technique of cross hatching.

8 January 2014 Twig Tumbler

Wire and glue a stack of sticks into a cylindrical or tube shape

29 July 2015 Disk Twig Armature

Glue a few wigs to follow the shape of a glass bowl to create a disk armature

6 February 2019 Winter White Twig Screen

Glue twigs to screen delicate flowers for a wintry design.

19 February 2020 Twig snippet pillar armature

A great do-in-advance and reusable design solution for a winter, early spring floral display.

17 July 2019 Twig Dome Armature

Crafted from a hand full of twigs to give you a large design... even though you add only two stems of sweet peas.

6 September 2011 Twig collar

Create a light and transparent collar-base for the large composite flower to nestle into.

8 July 2015 Using a pin to place tiny dew drop crystals

It's sometimes difficult to place a tiny crystal or bead exactly where you want it.

Favourite Flowers

Alstroemeria

Inca lily, Peruvian lily or lily of the Incas

Related Designs

14 October 2020 Stick it out… the creative spirit version

Soft minimal Fall armature making it easy to replace the flowers as the season progress.

27 October 2021 Ship Shape

The dry wheat stems are suspended from the outside of the container so that they remain dry and the flower stems can gently rest inside to remain hydrated.

24 July 2012 A little bit of Art and Soul

A twig structure with roses

2 October 2019 Cross-hatch a Shadow Bright Autumn

A clever trick borrowed from art techniques to add dimension to a bright and colourful Autumn floral design.

8 January 2014 It's stick season!

Snap and stack an glue a few twigs to create a lace like armature

29 July 2015 Beautiful Things

Glue a few twigs into a disk armature

6 February 2019 Tread softly on winter

A delicate winter twig armature to show off the delicate beauty of these early spring coloured tulips.

8 June 2016 When the wind whisper

Glue a fantasy forest from Popsicle sticks, grape vine tendrils and willow tips

19 February 2020 The Upside of being Inside

A creative design that has some height to it without blocking the view. This can easily be scaled up or down to match the environment you want to display it in.

17 July 2019 … and... a bit more... effort… to make it special

Instead of just placing a handful of twigs and two stems of sweet peas in a vase... why not...?

6 September 2011 When Autumn Fall

Autumn leaf composite flower