Christine de Beer - effortless floral craftsman
Turn, tuck and refine a papyrus disk bird’s nest armature
- 11 March 2026

Glue a few decorative twigs to the outside of a fishbowl vase with hot glue.

Fill the container with water when you have a snug little nesting spot for your little bird.

Cut a large papyrus umbel from the plant...

And rest it in the twigs with the cut stem below so that it can remain hydrated in the water.
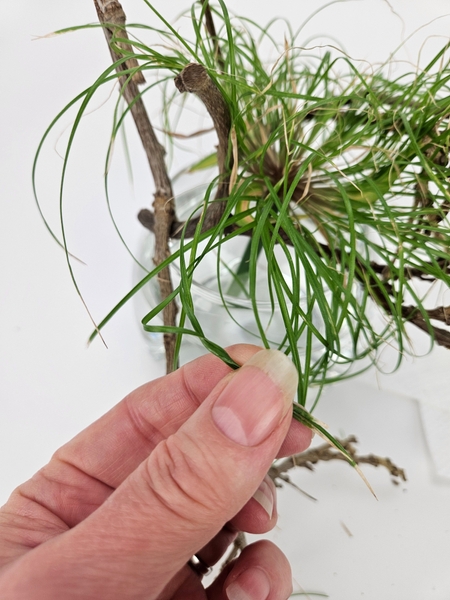
Dab your finders on a damp paper towel to make it easier to twist the papyrus...
Book readers turn to page 46 where we discuss basic cordage techniques. This is exactly the same technique as what we use in rope making.
For more information about my book: The Effortless Floral Craftsman
But to get you started you can always braid the umbel together. See the Tutorial below for detailed instructions.

Create a circle of cordage all the way around the umbel.

Roll the tail end of the umbel over the start to secure it firmly in place.
Delicate work!!! Probably you need a fine beak instead of fingers. How do birds do this so accurately and so neatly!?!

Your disk nest armature is now ready to design with.

Tuck a few gorgeous begonia flowers low into, under and nestled just over the disk like you are feathering a pretty nest...

To weave the bird see the detailed Tutorial below this post...

Finish weaving the bird but do not cut any of the ends shorter to make sure you can tailor make the bird to add just the right personality to your design.
The head knot will give the design the finishing line touch in the end.
Every Wednesday morning (Vancouver time), I send out a design note as an early glimpse at the newest Design and a few notes that I picked up creating the Tutorial that might be useful to you. This week, I show you how to alter the overhand knot to give just the right support for your draped grass to give it the height it needs.
If you’re new here, you can sign up below this post. And if you’ve been receiving these notes for some time, I hope they feel like a welcome break in your busy week.

Add in another papyrus umbel to give the little bird enough building material for the rest of the nest

Drape the papyrus around the design and secure it every here and there with a tiny bit of floral glue to give you the impression that the little bird is constructing a nest.

Cut the dangling pieces to shape the foliage bird...

Place the bird into the design and slip a blade of grass into the water and allow it to drape up so that it looks like the bird is weaving with it.
Design note: For these grass lines (I am adding 3) I wanted to use the same grass as what I used to weave the bird. Only they were too heavy so I ripped them with a pin. See the Tutorial below for detailed instructions on how to rip foliage.

Add in three strands of grass to gently drape over to the front and place tiny, tiny dew drop crystals on these grasses so that the sparkle catches your eye.
See the Tutorial below for detailed instructions on how to place the crystals so that the grass won't buckle and fold as you place them.
Sign up for my weekly newsletter
Every week I add a new design with related tutorials. Be sure to subscribe to receive an email notification with design inspiration.


