Christine de Beer - effortless floral craftsman
Hydrangea pomander with just a hint of pumpkin in its ribbon layered to hide a secret (refillable) water source
- 15 October 2025
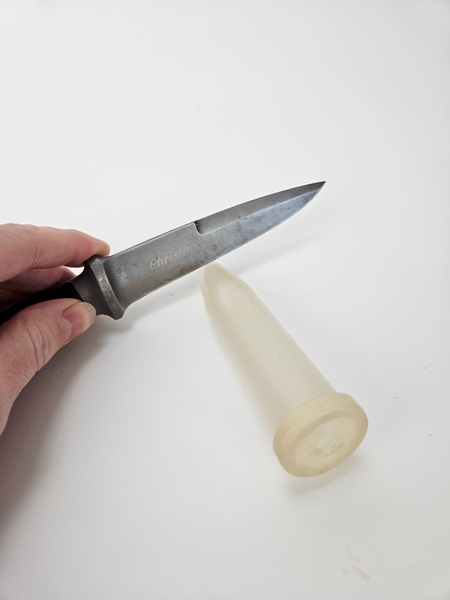
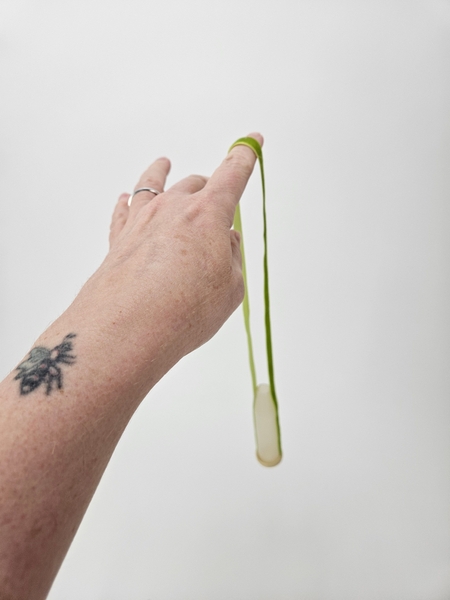
For this design I am giving a few of my book How To's a bit of a new twist. Starting with cutting a water tube so that you can top up water...
Book readers turn to page 189 where I show you how to cut a water tube so that you can top up the water for upside down hanging designs.
For more information about my book: The Effortless Floral Craftsman
While you are on that page also glance at the opposite page to see my advice on how to adjust the water level and stem position inside a water tube for upside down hanging flowers so that they can remain hydrated to the absolute last drop of water available... so important when designing with thirsty hydrangeas!
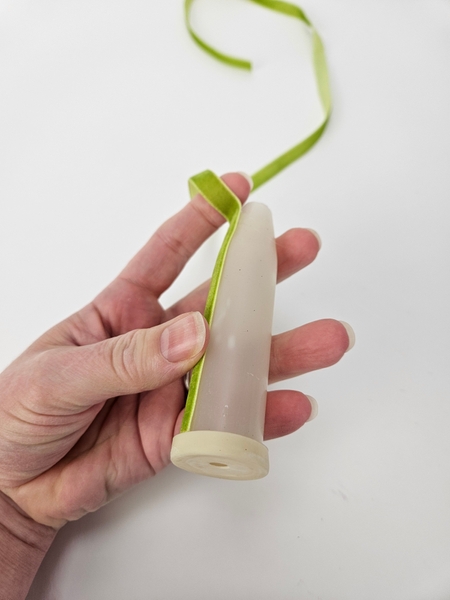
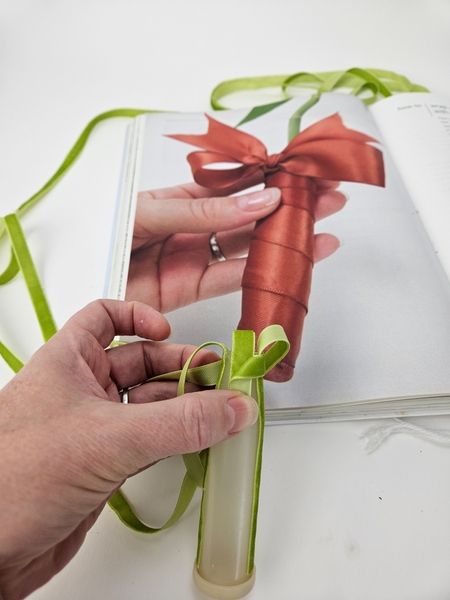
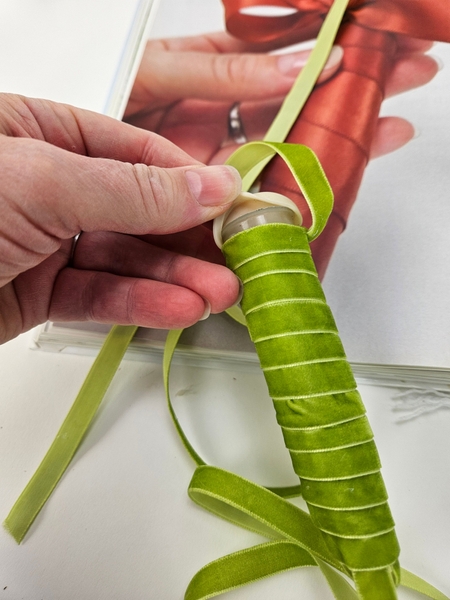
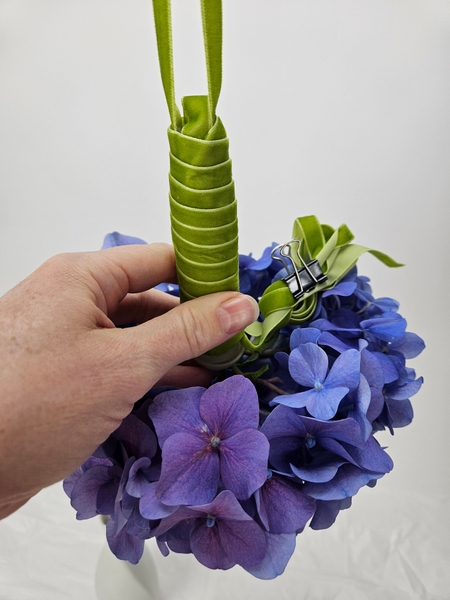
To design a handle for the design to hang from glue a ribbon down one side of the water tube...

I used a thin row of hot glue to secure the ribbon.
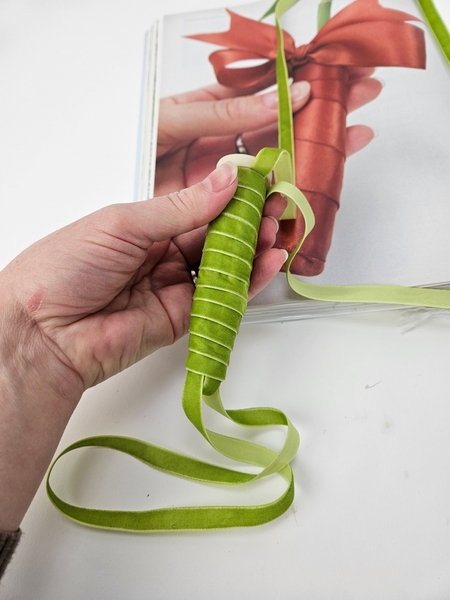
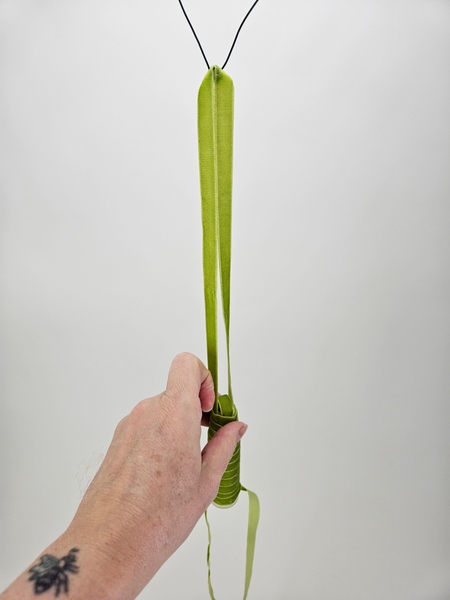
Loop the ribbon over the water tube so that you can hang it from the loop.
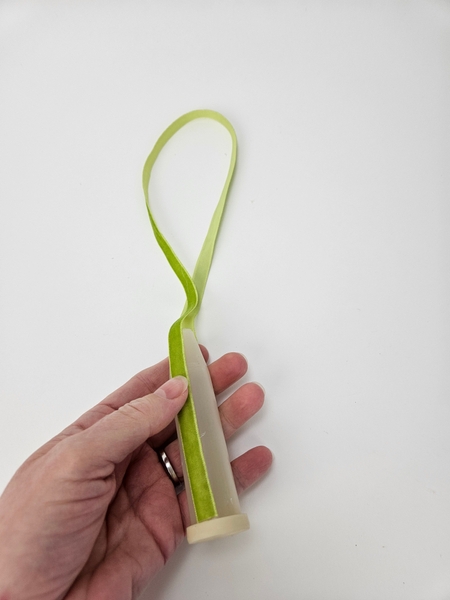
Test the hanging position of the tube to make sure it is absolutely straight and secure.

Cut and fold a long length of the ribbon in half and so that both halves include a long tail to give you design options to finish it off later.

I am basing the design on the How To you will find on page 192 of my book. This one is for wrapping water tubes with ribbon, for general use. To tweak it slightly for upside down designs you will notice that instead of the ribbon hugging the end neatly to cover I am leaving a loop so the you can fill the water tube with water when it hangs.
Fold the ribbon over the water tube and then fold it again so that the velvet side faces up...
So that you can wrap the water tube with the pretty velvet side showing.
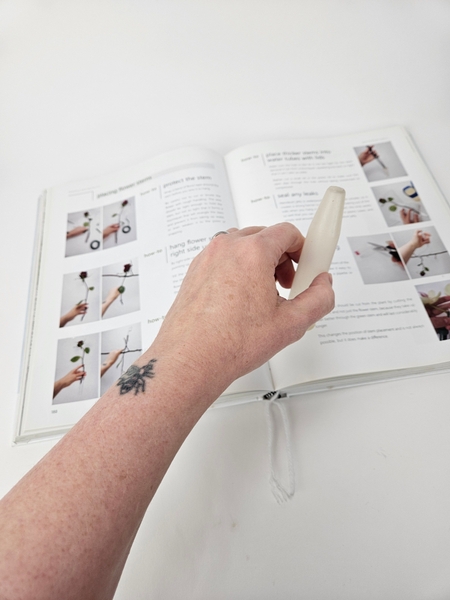
To get you started I am also adding the Tutorial from the book below this design.
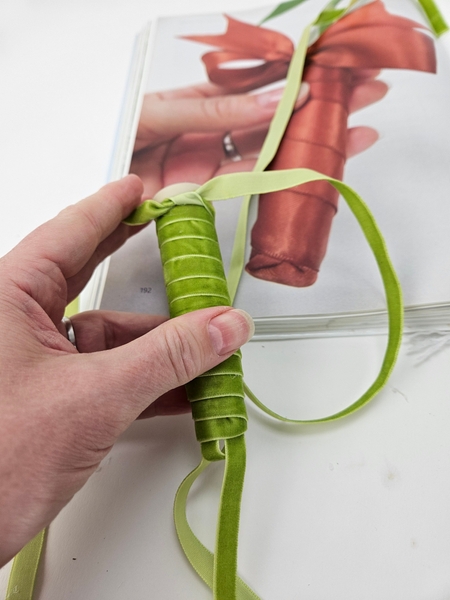
Knot the ribbon to secure it in place.
Remove the rubber seal.
Hang the water tube by hooking the loop over a hook.
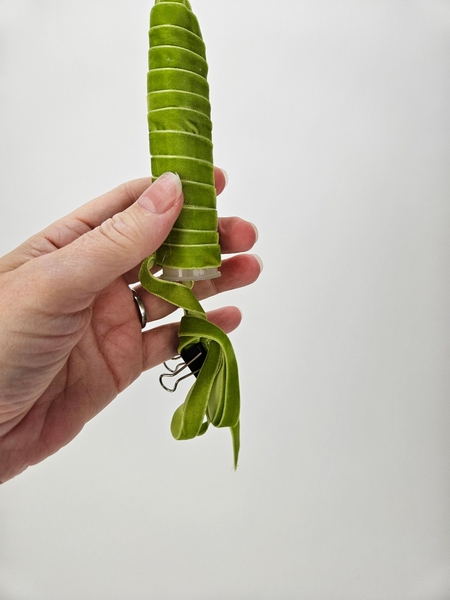
Clip the ribbon tails out of the way to make it easier (and keep it clean when you start using glue) to design around them.
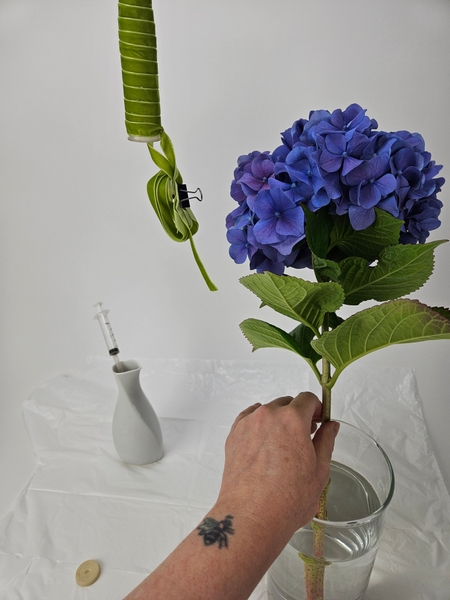
Make sure you use well conditioned hydrangeas for this design.
Book readers you know I have a few trust issues when it comes to designing with hydrangeas (see page 69 when I talk about first aid for your plant material) so keep the hydrangeas in water till the last moment before placing the stem to make sure your hard work remains as pretty as possible for as long as possible. If you top up the water there's a great chance the design will dry like this!
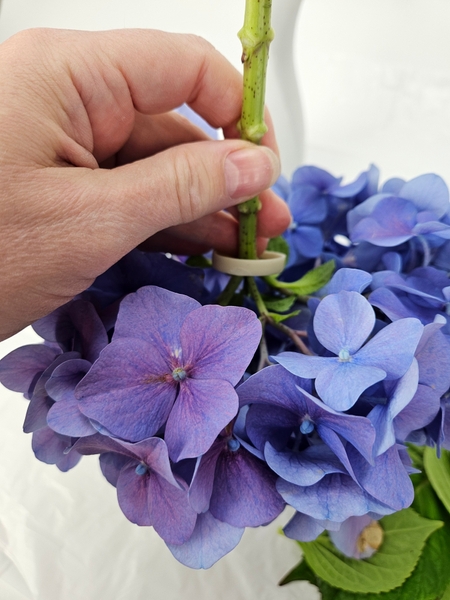
Slip the rubber seal over the flower stem.
Make sure it is a new seal that still... well... seals to avoid messy water leaks. This week in our design note email I show you a trick I use to make sure all the water seals are completely water tight. I also show you where I place the seal on hydrangea stems so that the water will not leak out. I send out a design note email every Wednesday morning (Vancouver time) the moment the latest design is ready for you to view with a few remarks on what makes this specific design remarkable. The sign up is below this post.
Seal the flower stem inside the water tube...
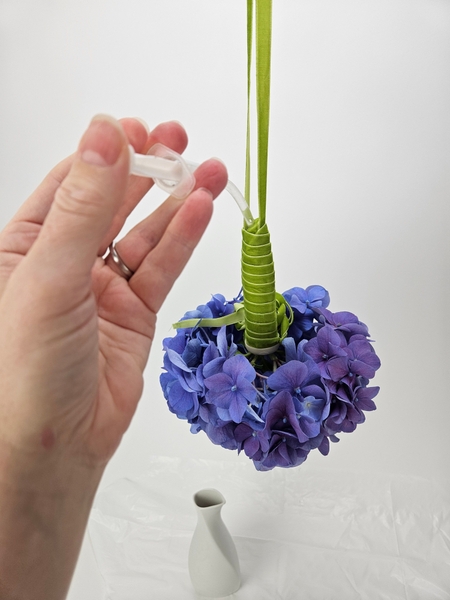
And fill the tube with water. I use a syringe with an aquarium tube fitted to the front to push the ribbon out the way and fill the tube. These are so easy to make and a staple in my design tool bag. I actually have a few sizes so that I know exactly what size I need to fill which water tube, even if I can not see the water level inside.
See the Tutorial below for detailed instructions on how to make these.
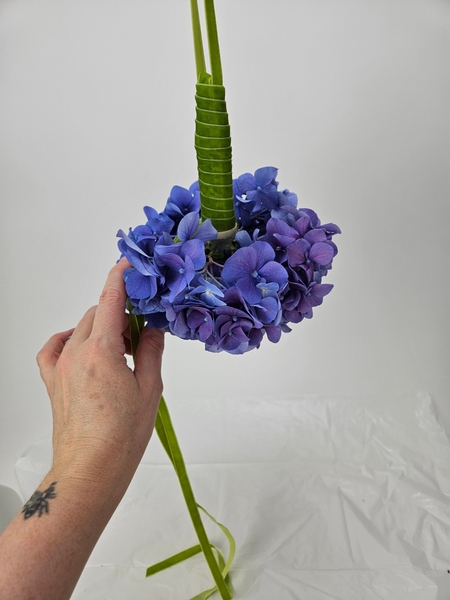
Release the ribbon to dangle down the design...
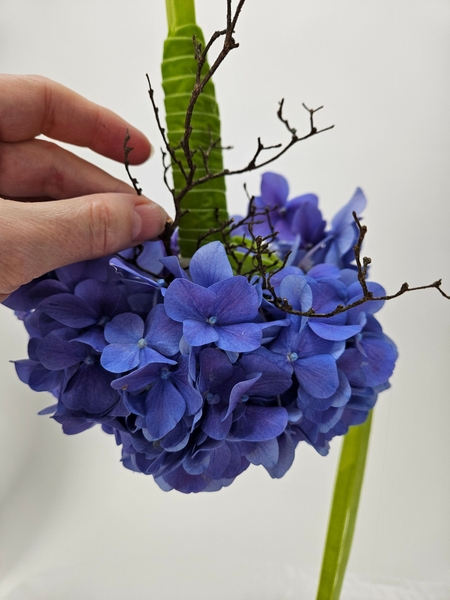
Glue in a few dried twigs to add some autumn to the kissing ball...
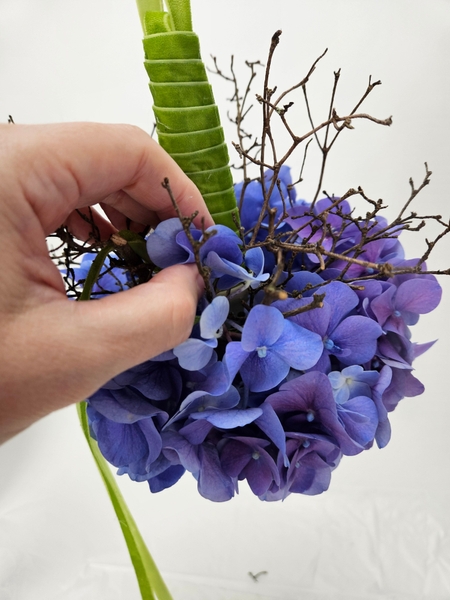
Reach deep into the hydrangea to lift out the hydrangea florets so that they are supported by the twigs around the ball shape. Hook the stems of the corymb or cluster to hook over the dried twigs. Make sure not to bruise the petals, though.
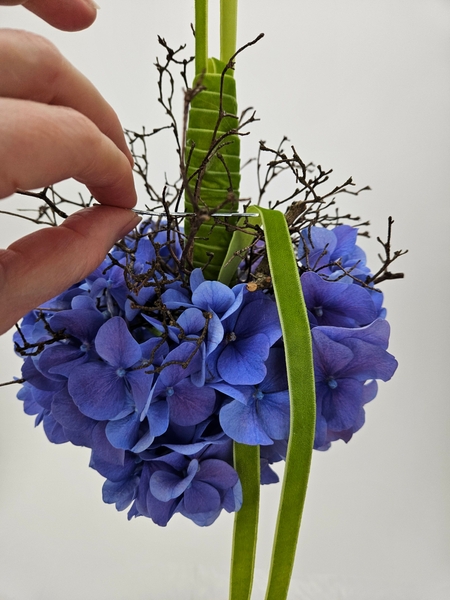
Style the ribbon so that it adds personality to the design. I am simply lifting the ribbon (I use a metal cuticle pusher to reach into the design and lift the heavy ribbon out without breaking any of the delicate twigs) and allowing it to cascade down the design. You might want a bow... or a few bows... whatever you love, do that.

Add in a few vines in the gap at the top of the water tube to add a bit of plant material to the ribbon covered section.
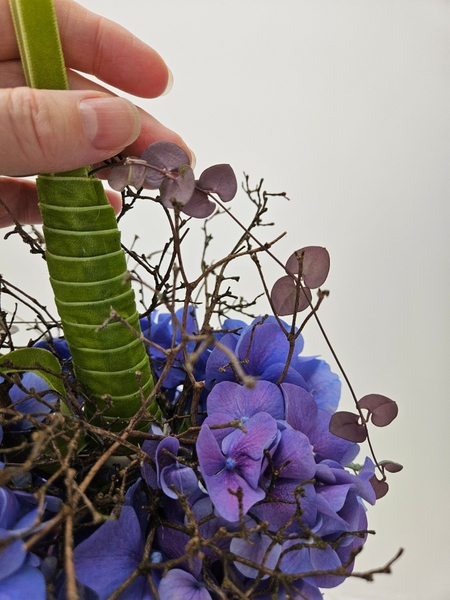
Notice how lovely the back of the rosary vine leaves look against the purple hydrangeas? It's a perfect match! The vines naturally look like this at the end of summer when they need their natural "sun screen" the most, and that shows up as this gorgeous purple!
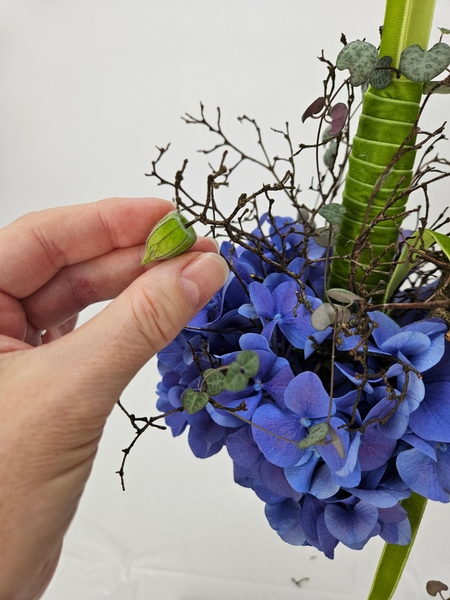
Glue in a few seed pods. This one is a young Cape Gooseberry. Notice the purple vein on the lime green husk, pretty, right?
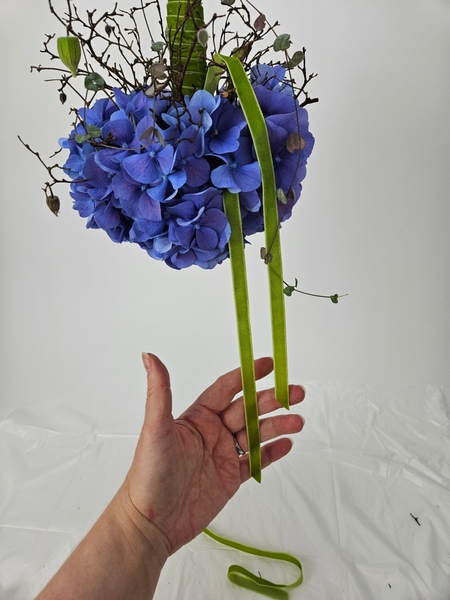
Once all the floral details are designed in cut the ribbon to match the design. You might want really long ribbon tails. Or tiny ones. Or something in between.
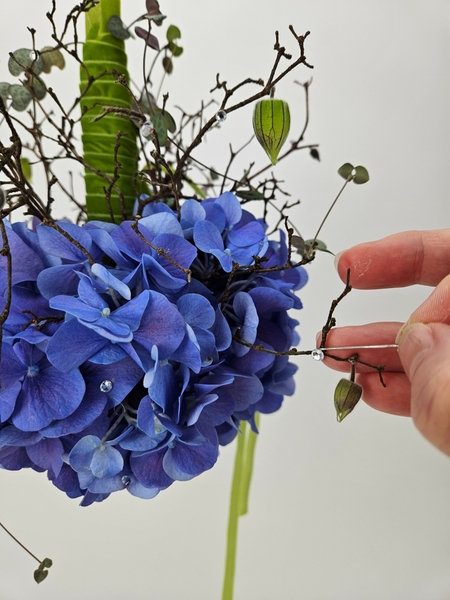
And as always I finish off my design with a few dew drop crystals
Sign up for my weekly newsletter
Every week I add a new design with related tutorials. Be sure to subscribe to receive an email notification with design inspiration.


 to-do list")


