Christine de Beer - effortless floral craftsman
Delicate snow willow twirl around a growing Slipper orchid plant display
- 5 February 2025
Now... and I am rather proud of this... this is the first of three designs that I made from my willow coppice that I am growing in my balcony garden!
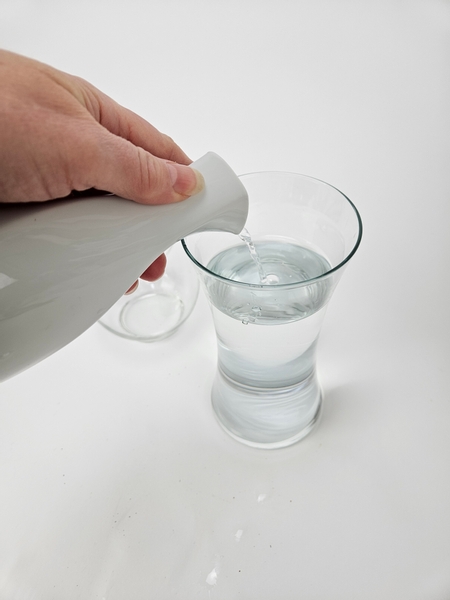
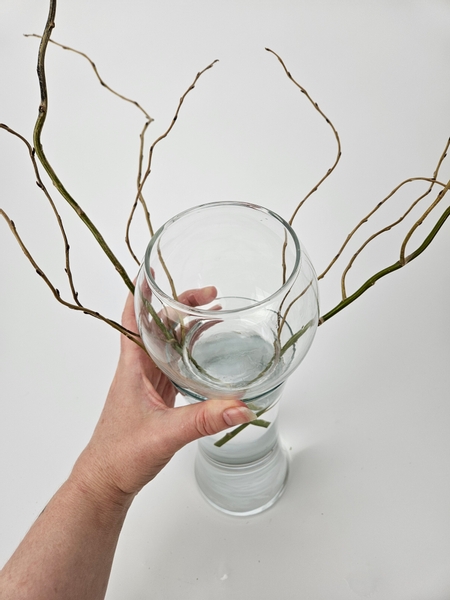
For this design I am using two display vases with the bottom vase filled with water to hydrate my willow stems...
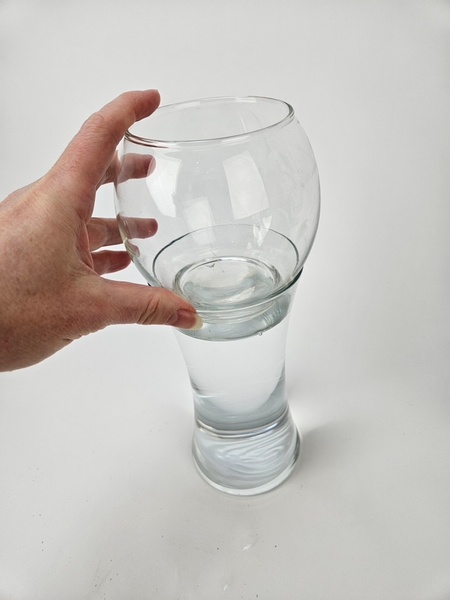
The bottom container gives the design a bit of height and the top container holds the willow in place and is a perfect fit for the orchid plant.
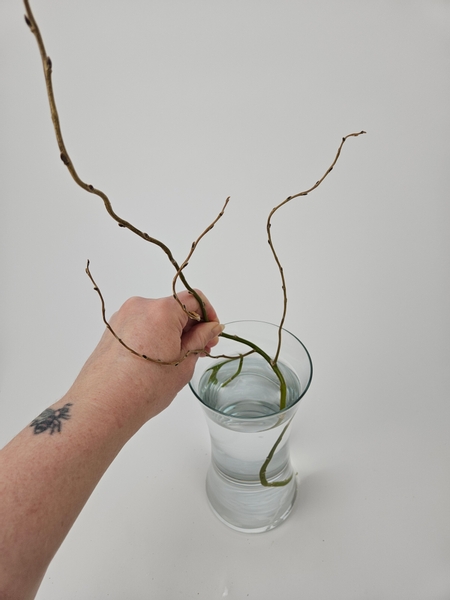
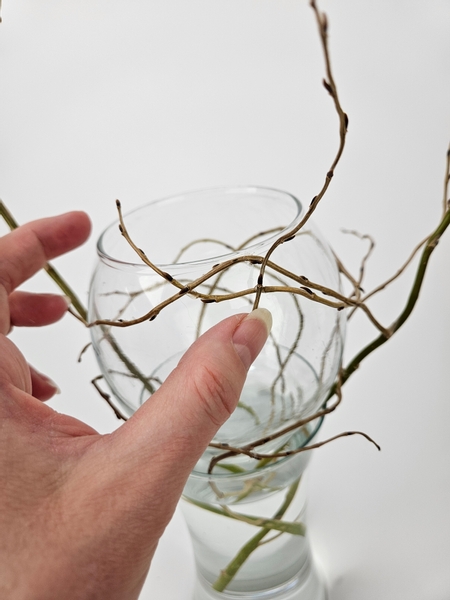
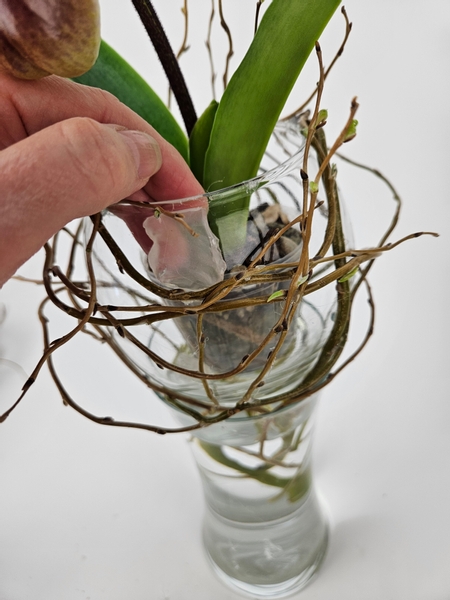
Choose willow stems with fresh side branches that you can manipulate around the display container.
Cut the willow stems short so that the side branches can be woven into a nest for the top container to snuggle into.
Place the second container on the willow to weigh down the stems so that they remain in place.
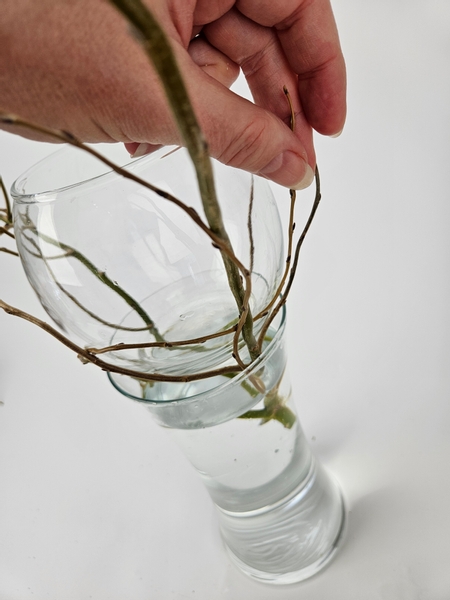
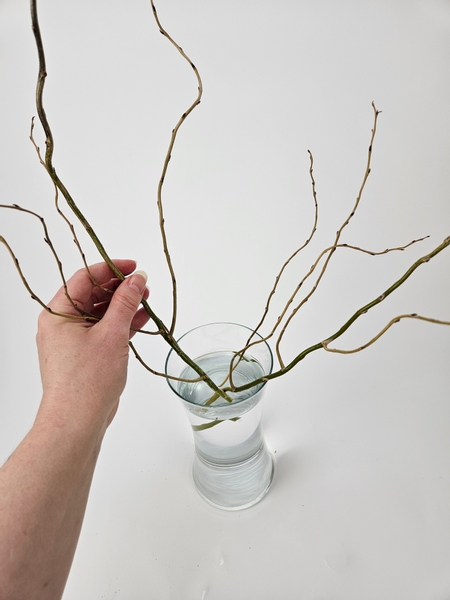
Gently twirl the willow stems around this top container...
Weaving them through and around the side branches...
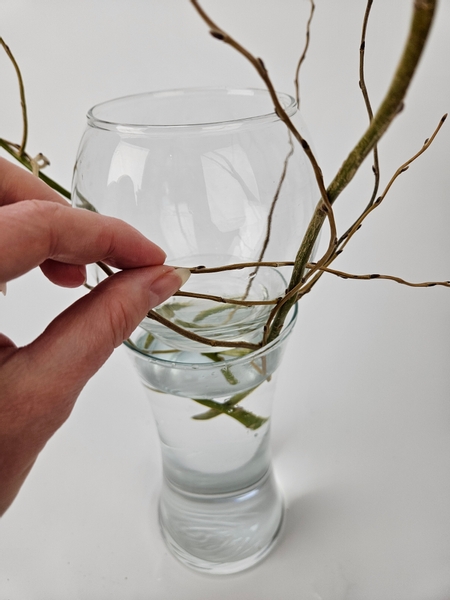
Securing each branch with the smallest drop of glue as you go along...
For this design I am using floral glue to secure the willow to willow and hot glue to secure the willow to the glass.
I use hot glue when I secure anything to glass because it is so easy to soak the glue in water to remove it from the glass. I then scoop up the glue, let it dry and reuse the glue by melting it in a hot glue pan.
And yes, there is a trick to applying the glue. You need the tiniest drop... no maybe half of the tiniest possible drop... so that it is "lean in closer to see exactly how this is possible" neat. Absolutely using glue is a skill that you should master. This week in our email (in case you have not heard, I send out a weekly email with a design tip every Wednesday morning, Vancouver time) I tell you how I get my glue drops this tiny. And I show you what I do when I need to reglue something to make sure you do not have a larger blob of glue than what you want in your display. The sign up is below this post. Also I have had a few emails asking... yes, the tip email is free and part of my weekly design inspiration.
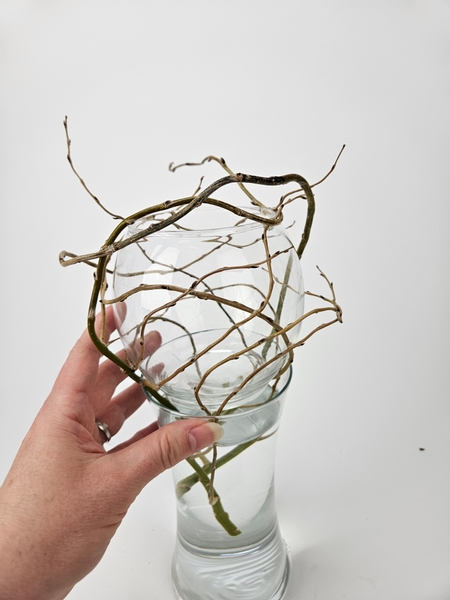
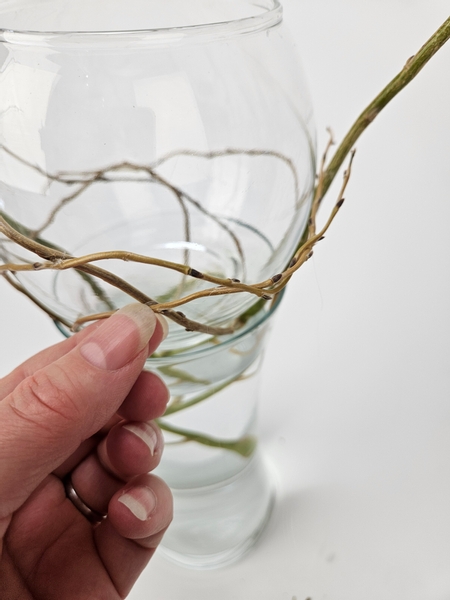
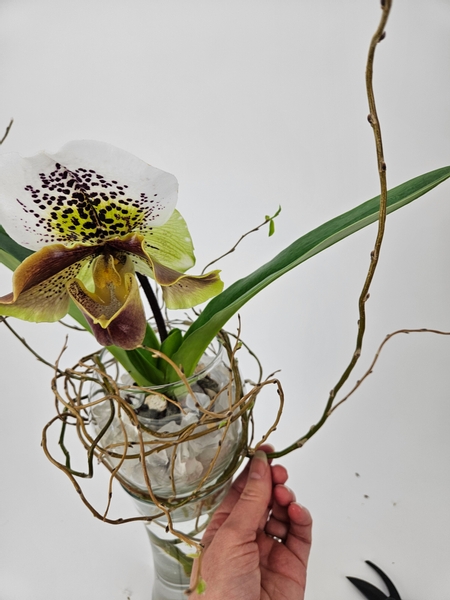
Make sure the top display container remains snuggled in the opening of the bottom container with the willow nestled around it.
Design note: the reason why I do this without the orchid is because I do not want to damage the plant while manipulating the willow. If you struggle to keep the top vase from lifting out place a heavier rock in the top container and replace it with the orchid right at the end. But if your willow is fresh it should be easy to twirl and secure the stems without the vase lifting out as I did here.
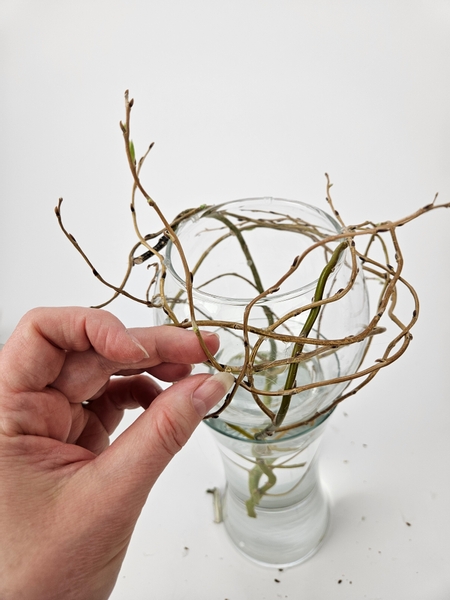
Once all the willow stems are twirled around the container...
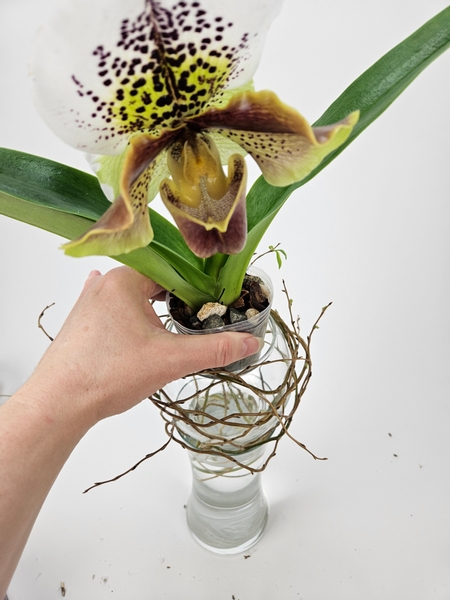
Place the gorgeous slipper (Paphiopedilum Hampshire zoo x Hung Sheng Nulight) orchid plant in the top container.
Book readers: If you want to plant something with the orchid in a growing design like this turn to page 108 to read more about companion planting in growing displays.
For more information about my book: The Effortless Floral Craftsman
Drop frosted glass chips around the plant pot to conceal it.
I use the pebbles because it will ensure that the orchid will not stand in a pool of water when I water the plant and it will not rot as bark or moss might.
Add in a few fresh willow branches to twirl over and around the potted orchid...
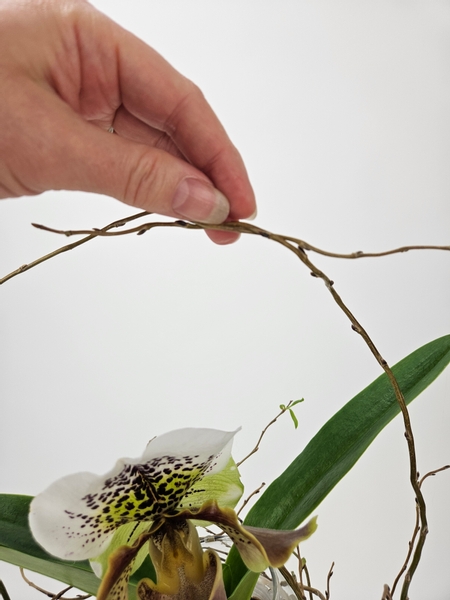
... combine the stems by weaving them together over the top...
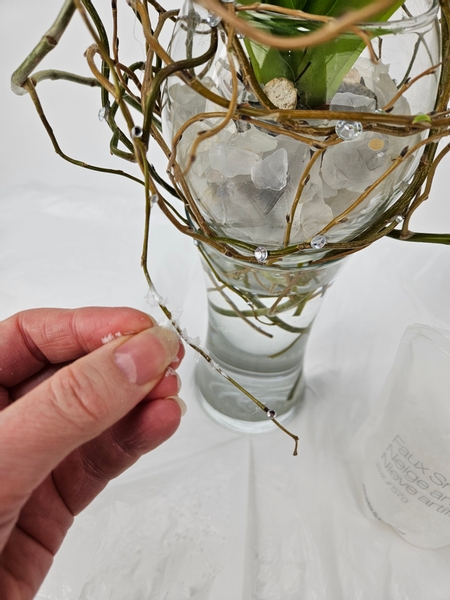
And I finished my design off with a sprinkling of artificial snow and some sparkling dew drop crystals.
You will find detailed instructions on how to add the artificial snow to the twigs and how I add the dew drop crystals without disturbing delicate floral material below this post.
Sign up for my weekly newsletter
Every week I add a new design with related tutorials. Be sure to subscribe to receive an email notification with design inspiration.


