My Creative Workbook

Christine de Beer - effortless floral craftsman

A contained design for watching those pretty twigs get their leaves

New growth... so tempting to use! If you know my work you know that I grow these especially to design with. If you have tried to cut these beautiful twigs from your garden and were disappointed to see it wilted before you could even design with it you will understand why I go through so much trouble to condition the stems. For more information on the how and the why turn to page 75 of my book.

Encourage the stem to develop new growth by removing the catkins

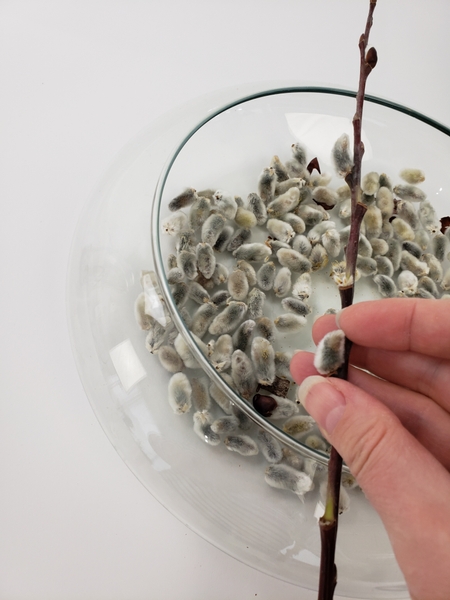
Design note: This design needs a bit of prep-time. Again we are working with the natural energy of plants. Encourage the stem to develop new growth by removing the catkins. Place the stem in water and watch it grow.

If you want to read more about this refer to the First Aid for your design elements part of my book (page 69-110) where I explain how and why this works.

Place a shallow round container on your working surface

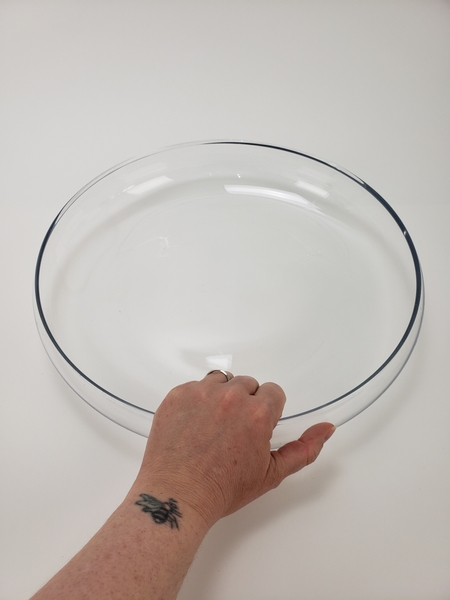
Place a shallow round container on your working surface.

Manipulate your pussy willow sticks to guide the curve. If you are unsure of how to manipulate twigs see the Tutorial below. For more information on how I calculated my curve to look so precise make sure to read our email for this week. If you are not yet subscribed the button is below the post.

Cut the twig just above the roots

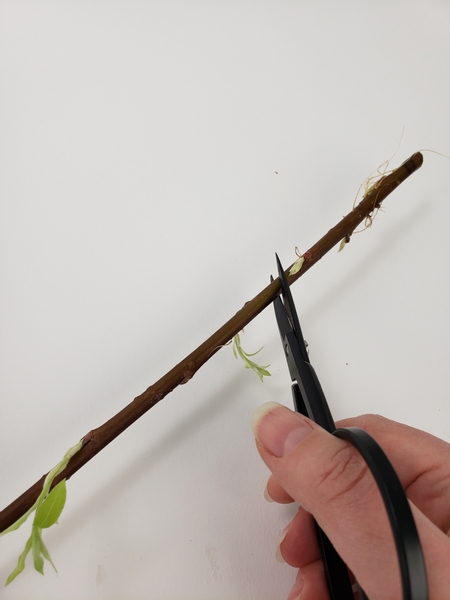
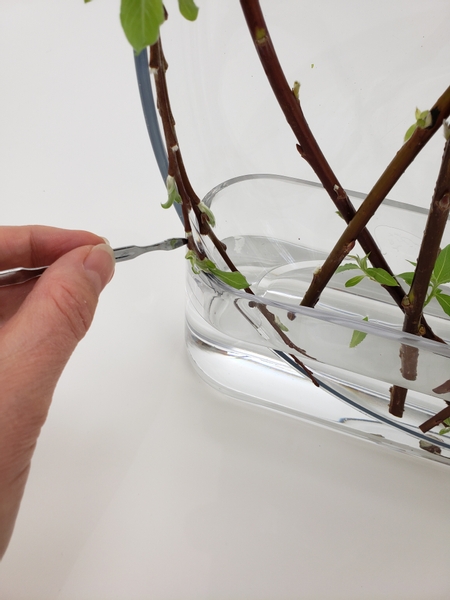
Cut the pussy willow twig just above the roots.

Bend the next twig with the cut stem end ending next to first stem

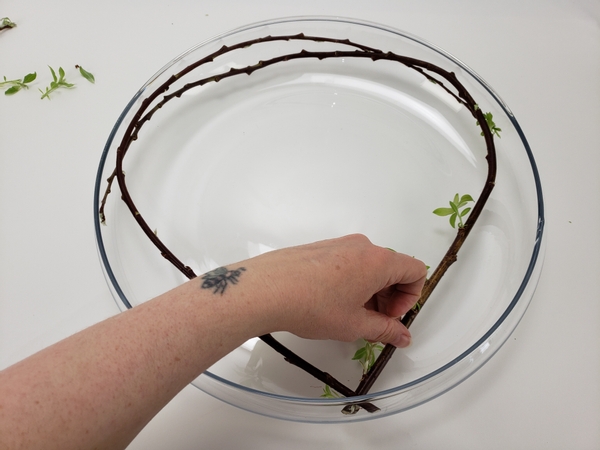
Bend the next twig with the cut stem end ending next to first stem.

Carefully add in the next stem

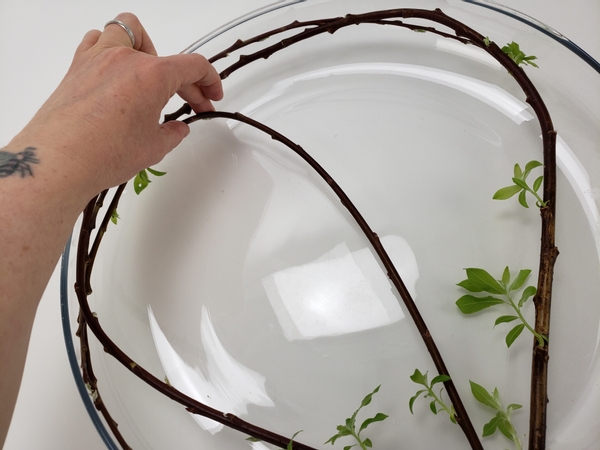
Carefully add in the next stem. Take special care not to damage the new growth. Again let the stem end on the same side as before.

Add the next twig

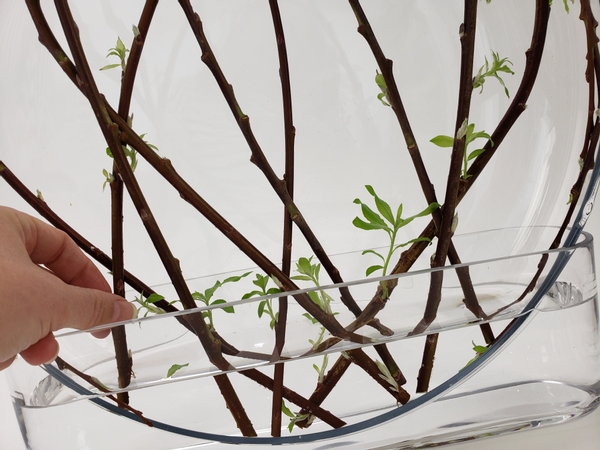
Add the next twig. Cut end fanning out from the same place as the ones before and the tip gently curving along the container.

Build up the design one twig at a time

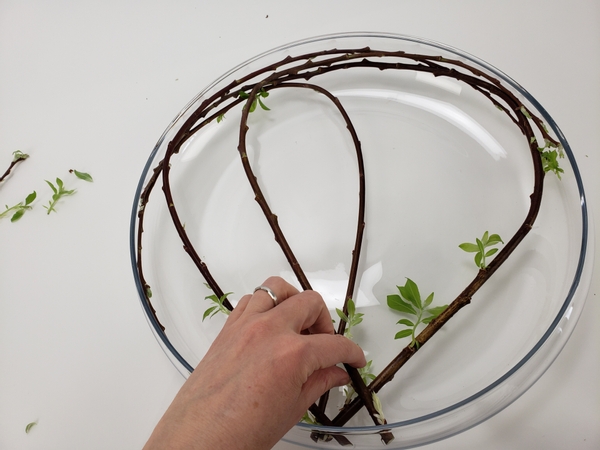
Build up the design one twig at a time making sure the cut ends are neatly placed at one end.

Make sure there is space for the new growth to continue to develop

Make sure there is space for the new growth to continue to develop.

Flip the container over to remove any leaves or buds that broke off while designing

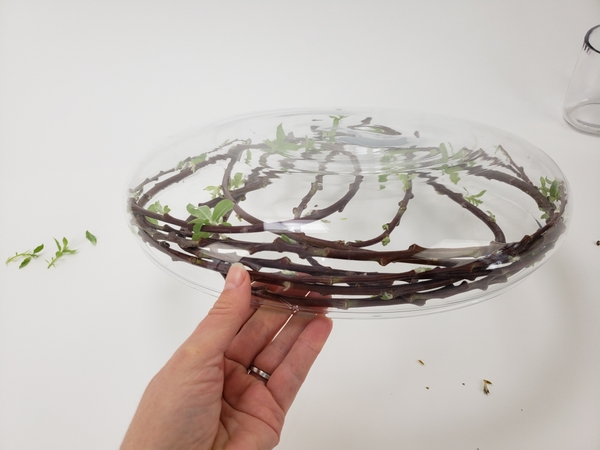
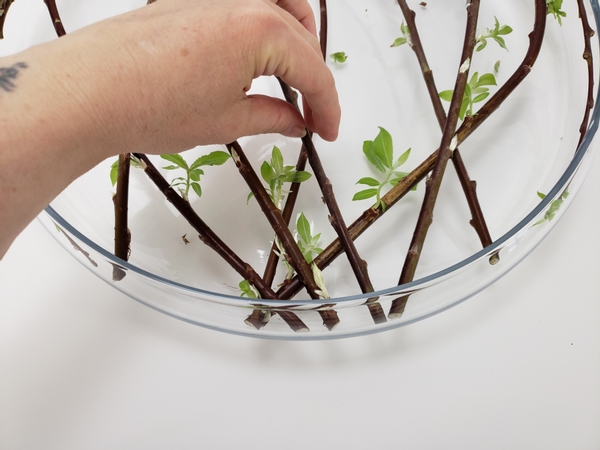
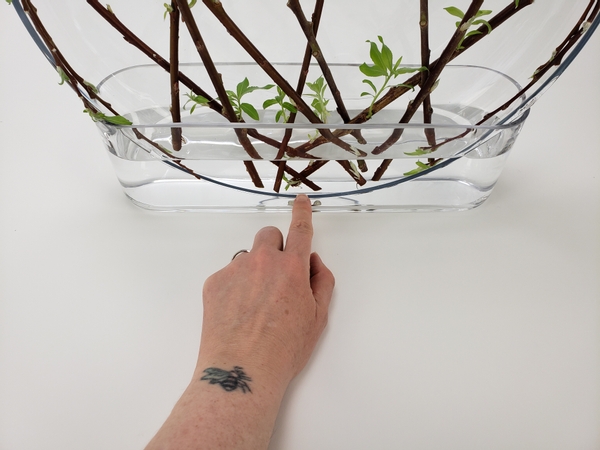
Flip the container over to remove any leaves or buds that broke off while designing.

Balance the shallow container on its side to rest in an oval container

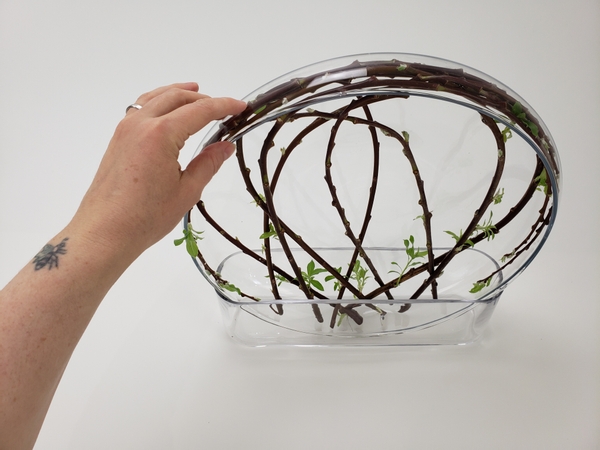
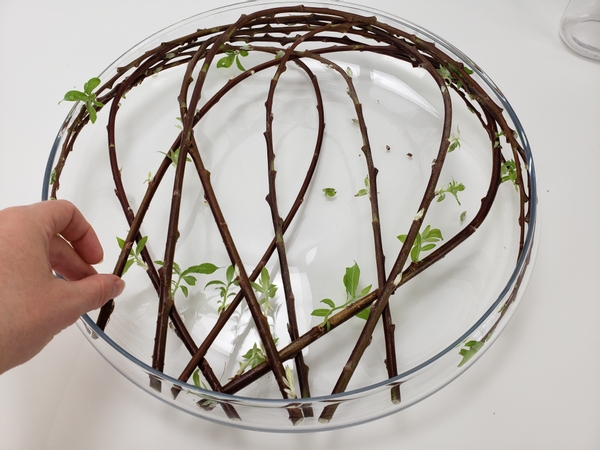
Balance the shallow container on its side to rest in an oval container. Make sure all the cut ends face into the container.

Fill the container with water

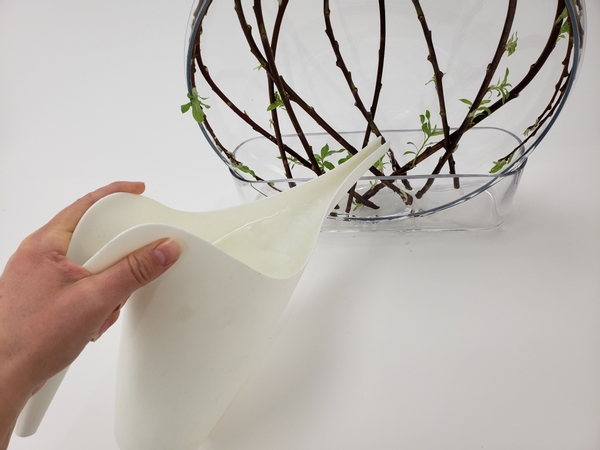
Fill the container with water.

Reposition any stems

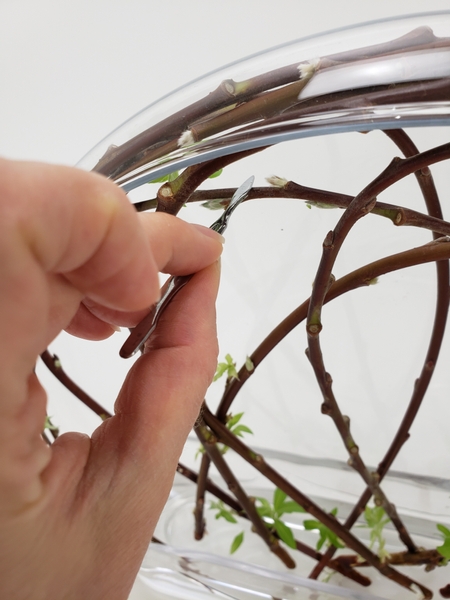
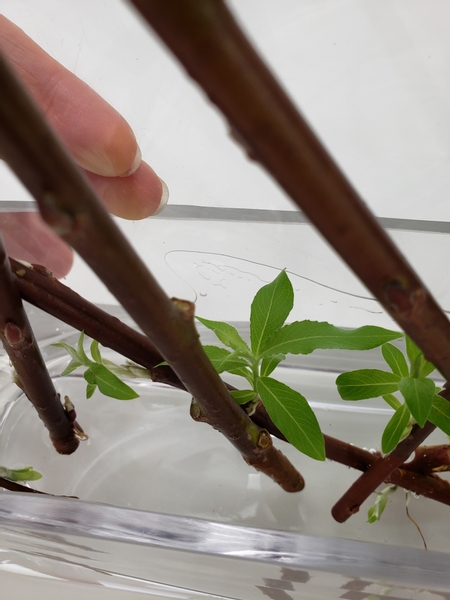
Reposition any stems that looks like they are crowded...

And guide the new growth so that they are able to continue developing

And guide the new growth so that they are able to continue developing.

Make sure all the cut stems fall below the water line

Make sure all the cut stems fall below the water line.

Reposition the stems to create a radiating impression

Reposition the stems to create a radiating impression.

Water seeping between the containers

A final design note: It is natural that water will seep in between the two containers. Before placing the design somewhere to display allow it to settle first so that you can adjust the water level so that the water won't spill and damage your surface.

Every week I add a new design with related tutorials. Be sure to subscribe to receive an email notification with design inspiration.

Tutorials

22 May 2012 Bite and snap a sturdy twig

Break the sturdy twig on the scribe line.

19 February 2013 Manipulating stems: Snapping at an angle, Bending, Spiraling, Curling and Straightening

Most stems, twigs and even sturdier branches can be bend into shapes. It takes practice and more than a bit of patience. The main idea is to slowly manipulate the branch without...

16 January 2019 Delicate Twig Hammock Armature to keep tulips upright in a shallow container

Craft a suspended armature to create a clear winter design.

9 December 2015 Scalable twig and Phalaenopsis orchid winterscape panel

This design can easily scale up or down by using larger or smaller pieces of wood to create a larger wall panel or make a few of these panels to stack as tiles to create a more...

2 May 2018 Radiating rainbow vine armature

Design an armature that is light enough to be carried by two flower stems to create a radiating frame.

7 February 2018 Bend Wired Equisetum into a Hollow Wreath

Craft a wreath with a hollow cavity inside to use as an armature for your flowers

15 May 2019 Glue a grapevine armature shaped like the petals of an open rose

Cut a wreath into sections to glue back together into a beautiful rose petal shape

17 July 2019 Twig Dome Armature

Crafted from a hand full of twigs to give you a large design... even though you add only two stems of sweet peas.

5 February 2020 Pour glue over a stick Bundle to craft a Poke Out Spring stick Armature

Fake an early Spring by crafting a long lasting stick bundle that has a blossoming branch of succulent flowers.

19 February 2020 Twig snippet pillar armature

A great do-in-advance and reusable design solution for a winter, early spring floral display.

7 April 2021 Spring breeze tangled ribbon wreath

Using branches pruned from a fruit tree... with a few dried flowers and just a few orchids to make a fresh Spring design.

Related Designs

28 April 2021 Here comes the sun...

A minimal design celebrating the new growth on twigs

4 January 2023 Around and about the new year

A glowing cranberry ball for frosty evening decorating.

1 November 2023 That day after Halloween feeling

Time to cut down vines... and enjoy them a bit longer in a Halloween display.

16 January 2019 Every. Single. Week.

Stand tulips upright in a shallow container with a suspended twig armature.

9 December 2015 On a Grand Scale

My article and a floral panel design featured in DIY Weddings Magazine

2 May 2018 Over the rainbow

Craft a radiating design that suspends from the orchid stems

7 February 2018 Up around the bend

Bend Equisetum into curves to wire into an open wreath shape

15 May 2019 Heard it through the grapevine?

Have you heard? I have wonderful news this week. Oh! and I also have this pretty grapevine armature shaped like the petals of an open rose to show you. But... Have you heard...

17 July 2019 … and... a bit more... effort… to make it special

Instead of just placing a handful of twigs and two stems of sweet peas in a vase... why not...?

2 October 2019 Cross-hatch a Shadow Bright Autumn

A clever trick borrowed from art techniques to add dimension to a bright and colourful Autumn floral design.

5 February 2020 What it’s all about

A bundle of twigs armature to create a pretend Spring design for a snowy morning.

19 February 2020 The Upside of being Inside

A creative design that has some height to it without blocking the view. This can easily be scaled up or down to match the environment you want to display it in.

9 December 2020 Have yourself a Merry Cellulose Fibre Christmas: Gyp flurry Snowman

...ok not really that fancy- it’s paper pulp. Cardboard boxes, really. In the spirit of 2020- I am inspired by the endless stream of cardboard boxes being delivered. My list of...

7 April 2021 First we learn HOW to design… and then we learn how only WE design.

Whipped up to be light in the Spring breeze wreath design.