My Creative Workbook

Christine de Beer - effortless floral craftsman

First Frost Sparkle Wire and Twinkle Vine Wreath

Shape wire into a circle

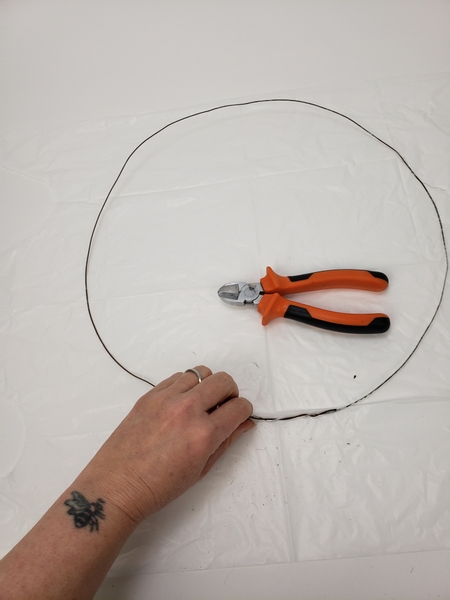
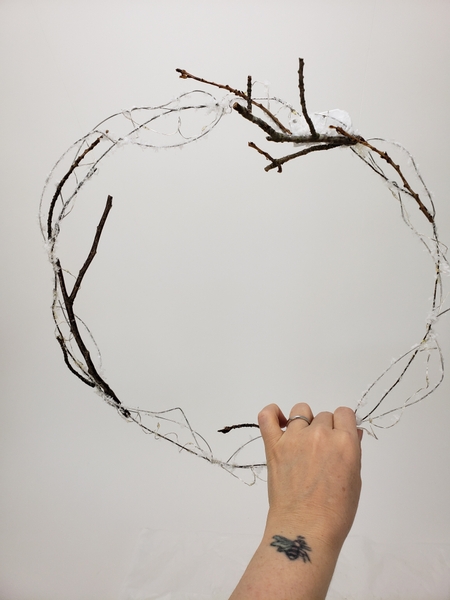
Shape wire into a circle the size you want the wreath to be.

Twist in wire around this basic frame to create the wreath frame

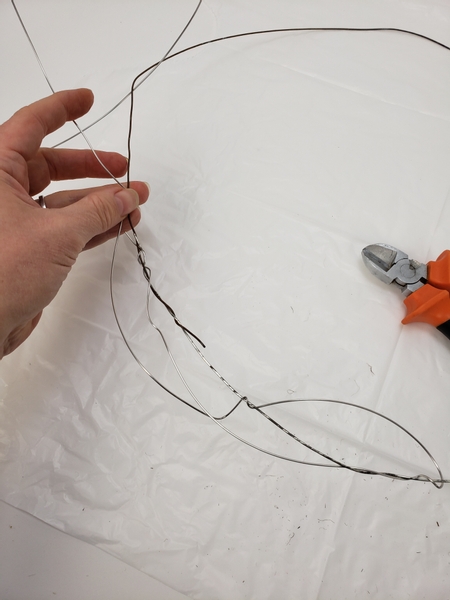
Twist in wire around this basic frame to create the wreath frame.

I explain a bit more about this way of crafting a wreath frame in our email this week. It is a great way to design a wreath that you intent to use again because it gives you design options for adding more details later. If you are not yet receiving my Wednesday morning (Vancouver time) email you can sign up below this post. This is also a great way for us to connect. Simply reply to the email if you have a comment of questions... or say hi. I would love to hear from you.

Twist and weave your way all around the frame

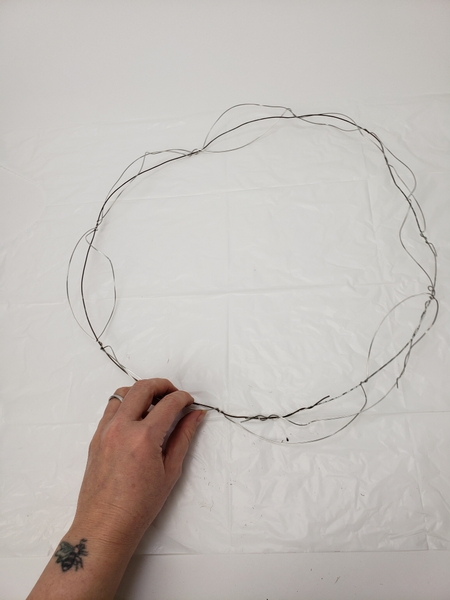
Twist and weave your way all around the frame.

Twist and weave in a fairy light all around the wire frame

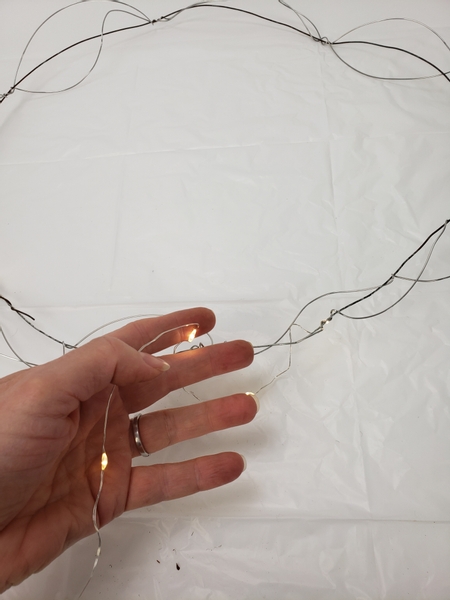
Twist and weave in a fairy light all around the wire frame...

Every here and there wrap the fairy lights around your finger

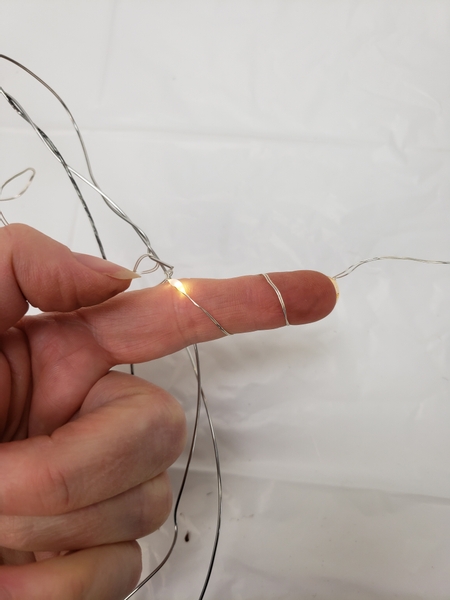
Every here and there wrap the fairy lights around your finger to curl it like a tendril.

See the Tutorial below for more detailed instructions on how to curl wire tendrils

And add the fairy lights all around the wreath frame

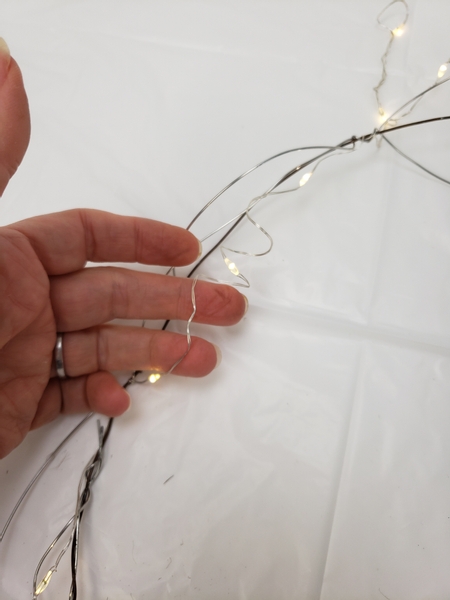
And add the fairy lights all around the wreath frame.

Wrap the battery and switch in the wire to secure it to the wreath frame

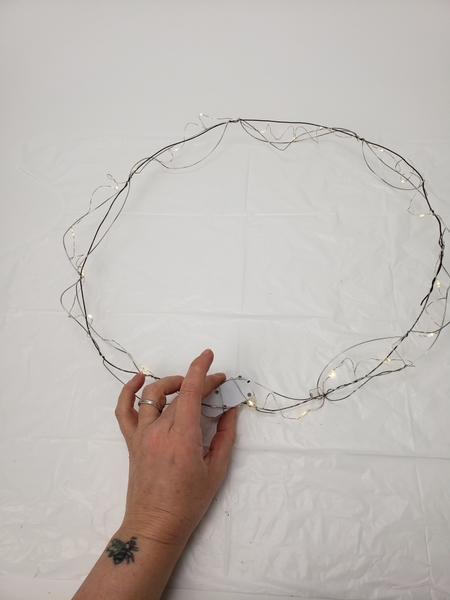
Wrap the battery and switch in the wire to secure it to the wreath frame.

Next I added the frost...

Pour out wood glue on to the wire

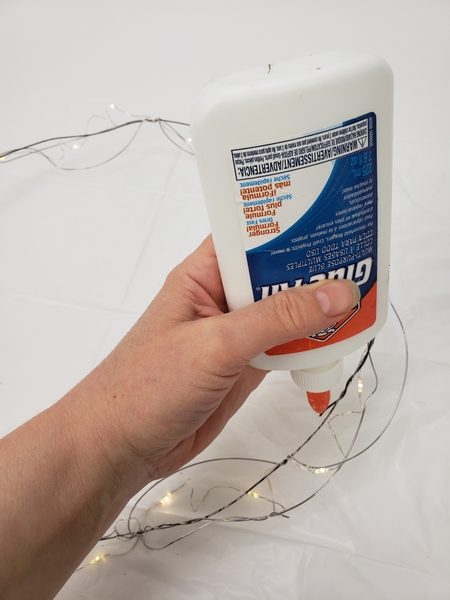
Pour out wood glue on to the wire...

And sprinkle artificial snow on to the wire

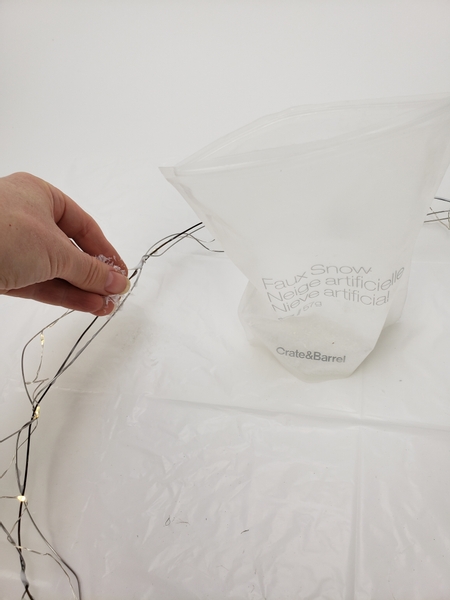
And sprinkle artificial snow on to the wire...

And switch to conceal it

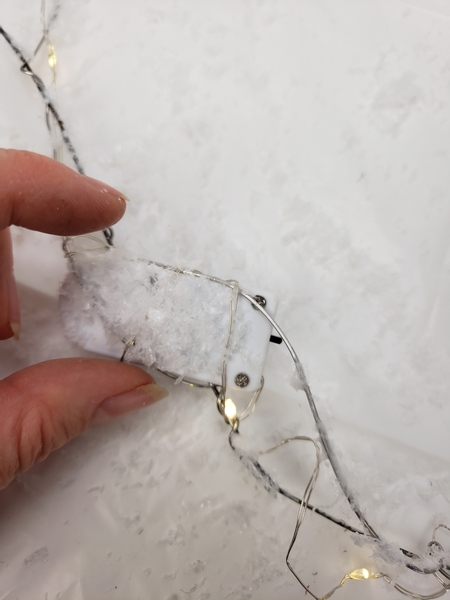
... And switch to somewhat conceal it.

The frosty wire wreath frame is now ready to design with

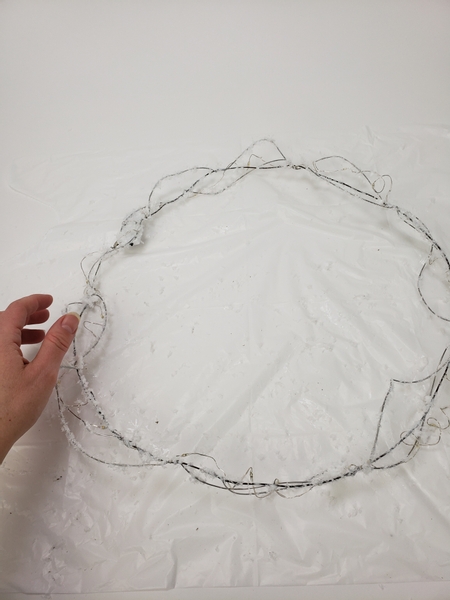
Once the glue is completely dry the frosty wire wreath frame is ready to design with.

Glue in a few winter twigs

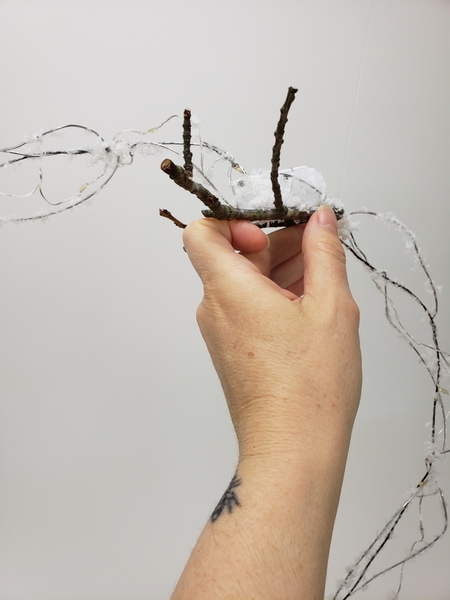
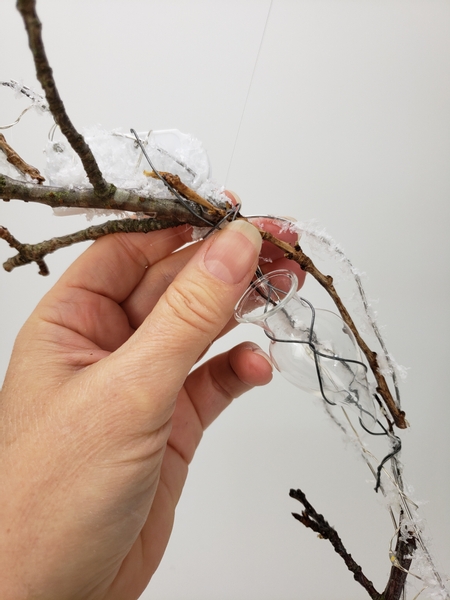
Glue in a few winter twigs...

Every here and there around the frame

... Every here and there around the frame.

Wrap wire around a few water tubes

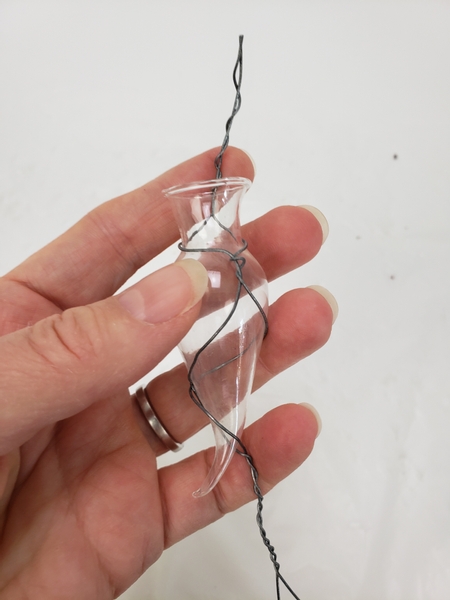
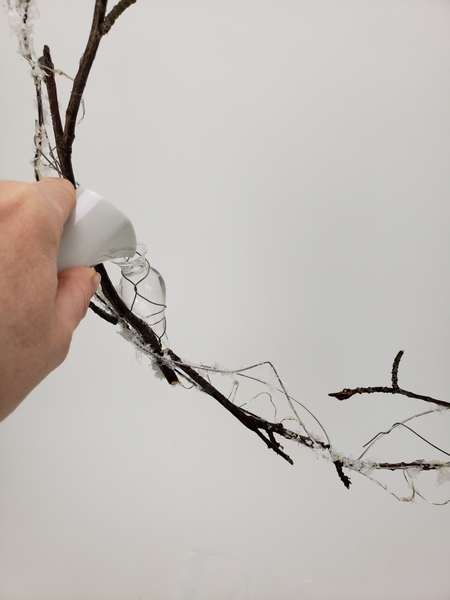
Wrap wire around a few water tubes...

And wire them into the frame

And wire them into the frame.

Book readers turn to page 175 of my book to learn more about adding water tubes into a design. Pay special attention to the bit where I discuss how to position stems so that they remain hydrated for as long as possible in whatever position you place them. Especially in a wreath design where you are likely to position the stems at different angles. Each angle requires a slight adjustment.
For more information about my book: The Effortless Floral Craftsman

Strip the foliage from a Love in a Puff vine

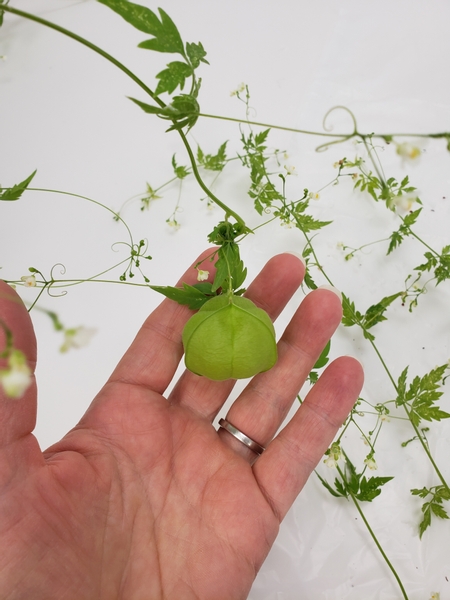
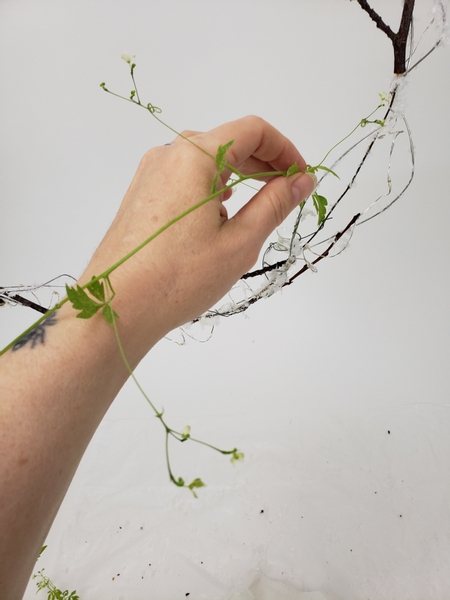
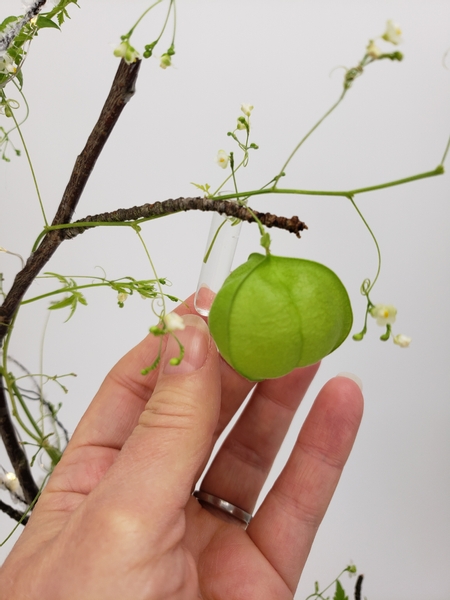
Strip most of the foliage from a Love in a Puff vine... beautiful, right?

Fill the water tubes with water

Fill the water tubes with water.

I used both these glass seahorses and a glass water tube for the seed puff. This is a great design to use your prettiest tiny glass water tubes because they will be seen. If you have small empty perfume bottles.. use them. They will look so pretty! Even small budvases. Again see our email it will explain how you can rest the bottles in the design.

Place the vine into the sea horse water tube

Place the vine into the sea horse water tube...

And weave the vine through and around the wreath frame

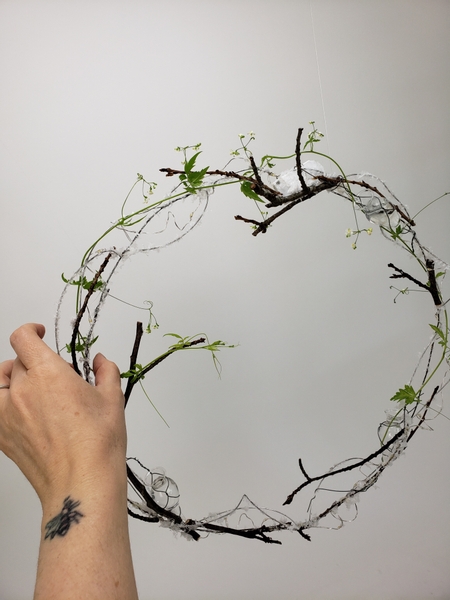
And weave the vine through and around the wreath frame.

So that the bright green vine twirls all the way around the wire frame

So that the bright green vine twirls all the way around the wire frame.

With a special water tube to keep the seed puff hydrated

With a special water tube to keep the seed puff hydrated right there to be the center of attentions dangling like a bauble in your design.

Glue in a few glass icicles

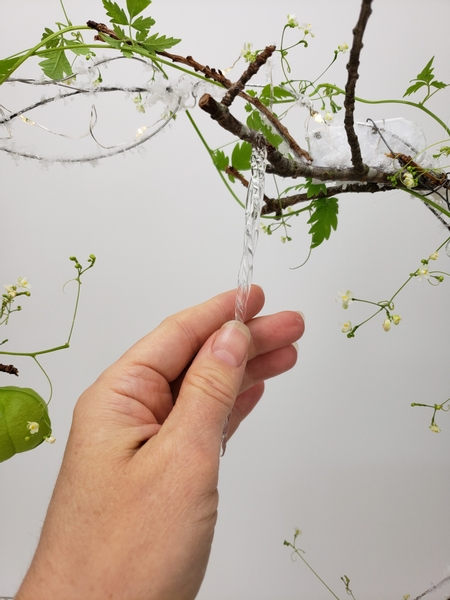
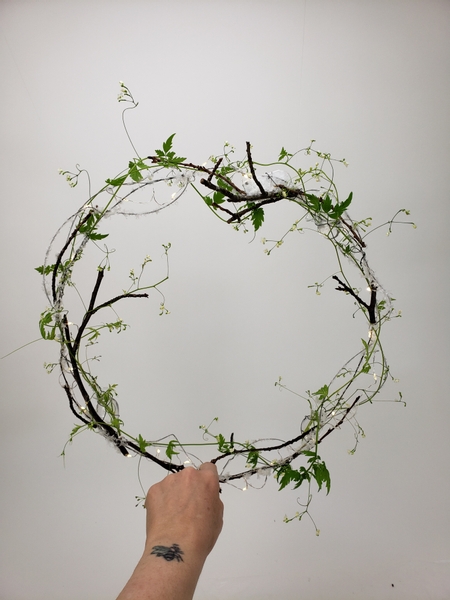
Glue in a few glass icicles...

To dangle down the design

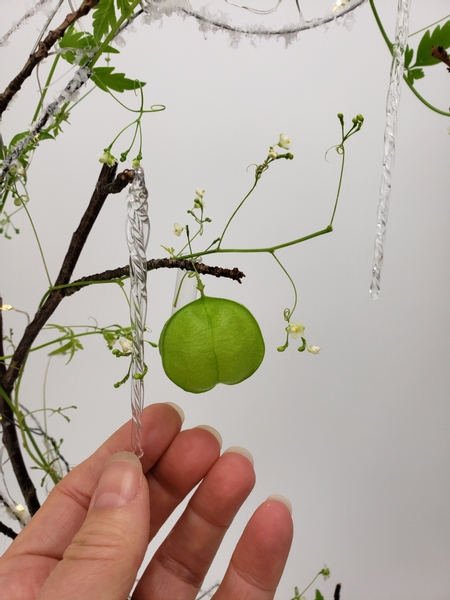
To dangle down the design.

And finish the design with a few dew drop crystals for that last bit of sparkle

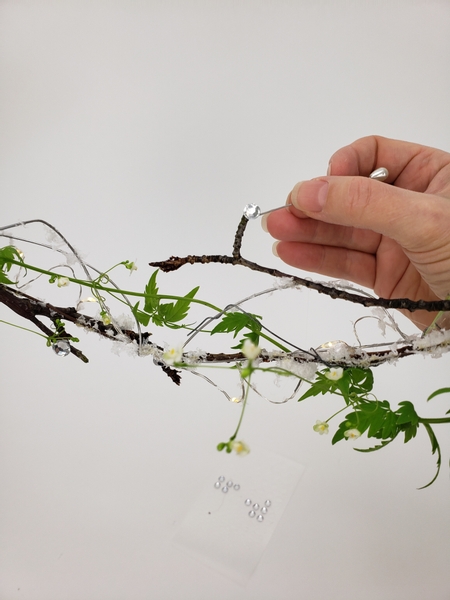
And finish the design with a few dew drop crystals for that last bit of sparkle.

See the Tutorial below for more detailed instructions on how to add the crystals without disturbing your delicate design details.

Every week I add a new design with related tutorials. Be sure to subscribe to receive an email notification with design inspiration.

Tutorials

1 November 2011 Weaving a twig wreath

For my design I wanted the wreath to look wind blown so I added a few loosely woven twigs into the weave. I also wanted to emphasize the autumn colours so I added a twirling...

20 December 2017 Twinkle and Pine Christmas Star

Use a cardboard shape to craft a simple wire Christmas star

12 August 2012 Twist your own Wire Wreath frame

Make a wire wreath frame with wire and cover it with growth mesium or moss to design on

26 July 2011 Wire Tendrils

Curl the wire at irregular intervals to create a natural wire tendril similar to that of a passion fruit plant

30 November 2016 Barely there Wreath armature

Glue snippets of Baby's breath and grass into a lace fine wreath shape to showcase the tiny chocolate cosmos buds

4 November 2015 Bleached Baby’s Breath Wreath

Glue a radiating wreath from bleached Gyp

27 December 2017 Pine NeedleTube

Glue pine needles to a up-cycled disk to create a winter scene

29 November 2011 Messy wire lace

I call this “lace” because I use pins to guide the wire sections together- almost like you do when making lace.

17 December 2014 Daisy shaped Pine Star

Use the sheath as a casing to create a decorative pine star

12 December 2012 Piled Pine Needle Tabletop Wreath

Use wood glue to make a light as air table top wreath from pine needles

17 May 2017 A Dandelion Seed Puff that stays just so

Use a thin wire to puff out dandelion seeds to look like it spilled from a basket

12 June 2012 Sticky Shooting Star

Glue gypsophila sticks, flowers and dandelion seeds into a star shape

25 December 2018 Twig Snowflake

Glue twigs into a snowflake twig armature for Christmas trimmings.

28 December 2016 Adding snow to twigs

Glue artificial snow to twigs

Related Designs

8 November 2023 A warm up

An almost Christmas... Christmas wreath featured in the winter edition of Flora Magazine.

27 December 2023 A Very Merry Dried Orange and these from My Greenhouse to yours Trendy Christmas Cheer

And of course I would add the environmentally friendly-estest floral design option to top all the rest. Reusable and upcycled... and smells wonderful.

25 November 2015 So white

A dried Baby's breath and fresh orchid wreath

4 November 2015 Delicate

Bleached Gypsophila wreath with delicate autumn touches

27 December 2017 Can it be?

Craft a pine tube to display a soft and snow filled winter scene

20 December 2017 A Very Merry Christmas Star

A wire Christmas star with a secret plan to hide the twinkle

29 November 2011 Jack Frost’s Christmas stocking

I used wire, fishing line (mono-filament) and Phalaenopsis orchid roots to make a messy lace Christmas stocking and dressed the stocking with frost green Cymbidium orchids

17 December 2014 Star of Wonder

Glue pine needles into star shapes

12 December 2012 It's a swell time…

An exceptional moment frozen in time… 12:12:12 12/12/12

18 December 2012 So this is Christmas, I hope you had fun…

Capilano Flower Arranging Club Designing for Christmas Workshop: Yule log

17 May 2017 Nobody move!

Weave a small basket with a lid to keep fluffy treasures in

11 June 2012 Wish Upon a Dandelion Star

A sticky shooting star made with gypsophila stems and fluffy dandelion seeds