Christine de Beer - effortless floral craftsman
Knotted parcels to position your plant material in a design
- 18 February 2026
- and more
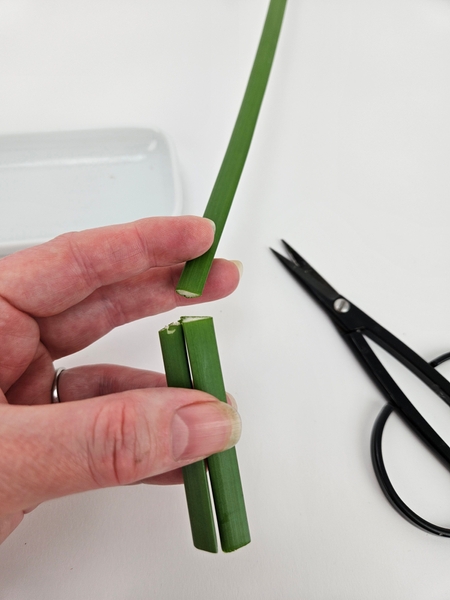
Cut papyrus stems into snippets.

The inner, white, pithy part of the papyrus stem will oxidize and darken when cut and exposed to air.
Design note: I preferred this in my design because the stem is less "obvious" and blends in perfectly with the black stems of the wire vines. It is a natural process though (lignin and exposure to oxygen) but you can minimize it with lemon juice... or you will notice that I positioned one stem to the front of the design that is browning slower. This stem is from the middle part of the papyrus stem. So you can control how the stem browns simply by arranging the stems in the way you cut them. The lower parts of the stem will brown first and the middle part of the stem taking the longest to brown.
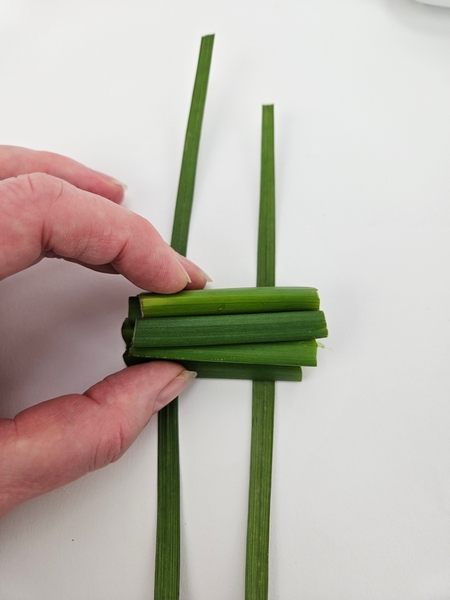
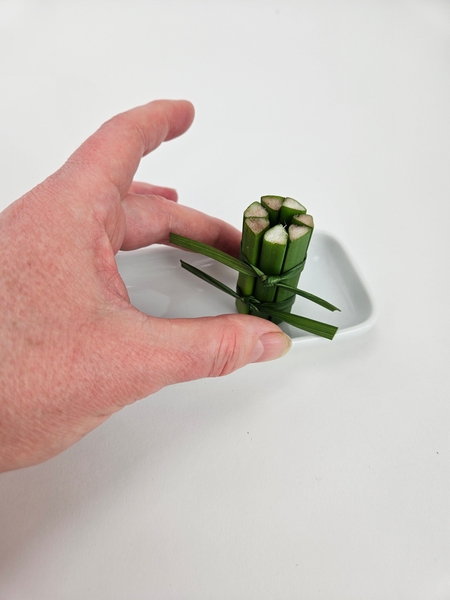
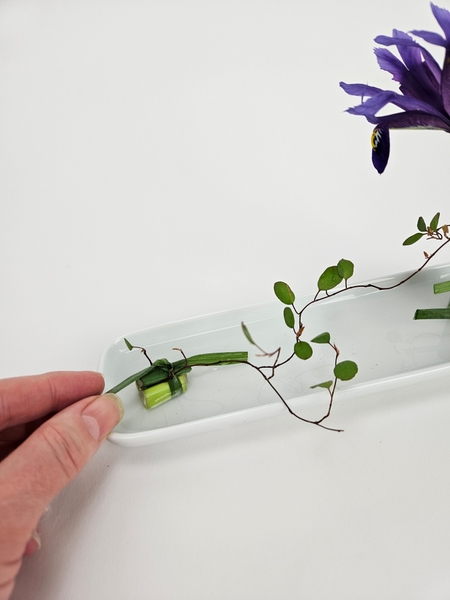
Place your stem bundle on lily grass...

Carefully knot the grass to secure the stem bundle.
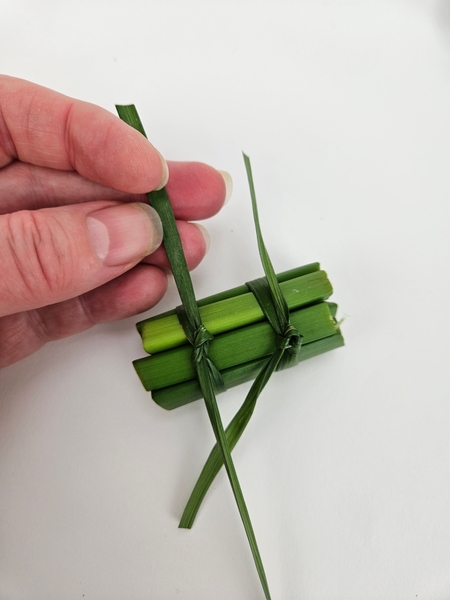
And another double knot below. I add the grass knots for taller support bundles and...
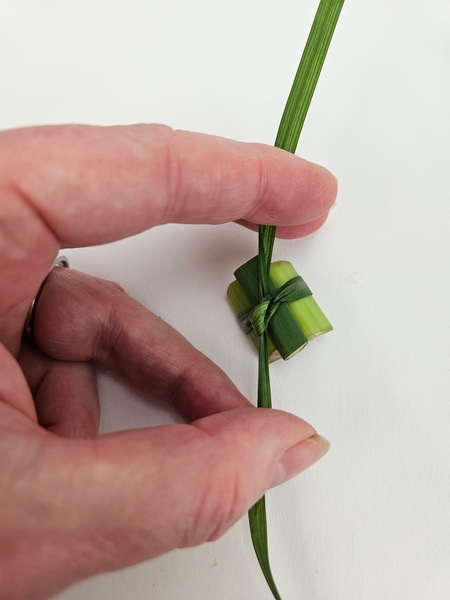
.. a single grass knot for shorter stem bundles.
For this design I am using a simple granny knot. Book readers turn to page 49 where I show you a few knots (including how to make sure your granny knot remains knotted, when you knot a plant material granny knot- say that fast 10 times!) For more information about my book: The Effortless Floral Craftsman
Place the taller papyrus stem bundle to stand upright in a container.
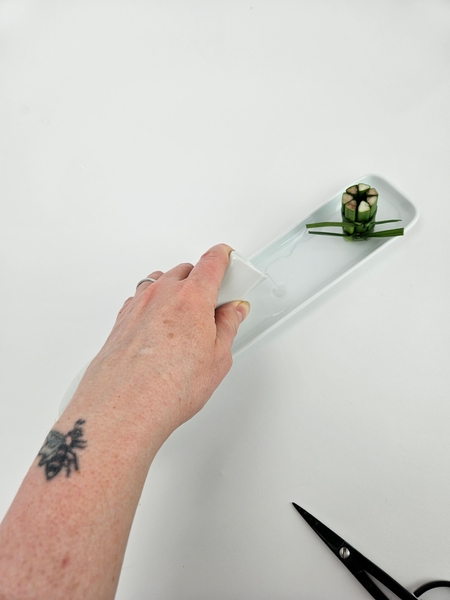
Add enough water so that the papyrus is firmly in the water to remain hydrated.
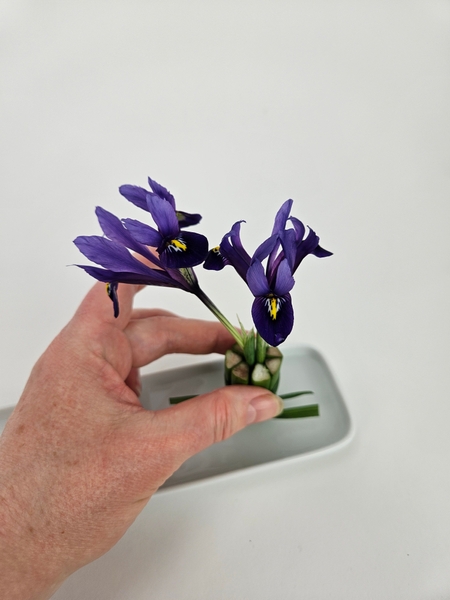
And place two iris stems right through the bundle so that they stand firmly in the water to remain hydrated.
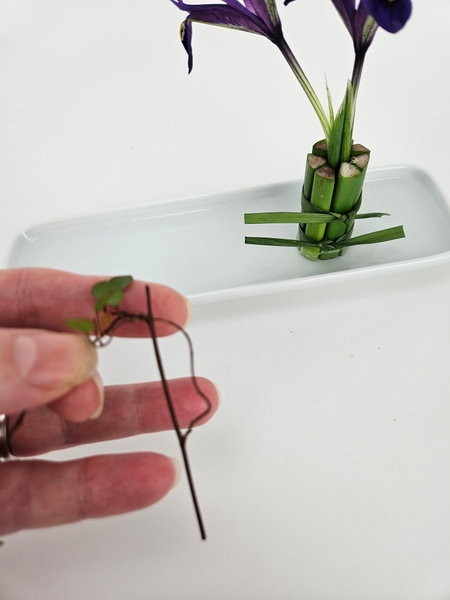
I am using the vertical lines of the papyrus stem to position the side branch of my wire vine. so that it extends out... and up...
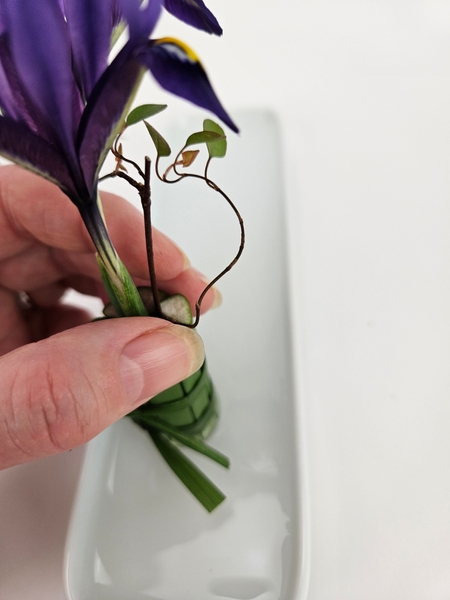
Slip the wire vine into the papyrus bundle...
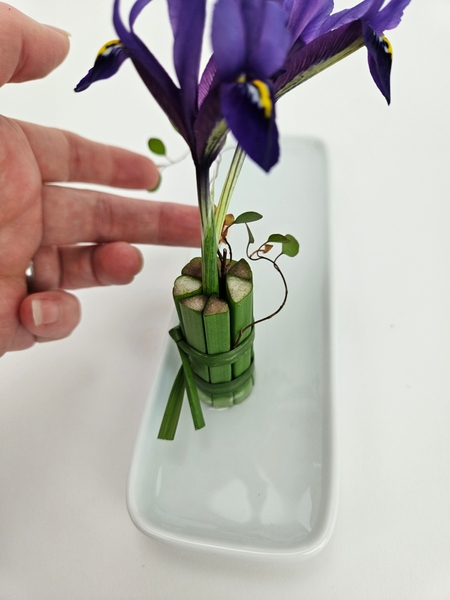
And feed the side branch so that it extends out from the gap between the two papyrus stems.
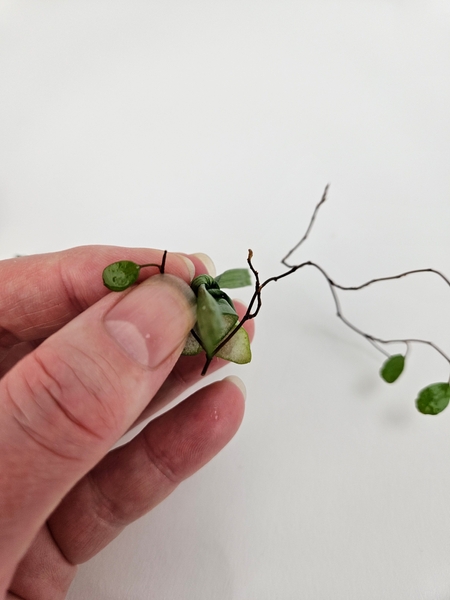
For the shorter bundle I am splitting the wire vine so that the papyrus stem created a wide gap...
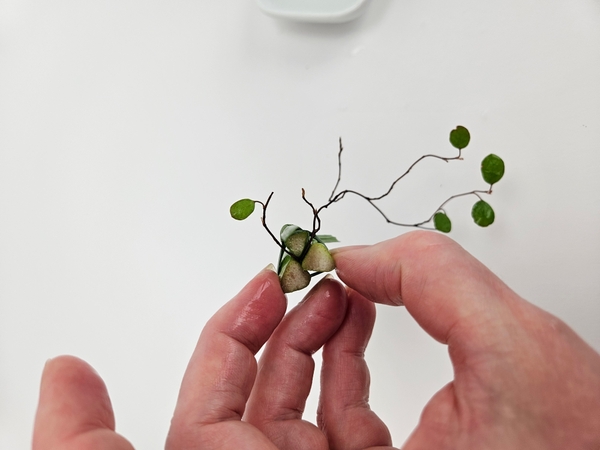
... to lift and drape the vine horizontally.
And my trick to get the two vine bundles to reach over and almost touch without looking glued in place? Museum gum!
Every Wednesday morning (Vancouver time), I send out a design note as an early glimpse at the newest Design and a few notes that I picked up creating the Tutorial that might be useful to you. This week, I show you how to roll a sliver of museum gum into a tube that stretches so that your plant stays where you want it but also moves where to it naturally wants to.
If you’re new here, you can sign up below this post. And if you’ve been receiving these notes for some time, I hope they feel like a welcome break in your busy week.
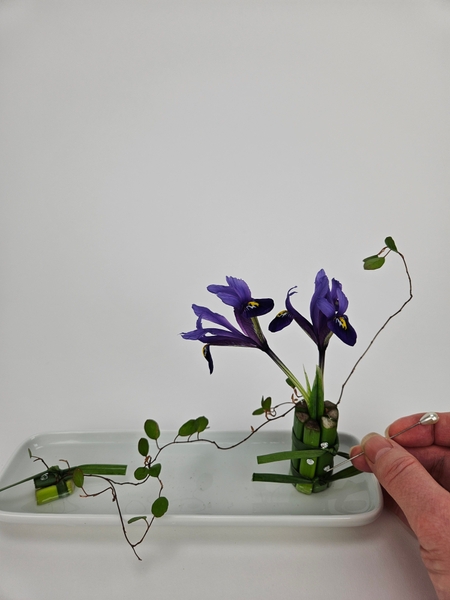
Add a few dew drop crystals on the stem bundles for extra sparkle.
See the Tutorial below for detailed instructions on how and why I add the crystals with a pin.
Sign up for my weekly newsletter
Every week I add a new design with related tutorials. Be sure to subscribe to receive an email notification with design inspiration.


 of autumn leaves so create a natural, upright flower frog")


