My Creative Workbook

Christine de Beer - effortless floral craftsman

Fluffy Seed Snowflake Sparkle

Overlap two bunny tail grass blooms

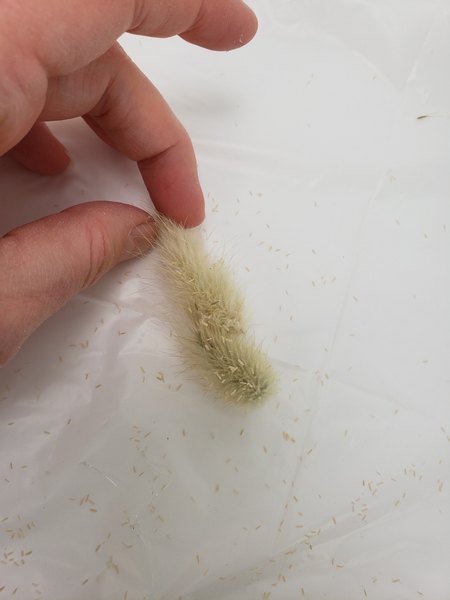
To start the snowflake, overlap two bunny tail grass blooms and secure it with hot glue.

Design note: you can treat the grass blooms with hairspray or fixative to make sure it stays together. But I found I rather like the natural fluffiness in this design. The tape also mostly kept it together so if you prefer you can skip this step and use the snowflake as a way to keep the seeds in the star shape overwinter to plant out in spring.

Glue on two more fluffy blooms to create an arrow

Glue on two more fluffy blooms to create an arrow.

Glue six arrows to start the snowflake

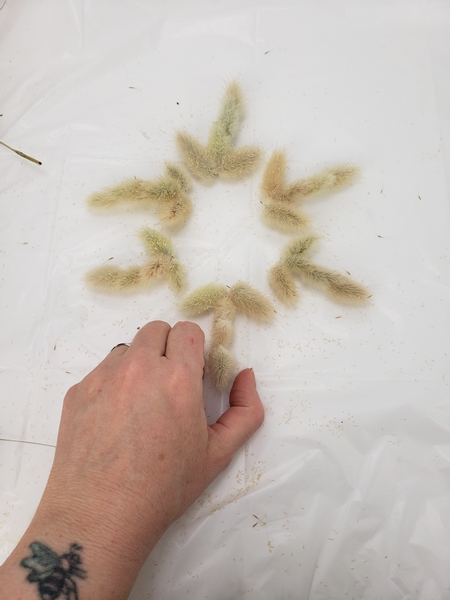
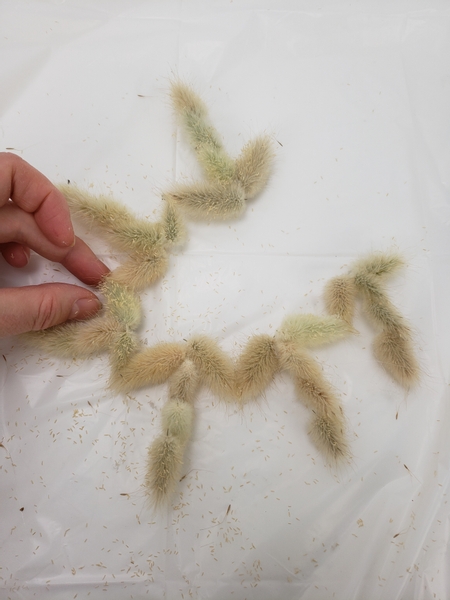
Glue six arrows to start the snowflake.

Pair up the arrows by gluing the tips together

Pair up the arrows by gluing the tips together.

Pair up the pairs by connecting the tips of the next seed bloom

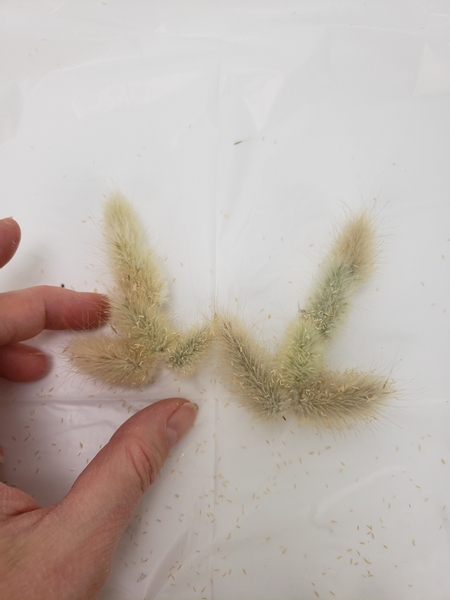
Pair up the pairs by connecting the tips of the next seed bloom...

To shape the seed blooms into a garland

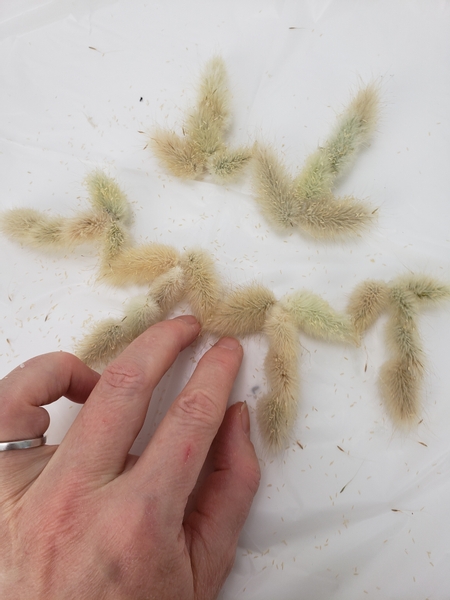
To shape the seed blooms into a garland.

Hmmm... this is nice as well! You can always just continue to shape the seed blooms into a long garland. But wait... let's get back to the snowflake...

Connect all the fluffy pairs to shape the basic outline of the snowflake

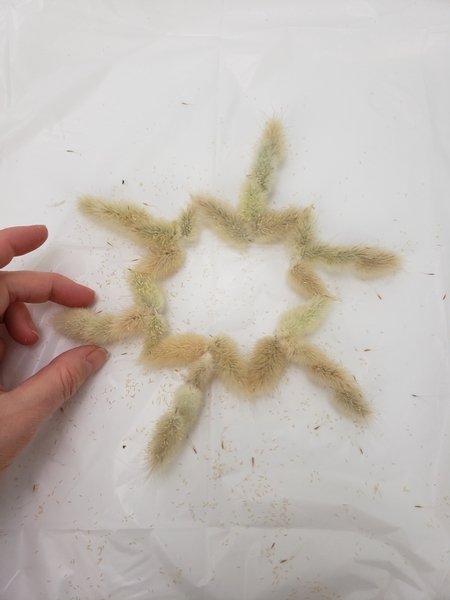
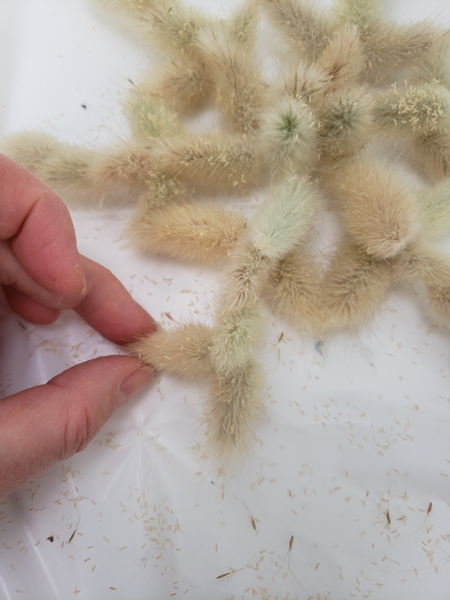
Connect all the fluffy pairs to shape the basic outline of the snowflake.

Glue another seed bloom to extend the arrow inwards

Glue in another seed bloom to extend the arrow inwards...

All the way around the snowflake

All the way around the snowflake.

Glue a cluster of three fluffy seed blooms

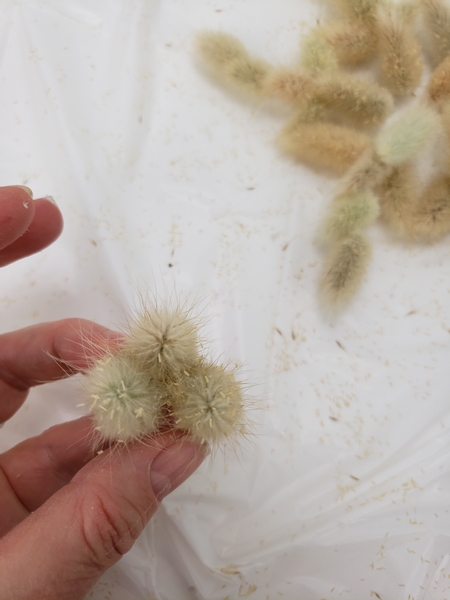
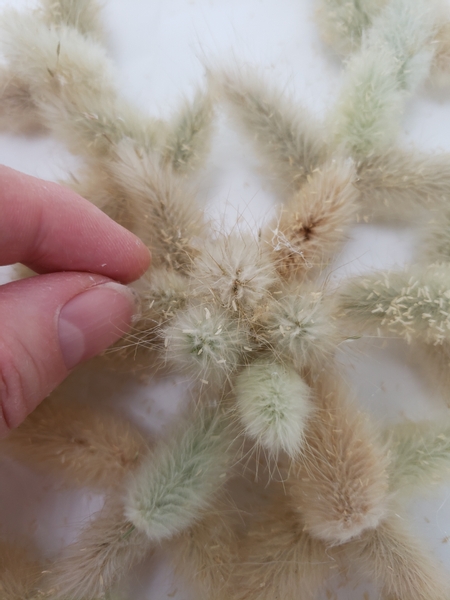
Glue a cluster of three fluffy seed blooms...

Secure the cluster in the middle of the snow flake with the smallest possible amount of hot glue

Secure the cluster in the middle of the snow flake with the smallest possible amount of hot glue.

Glue in two more seed blooms to the tip of the snowflake to make the branches sprout out

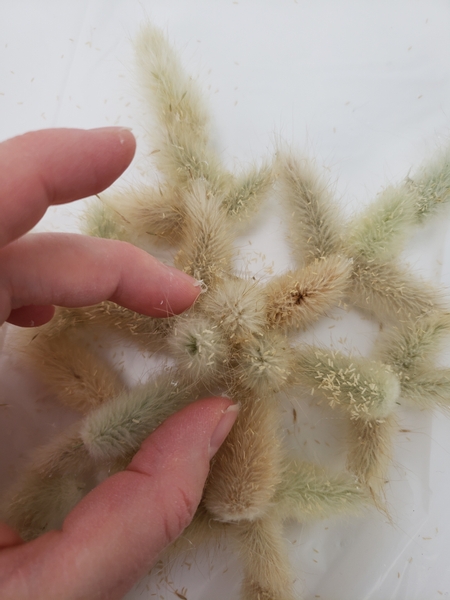
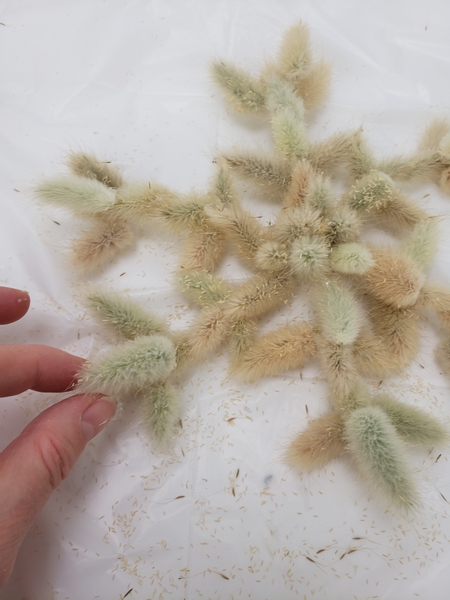
Glue in two more seed blooms to the tip of the snowflake to make the branches sprout out at the ends.

Glue in seed blooms to all the branches of the snowflake

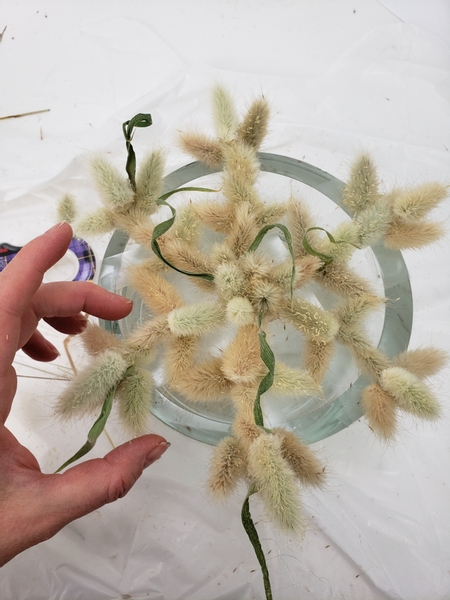
Glue in seed blooms to all the branches of the snowflake.

Add a few more bunny tails to the snowflake in the middle

now the fun part starts... give your snowflake a personality. Add in a few more fluffy bunny tails to the middle, if you want to.

... or give it a few more branches. Or fluff it up with a second layer. Whatever is your own style. If you want to read more about developing your own style of designing have a look at my book: The Effortless Floral Craftsman

You can even add a double layer of fluffy bunny tail seed blooms

You can even add a double layer of fluffy bunny tail seed blooms...

And a few bits of curled grass

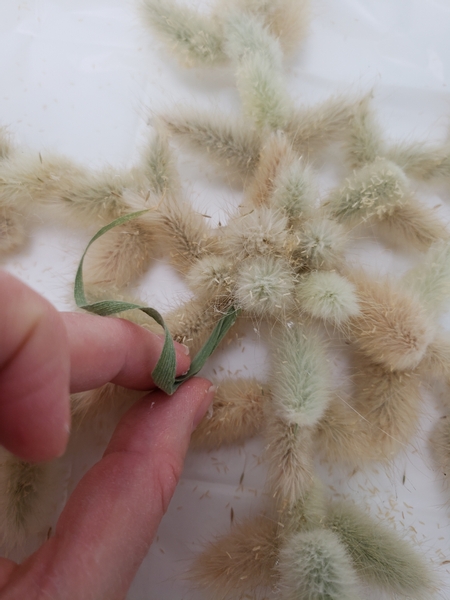
And a few bits of curled grass.

It is rather tricky to add the grass deep into the fluffy bunny tail seed bloom. It tends to get stuck in the fluff making it difficult to position just so... This week in our email I show you how to cut and glue the grass bits so that they are exactly where you want them without ruining the fluffy seeds. You can sign up for our Wednesday email below this post. I send out the email the moment the design is ready for you to view and I always add a bit that I find interesting or that I learned so that you can learn even more as i go along. If you have questions or a comment or even if you want to say hi... reply to the email. I would love to hear from you.

Tape a grid over a display container

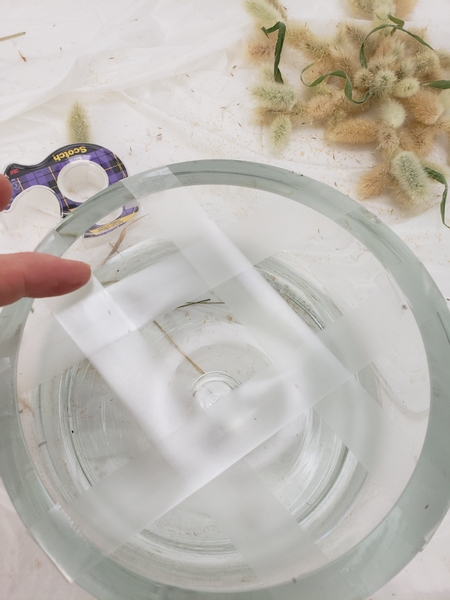
Tape a grid over a display container. If you have been following along for a while you know by now my twist is to tape the grid sticky side up so that I can have that extra bit of grip to position my delicate floral details. This is especially great for this design.

See the Tutorial below for more detailed instructions.

Position the seed bloom snowflake so that it secures to the grid

Position the seed bloom snowflake so that it secures to the grid.

Wiggle the container a bit to make sure it is secure

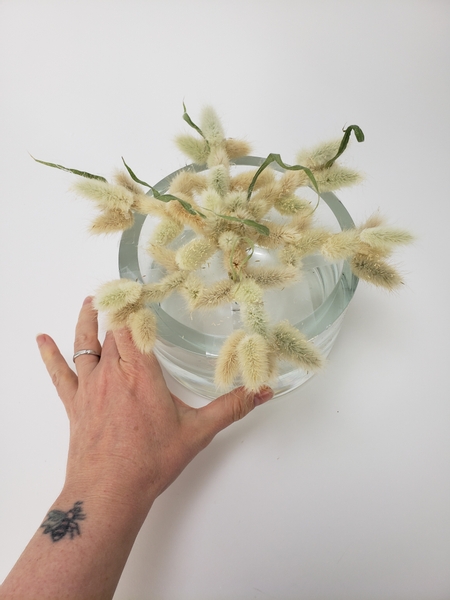
Wiggle the container a bit to make sure it is secure. Tap down any parts that is not yet secure.

Pour water through the grid to fill the display container

Pour water through the grid to fill the display container.

Remove the foliage from the stem of your alyssum flowers and set it in the water to continue to hydrate

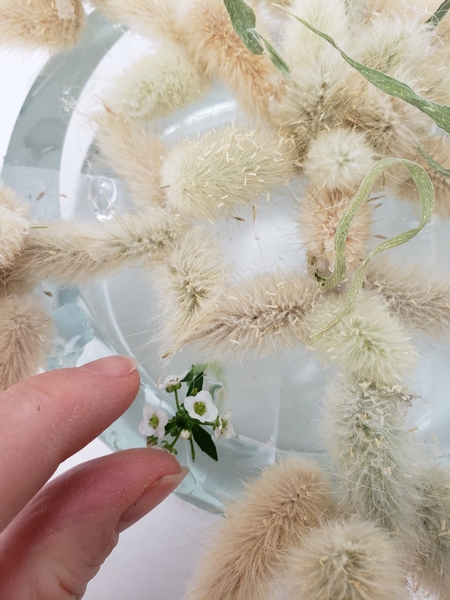
Next we add our carpet of snow... Remove the foliage from the stem of your alyssum flowers and set it in the water to continue to hydrate.

Place the flowers to look like it was scattered every here and there

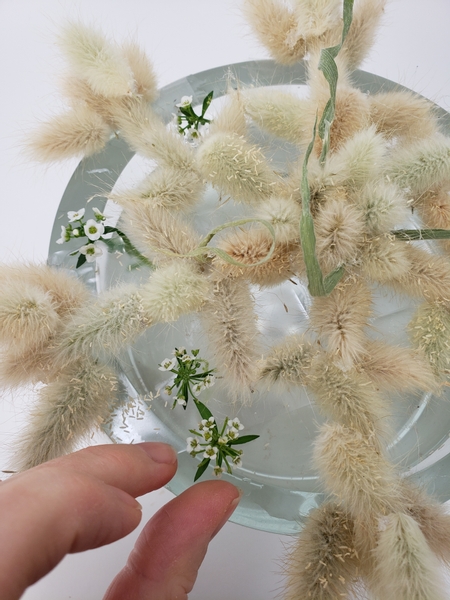
Place the flowers to look like it was scattered every here and there. Be careful not to cluster the flowers so that you still have just a dusting of flowers.

Finish the design with some dew drop crystals

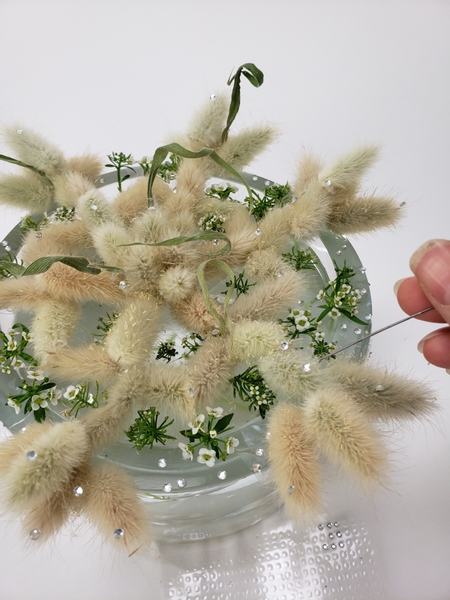
... and as always, I finish the design with some dew drop crystals.

See the Tutorial below for more detailed instructions on how to do this without breaking apart the delicate seed bloom.

Every week I add a new design with related tutorials. Be sure to subscribe to receive an email notification with design inspiration.

Tutorials

25 December 2018 Twig Snowflake

Glue twigs into a snowflake twig armature for Christmas trimmings.

2 April 2014 Turning the sellotape over the vase trick up-side-down for a sticky side out frog

Tape a grid over a vase to keep the floral details in place

8 July 2015 Using a pin to place tiny dew drop crystals

It's sometimes difficult to place a tiny crystal or bead exactly where you want it.

23 March 2022 A Double vase, Sticky tape, Reflexed AND Woven Nestled Grass and Tulip Whirl

so many techniques rolled into one rather pretty tulip nest. Perfect to celebrate new beginnings: Spring and my book birthday... and my online workshop!

2 November 2022 A Reflex Rose Rose Hip… Rose

Making a rose even more roselike by enhancing its rosy-ness.

13 September 2017 Tape a grid around the edges of a container for a table top wreath

Suspend flowers with an almost invisible taped grid

2 July 2014 Clearly invisible taped Grid

This is the easiest way to keep flower in place

30 June 2021 Sparkling dew drop puddle to keep flowers hydrated even during a heatwave

Done in no time design... and it is rather refreshing to make.

15 April 2020 A Sticky-tape way to keep blossom petals from dropping

Capture Spring for just a little bit longer by sticking blossoms down, in place.

8 February 2023 Hover winter twig armature with an acetate platform

Crystal clear floral design for winter styling

6 March 2019 Snow puddle armature

Connect twigs with puddles of artificial snow to craft a winter armature for your flowers.

2 December 2020 Lost and found snow mittens

Artificial snow covered cardboard mittens to add to a winter themed design.

2 December 2020 Ice skating pond inspired grid for a winter floral design

Turn the tried and trusted tape over the vase grid idea sticky side out... and adding artificial snow for a Christmas in Winter design solution.

20 December 2017 Twinkle and Pine Christmas Star

Use a cardboard shape to craft a simple wire Christmas star

12 June 2012 Sticky Shooting Star

Glue gypsophila sticks, flowers and dandelion seeds into a star shape

Related Designs

22 November 2023 Gentle transition

There's no need to rush the seasons. Take it slow and enjoy the plant material that are still available even if you are excited about what is to come...

2 November 2022 bonfire

A final rosy burst of fiery autumn colour.

28 October 2015 On Pumpkin Coloured Days

Create a besom broom to sweep up those Autumn leaves

7 June 2017 Dream, Job

Create a grid to rest some plant material so that it floats and some with their stems to rest in the water below

2 April 2014 Apricity

Turning a stand-by floral technique sticky side out

30 June 2021 Into a Puddle!

Heat proof floral design for summer.

15 April 2020 Helping Spring Stick Around

Blossom petals drop so quickly! Here's a way to make them last just that little bit longer.

8 February 2023 Snow… drops

A late winter design for minimal floral styling.

6 March 2019 It almost happened today!

Craft snow puddles to keep your flowers upright

2 December 2020 Have yourself a Merry Cellulose Fibre Christmas: Lost and Found Snow Mittens

...ok not really that fancy- it’s made from paper pulp. A cardboard box snow mittens… really. In the spirit of 2020- I am inspired by the endless stream of cardboard boxes being...

30 November 2022 Take a bough… it’s Christmas time!

A wool and twig snowflake design (made from candy canes!) that will last the entire Festive Season.