Christine de Beer - effortless floral craftsman
Two layer table top forest floor armature that Transition from Autumn to Christmas
- 10 November 2021
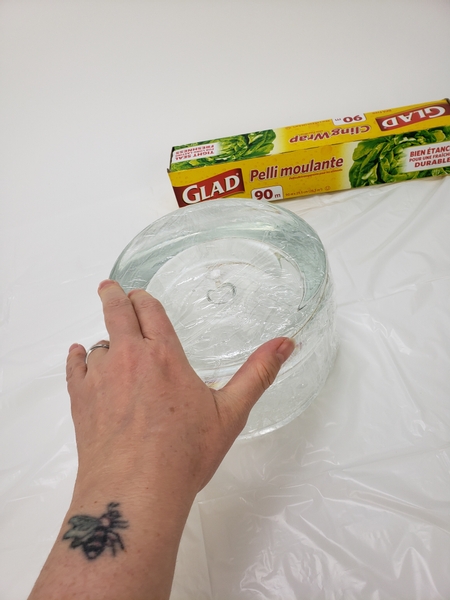
Cover a small container with plastic wrap.
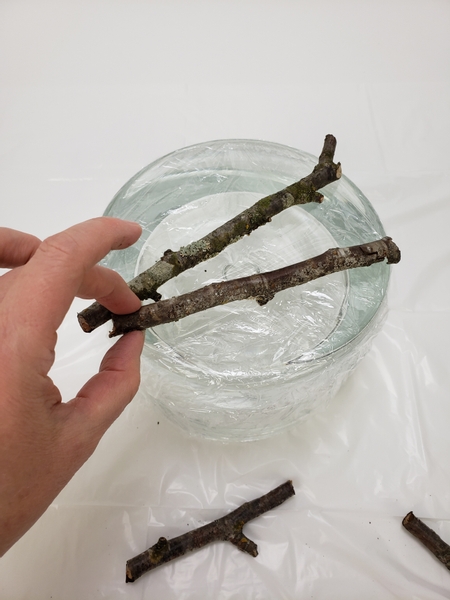
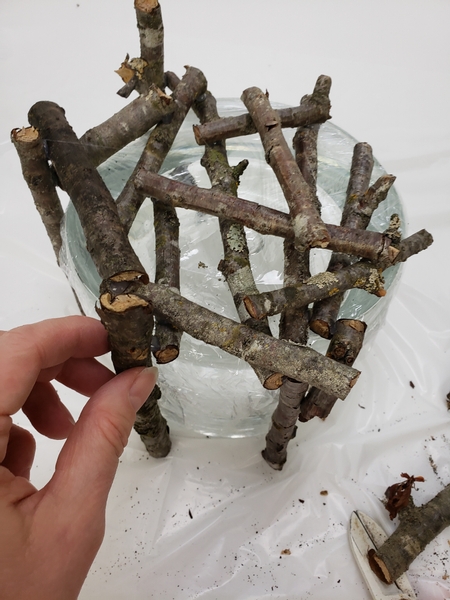
We are creating the bowl shape out of two layers. First sticks and then a bark layer in the gaps. To start, stack the sticks on the bottom of the container and secure it with hot glue.
Design note: I wanted my design to look a bit wild and overgrown- just like a forest floor so I used these oversized, moss and lichen covered sticks.
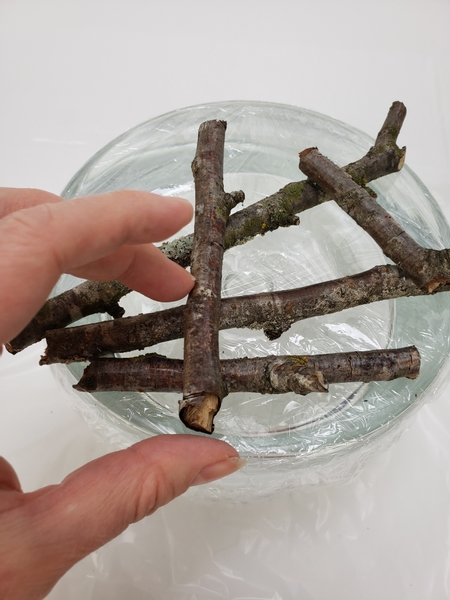
Make sure you glue the sticks to the sticks and not to the plastic film and make sure you secure each stick at, at least three places to craft a secure armature.
Glue in sticks to the side of the container to build up the bowl.
Tip:
When crafting the side part of the armature, add in a few of the side sticks first so that you have something to build upon.
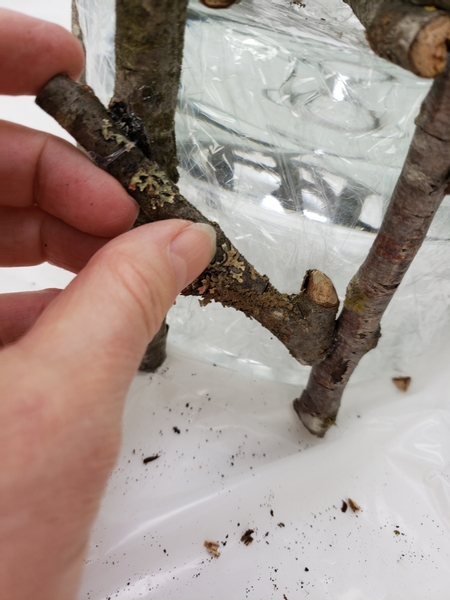
... Then simply connect the side sticks with more sticks.
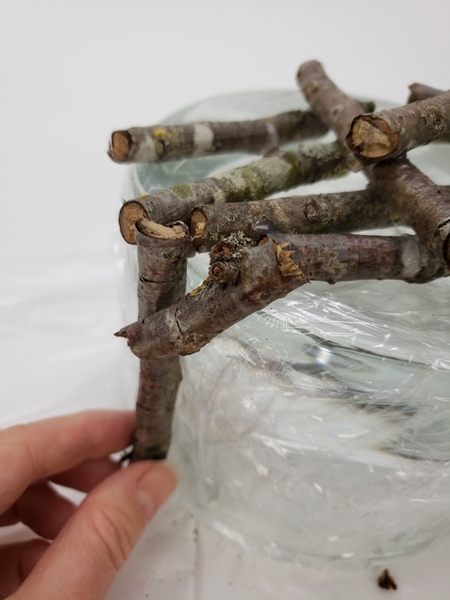
Add in a few longer sticks as legs for the armature to stand on. I added three leg sticks and then left open space on the opposite side so that I can glue in the last leg when the armature is finished so that I can adjust it to the position I require.
Wiggle the armature to make sure it is secure. If any of the sticks are not yet firmly glued in place add a few more sticks.
This is a really important step. If your armature is not secure now it is simply going to fall apart when you remove (you are going to have to almost break it) from the plastic once the second layer is dried. So make sure everything is extra secure.
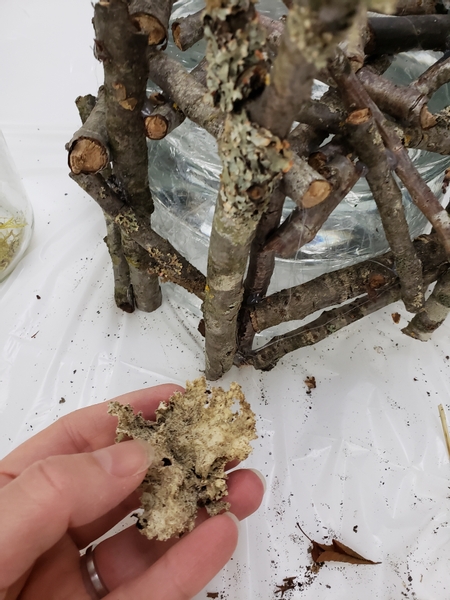
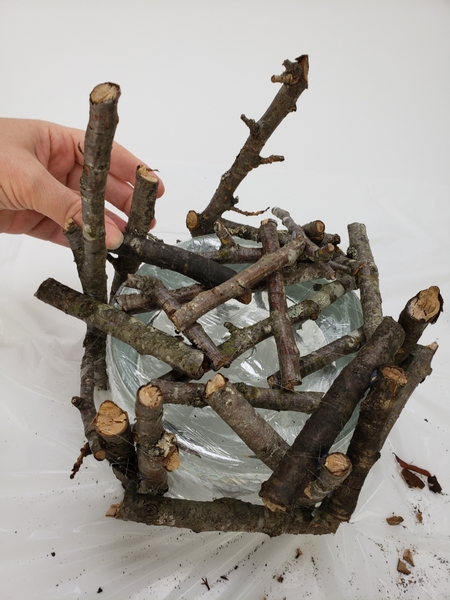
Glue in extra bits of lichen and moss...
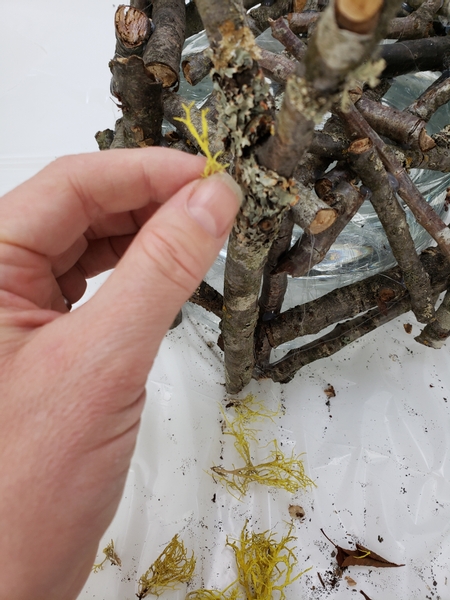
Focusing on the places where you might need to conceal bigger blobs of glue.
For the second layer:
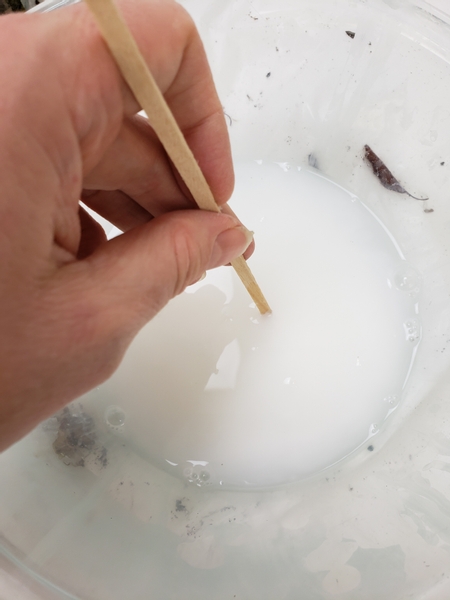
Thin wood glue with warm water
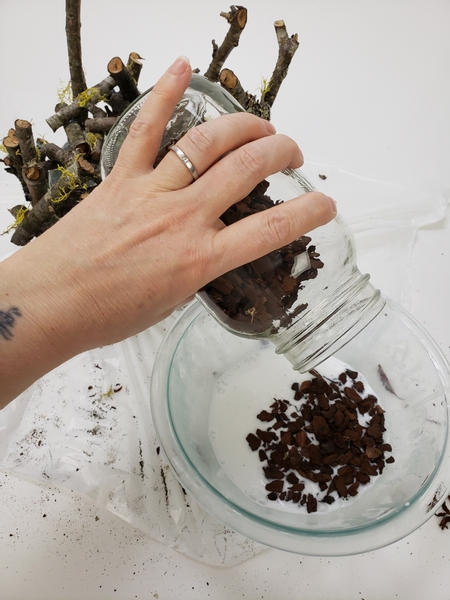
Pour wood chips into the glue mixture
Design note: orchid growth medium works great.
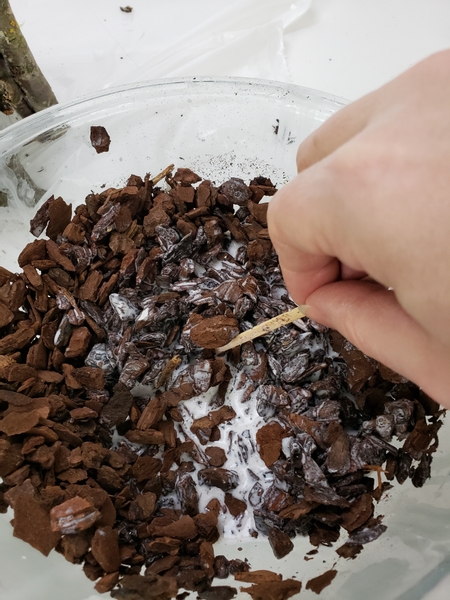
Let the chips soak in the glue mixture to be completely saturated.
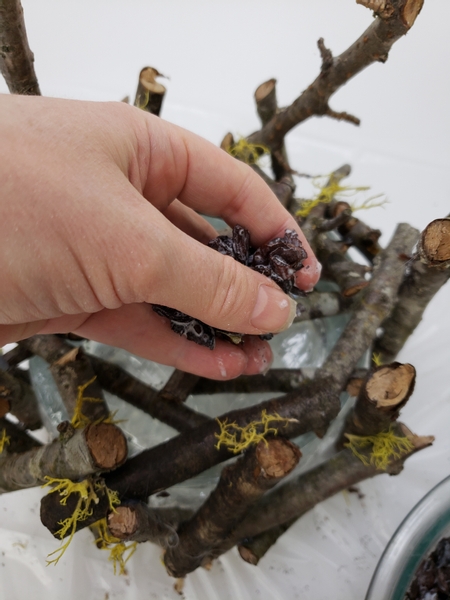
Drop the chips into the gaps between the sticks.
I wanted to show you a bit more detail and give you a few more tips this week on using this thinned glued technique so I added it to our email. Please read the tip before starting to craft the armature- the bark chips need to be so carefully packed! Sign up to receive the bonus tip each week, the subscribe button is below this post.
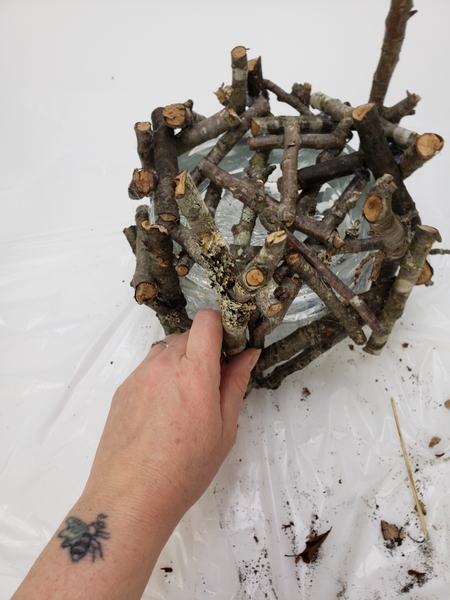
Stack bark up the sides to cover the form.
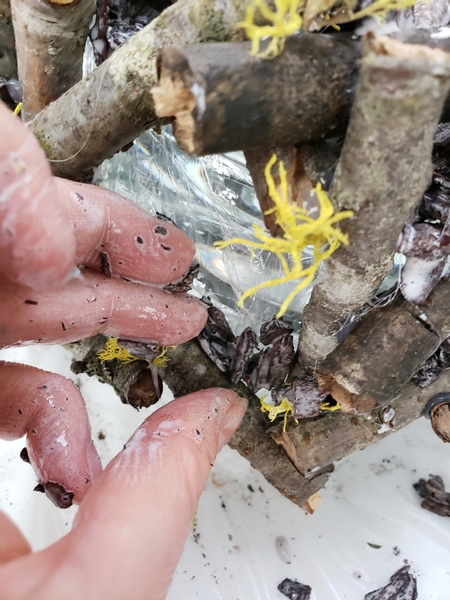
Let the armature dry completely.
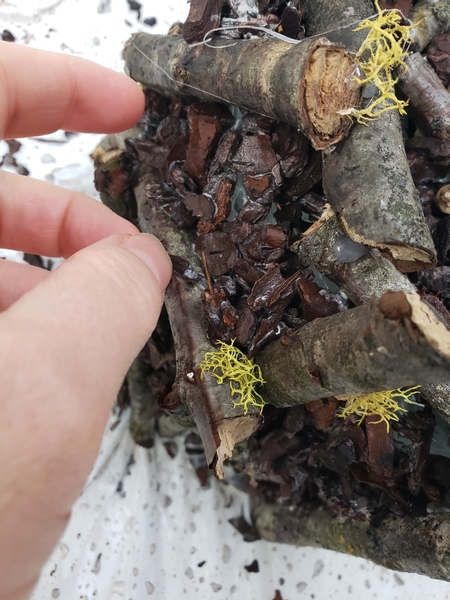
As the armature dries you can stack the bark chips higher and higher up the sides.
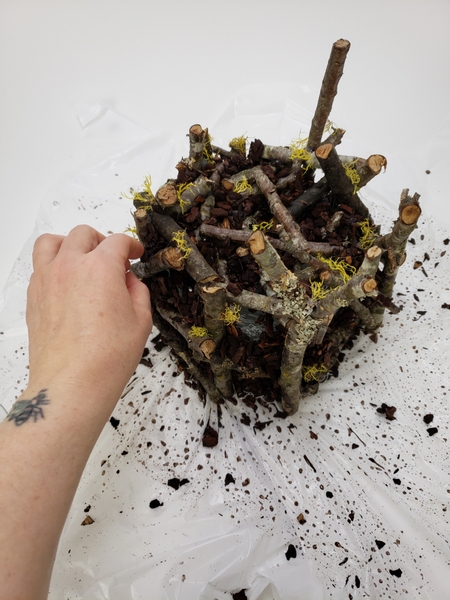
Test the armature before removing it from the form
Lift the armature from the container. As long as the basic shape is fully intact you can let the loose bits drop.
Do not be concerned if bits drop. You will still use the gaps and repair it later.
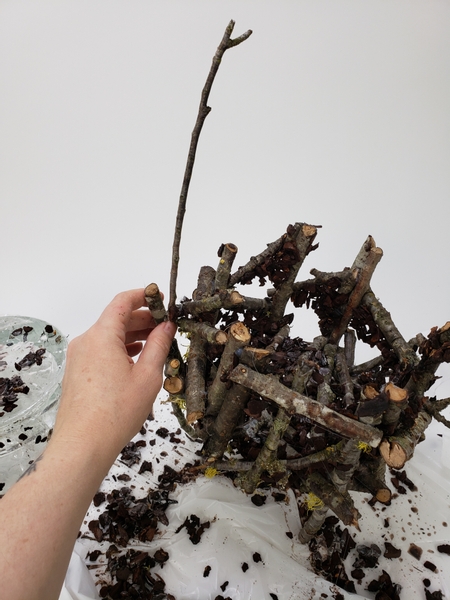
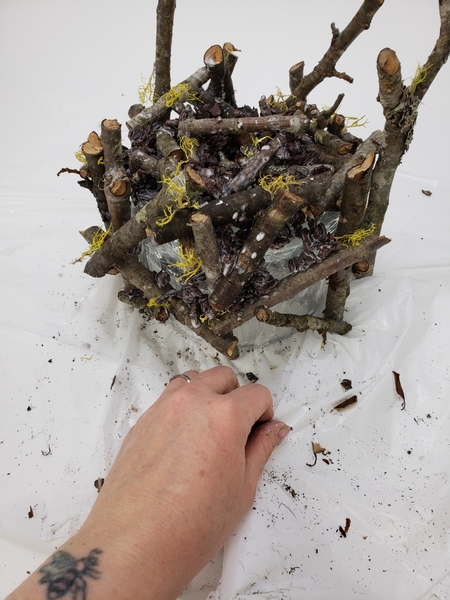
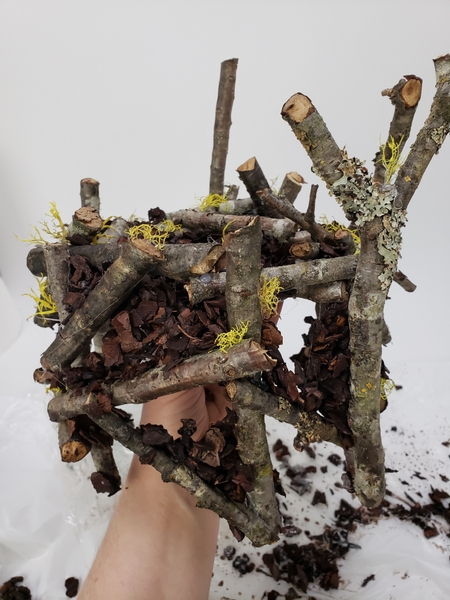
Flip the armature over to use it as a bowl. Glue in the last leg so that the armature stands up securely.
Make good use of the gaps by breaking up the bowl shape to make it look more like something natural. Add in a cross beam (to extend out and into the bowl shape) for the Christmas ornament to rest on.
Design note: I try to include our annual Swarovski snowflake crystal ornament each year into my transition from Autumn to Christmas design. This stick will be perfect to display it as if it is the first snowflake...
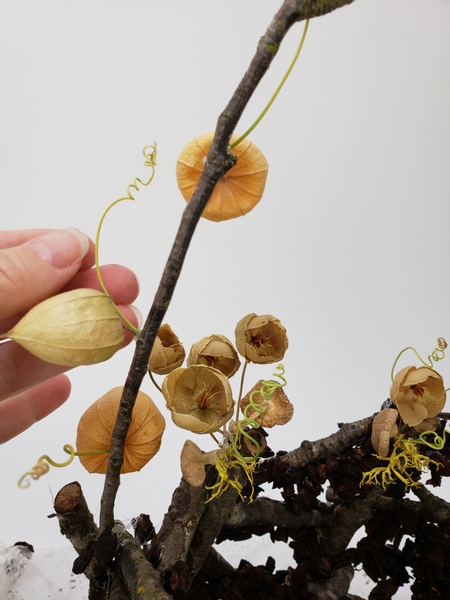
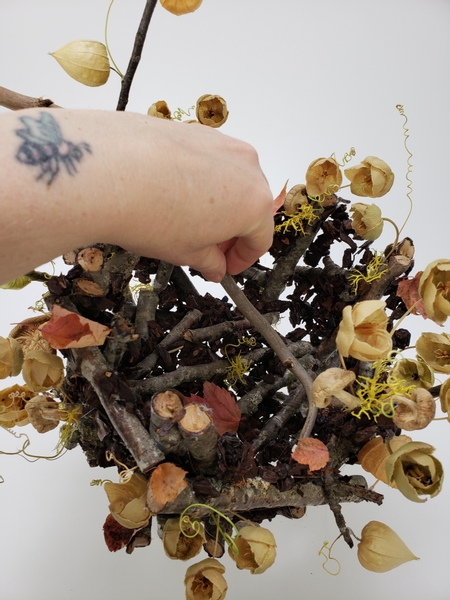
Glue in any dry flowery bits to decorate the forest floor.
Book readers turn to page 110 where we discuss First aid for your design elements- more specifically preserving flowers and foliage. The tips on page 111 was particularly useful.
But to get you started I have also linked a Tutorial for drying these cute little mushrooms and how to dry the Chinese Lantern below this post.
For more information about my book: The Effortless Floral Craftsman

I also used the gaps to thread my tiny lights into the design. Wire and clip the battery section to the back of the design so that it is concealed but you can still switch it on and off when needed. And still be easy to remove once you are ready without damaging it with glue.
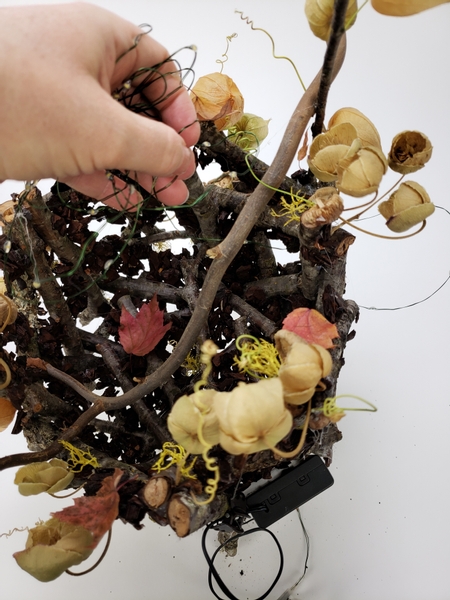
Thread the string of lights in and out and through the gaps in the bark and stick bowl.
Allowing the bulk of the lights to twirl like a tiny gust of wind on the inside of the forest floor bowl.
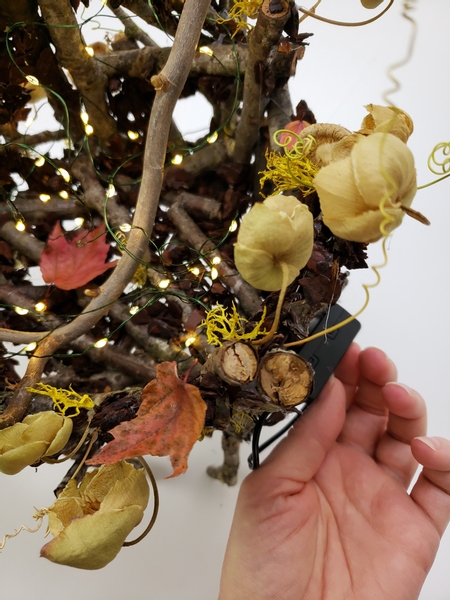
Switch the lights on to test.
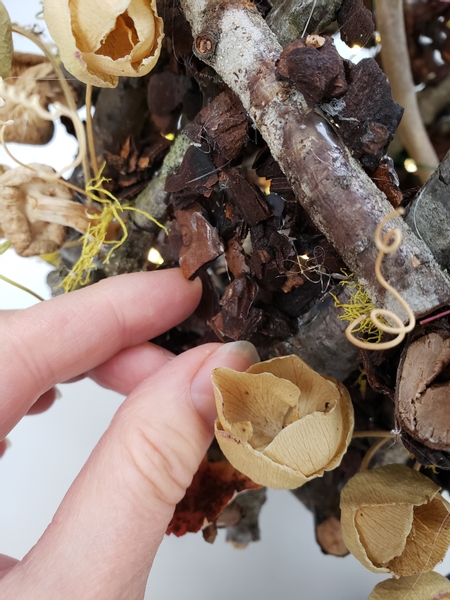
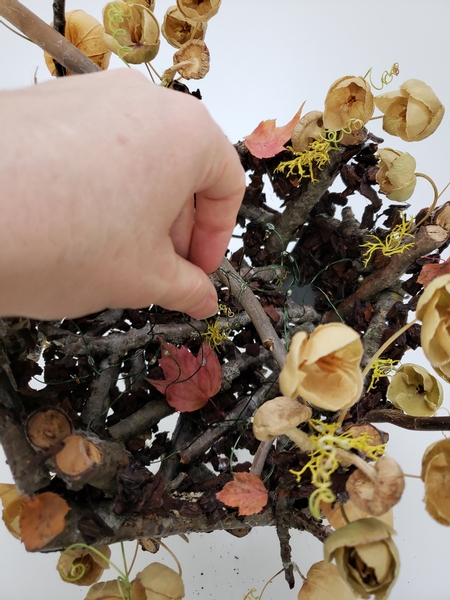
Fill the bigger gaps with bits of bark. Or the panels I spoke about in the email... see how that would make the job easier?
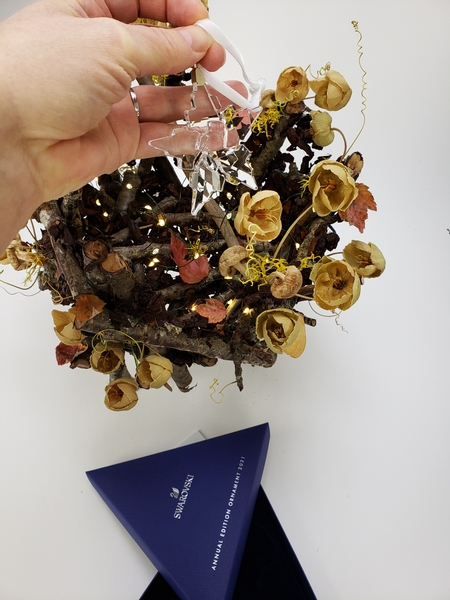
And lastly add one single Christmas ornament into the design to hint at wonderful things to come.
The day Marius and I pick up our annual Swarovski snowflake ornament is officially the start of Christmas design daydreaming. We have been collecting these Christmas ornaments for 20 years now. And this is the year when I finally have enough crystal ornaments to decorate the entire tree in glass and crystal. To say that I am excited is an understatement! How about you? Do you have a Christmas theme or decorating tradition?
Sign up for my weekly newsletter
Every week I add a new design with related tutorials. Be sure to subscribe to receive an email notification with design inspiration.


