My Creative Workbook

Christine de Beer - effortless floral craftsman

Take your time to craft a Bulrush Dial Armature

Place a large container on your working surface

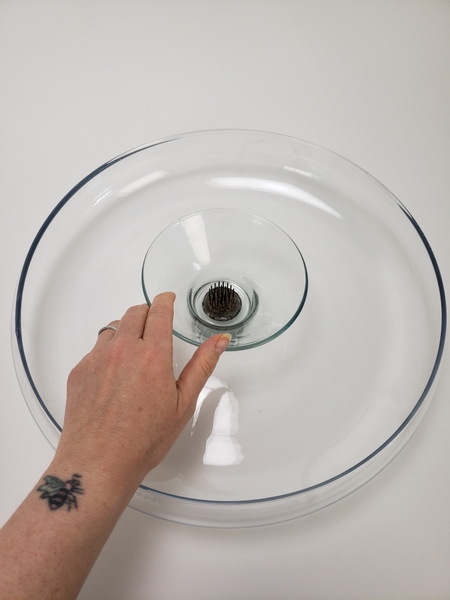
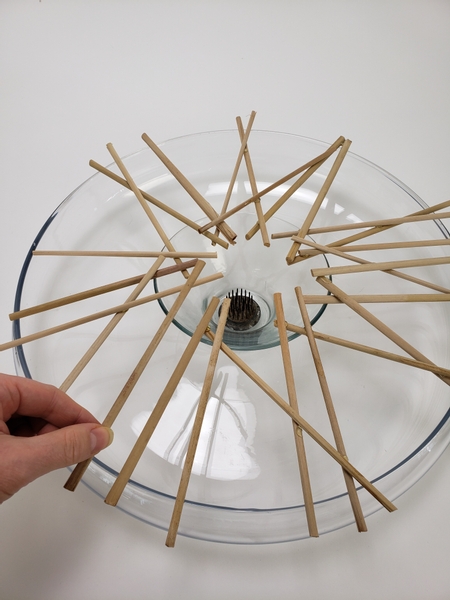
To help me guide my armature shape I placed a large container on my working surface with a smaller, slightly higher container inside that.

Design tip: This is just what I had on hand. You can use any container- even no container if you want. It just works easier to build on some guide and have the middle point slightly lifted.

Cut the dried bulrush into sections

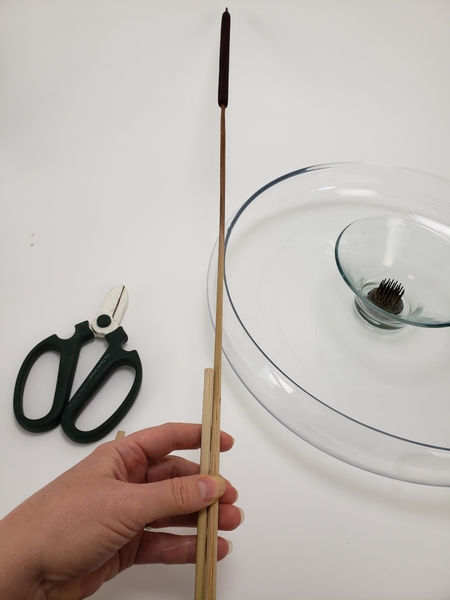
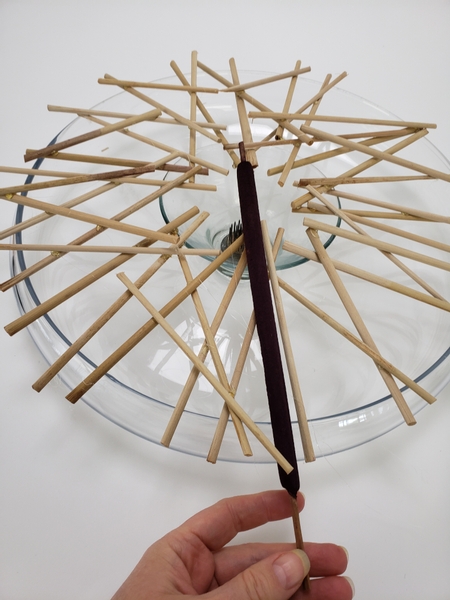
Cut the dried bulrush into sections.

Glue the end sections to radiate out from the middle point

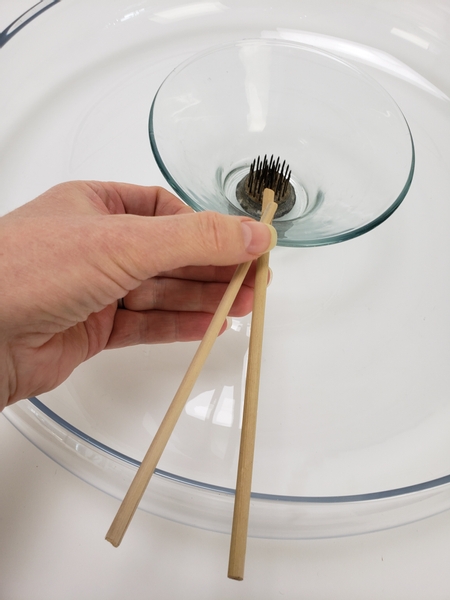
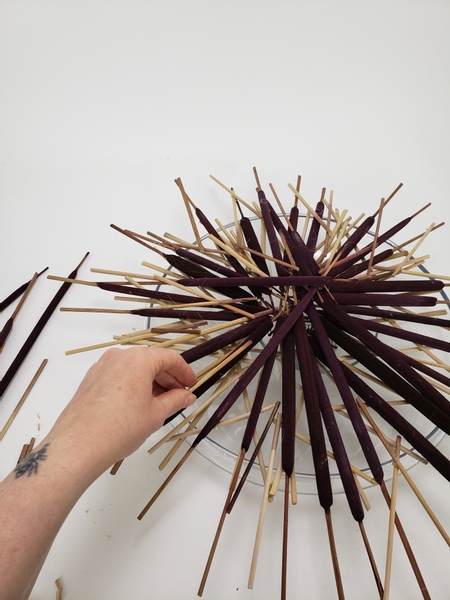
Glue the end sections to radiate out from the middle point.

Make sure to glue the reeds to reeds and not to the container so that it is easier to remove.

With every reed extend it slightly to cover all the way around the container

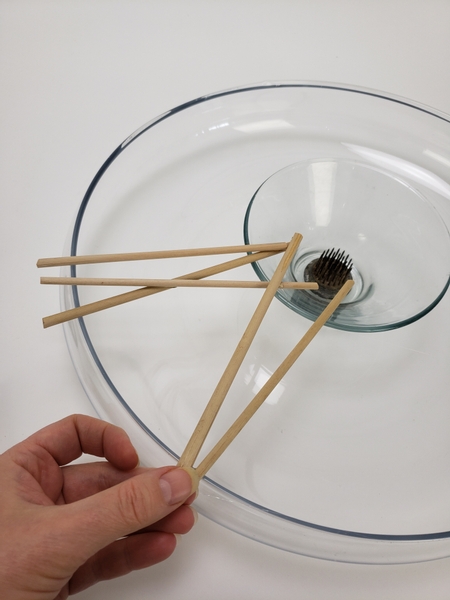
With every reed extend it slightly to cover all the way around the container.

Once you have a basic layer go around again to fill in the gaps

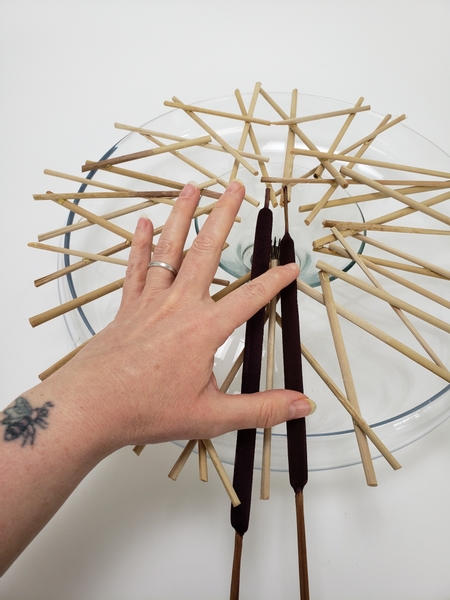
Once you have a basic layer go around again to fill in the gaps.

As a general guide try to glue each section in three place

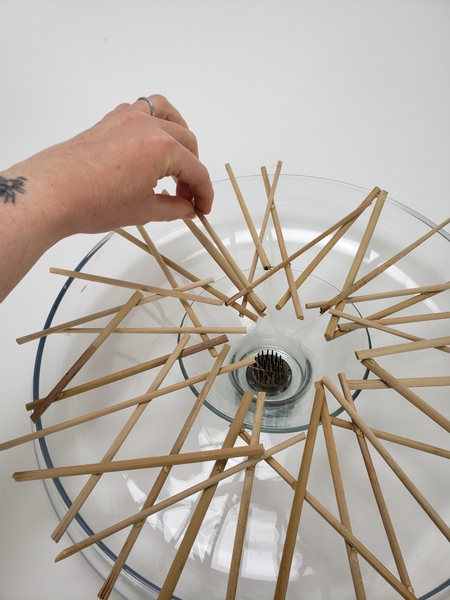
As a general guide try to glue each section in three places to create a secure armature.

Gently lift the armature from the container

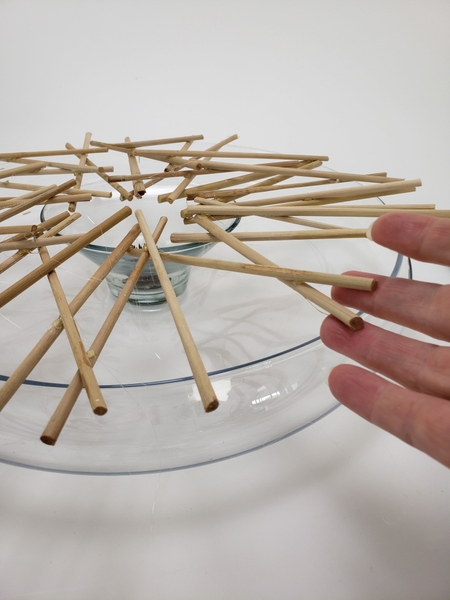
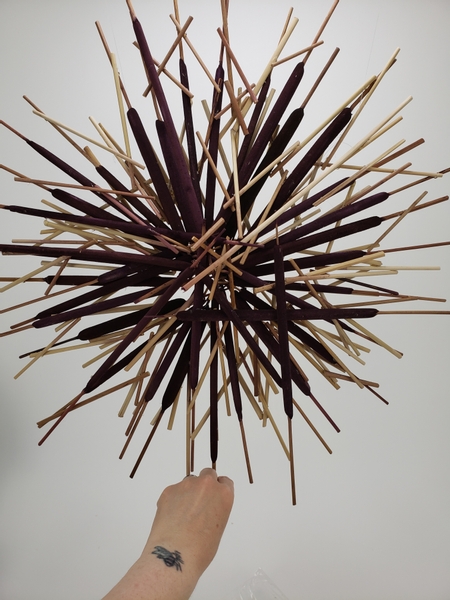
Gently lift the armature from the container to see if you need any support anywhere or to gently remove any stuck pieces that accidentally got glued to the container.

Add a few more support sections just to make sure it is secure enough to be picked up

Add a few more support sections just to make sure it is secure enough to be picked up.

Add the dark flower heads as a final layer

Add the dried seed heads as a final layer...

But be super careful

But be super careful... this sausage-shaped spike is filled with minute seeds, attached to fine hairs that disintegrate into a cottony fluff from which the seeds disperse by wind... everywhere!

Now some designers swear by spraying the heads with hairspray, others suggest using a stronger fixative like the one used to fix charcoal or pastel sketches all of which I show you in my book (Book readers turn to page 96 where I show you some ideas for Special Grooming Needs). I have even heard of dipping it into wax or varnish. For me, I like the fulness you can only get when it is untreated. So I clean up the design while it looks pretty (I show you how I do this in more detail in our email for the week) and then when it gets messy it is time to part with the design. If you are not yet signed up for the weekly email to read about the bonus tip each week, the sign up is below this post.
and for more information about my book: The Effortless Floral Craftsman

Again move all the way around and add the rush sausages to radiate outwards

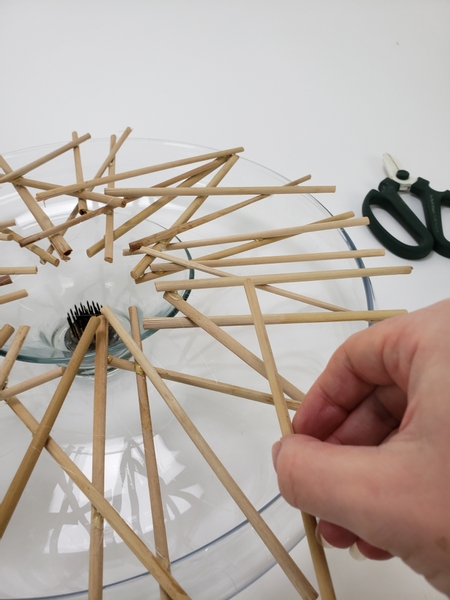
Again move all the way around and add the rush sausages to radiate outwards.

Placing some over and some under the reeds and seeds to craft a full armature

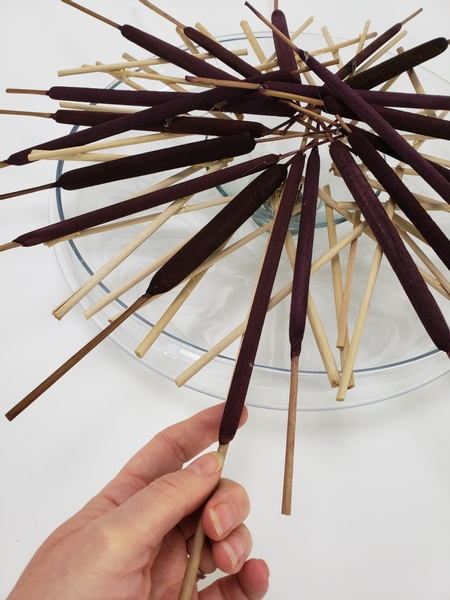
Placing some over and some under the reeds and seeds to craft a full armature.

Test the pieces to make sure they are secure

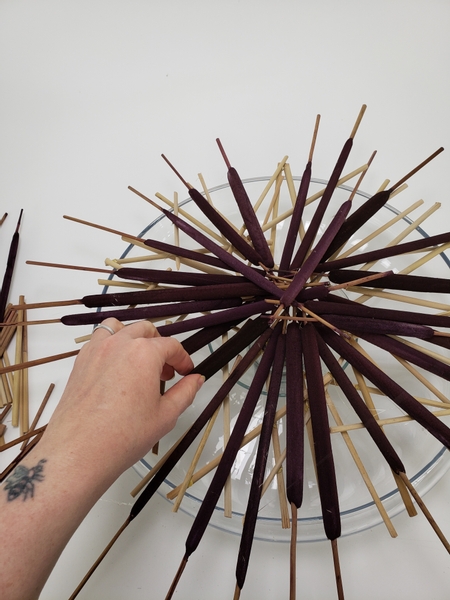
Test the pieces to make sure they are secure.

And add in more reeds where it is not yet secure enough to be picked up

And add in more reeds where it is not yet secure enough to be picked up.

I am hanging my armature

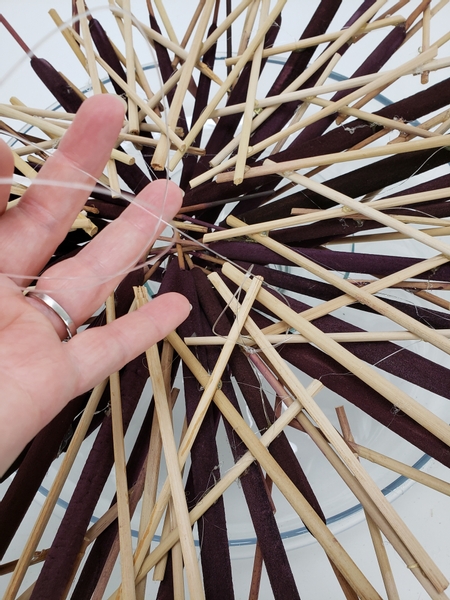
I am hanging my armature so I hooked some fishing line through the back to suspend it from. But you can easily hook the armature over a nail or even let it rest on the container or stand up in a container.

Add in more reeds to begin your design if you feel something is missing

Add in more reeds to begin your design if you feel something is missing... I added strong vertical and horizontal lines using longer sections of reeds.

Glue in water tubes and fill it with water

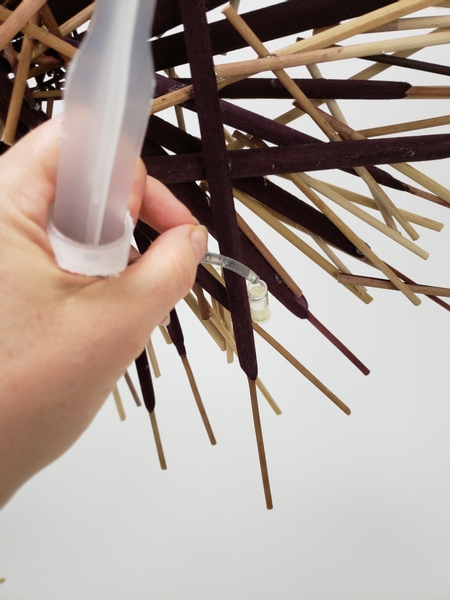
Glue in water tubes and fill it with water.

I make both the water tubes and the tube with water so that I can adjust the sizes to my design requirements. See the Tutorials below for more detailed instructions.

Add in the Aquilegia flower so that it remains hydrated

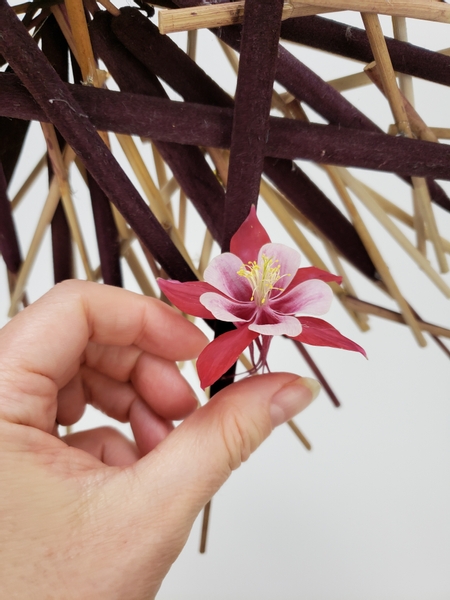
Add in the Aquilegia flower so that it remains hydrated...

And also... Let's not rush... is this not one of the most exquisite things you have ever seen!?!

Add in a few jasmine vines

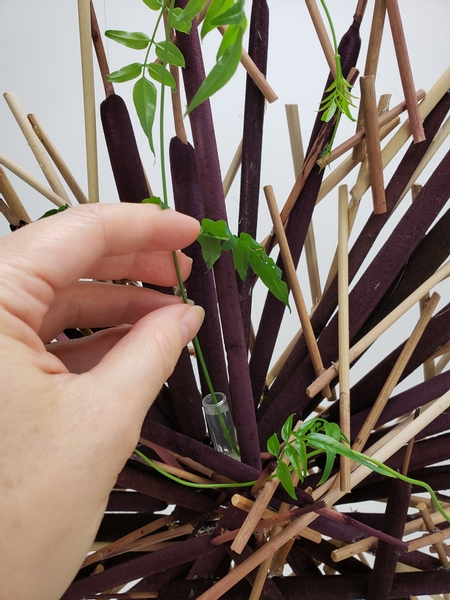
Add in a few jasmine vines...

To complete the design

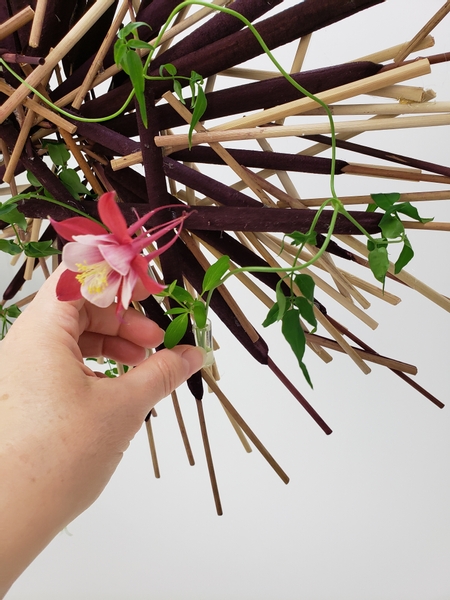
To complete the design.

Every week I add a new design with related tutorials. Be sure to subscribe to receive an email notification with design inspiration.

Tutorials

24 July 2012 Blow away hot glue strands

When you glue a structure with hot glue there are always a few stray strands of glue stuck all over the design. Blow it away with a hairdryer.

3 January 2011 Syringe with tube

Easy way to fill test tubes and easiest way to remove water from a vase

4 January 2011 Drinking straw "test tubes"

When you need to keep a tiny stem hydrated this is just what you need.

12 July 2017 Twig sparkler

Glue twigs to radiate out from a central point

7 August 2019 A Three level Kenzan skewer stack to Radiate Gladiolus spikes flat in a shallow container

Build up a design in a shallow container by stacking it by threading the plant material into the teeth of a pin cushion in three levels.

22 September 2012 Stir-stick Sunburst

Glue a radiating armature from stir-sticks.

2 October 2013 Spiny Twig Porcupine Armature

Glue a few twigs to display Autumn flowers and foliage on

29 January 2014 Twig Shooting Star

Wire and glue a twig armature

24 July 2012 Stacked Twig Roundabout

This is a great way to use all those bits of twigs and sticks in your design room to make a floral armature

29 July 2015 Disk Twig Armature

Glue a few wigs to follow the shape of a glass bowl to create a disk armature

9 February 2022 Tilt container with a spilling twigs armature

Perfect design for a warmer than usual winter design that hints at thawing.

Favourite Flowers

Typha

Cattail, graceful, ribbon grass

Related Designs

29 June 2022 But for this… let’s not rush

A take your time and mindfully craft a pretty design to celebrate the summer solstice- it is officially summer here in Canada.

30 August 2023 Courage, now

A bit of a rethink as the season is getting ready to change. How can I give my design idea a fresh twist?

12 July 2017 Sparkler

A radiating twig design

7 August 2019 Point Out: this is a single bunch of gladiolus!

Cut stems of Gladiolus to place in a radiating summer design.

22 September 2012 Turning of the leaves

An Autumn Equinox design that captures the moment before the spectacular colour burst of autumn floats around again

2 October 2013 Prickly

Build a twig porcupine armature for fall flowers

29 January 2014 Glued to stay just so

Wire and glue a twig armature

6 April 2016 Take it for a Spin

Make a clear grid to suspend plant material on

2 April 2014 Apricity

Turning a stand-by floral technique sticky side out

24 July 2012 A little bit of Art and Soul

A twig structure with roses

29 July 2015 Beautiful Things

Glue a few twigs into a disk armature

9 February 2022 Pouring

Place a small fishbowl vase at an angle to look like it is pouring out flowers and twigs.