My Creative Workbook

Christine de Beer - effortless floral craftsman

Upright standing besom for the modern witch on the go

The word ‘Besom’ derives from the old English ‘besma’ meaning ‘bundle of twigs’.

For a detailed Tutorial on how to make a basic besom broom see the Tutorial below this post.

Curl the ends of three sturdy wires

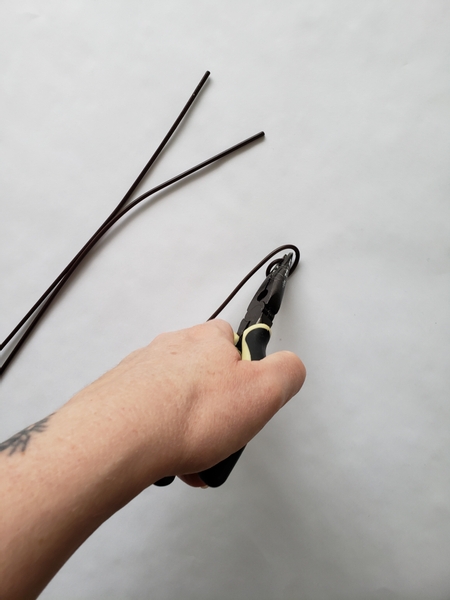
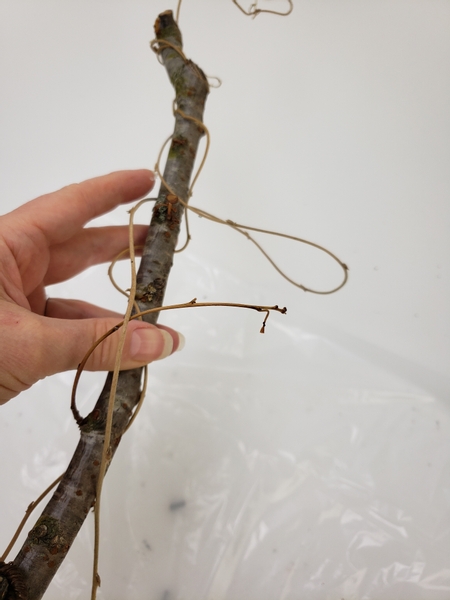
Curl the ends of three sturdy wires.

In case you are curious as to why three... see the Tutorial below where I explain a bit more.

Giving the broom a wider foot to stand on that would also not scratch the surface

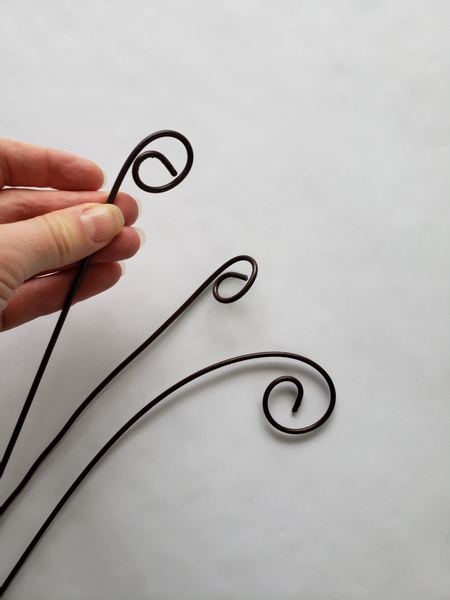
Giving the broom a wider foot to stand on that would also not scratch the surface.

To attach the wires to the broom handle:

Fold the other end of the wire over

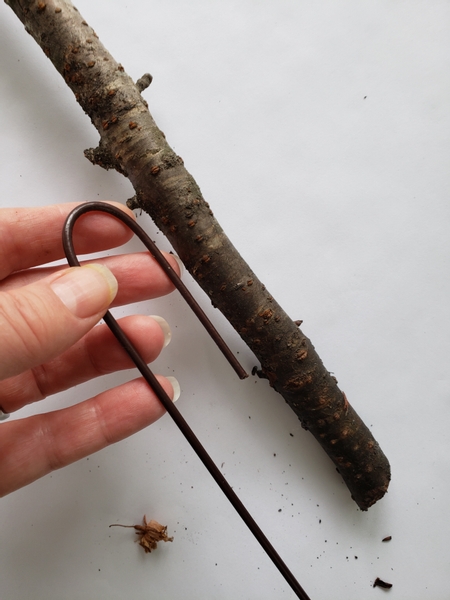
Fold the other end of the wire over...

Match the fold end to the broom handle

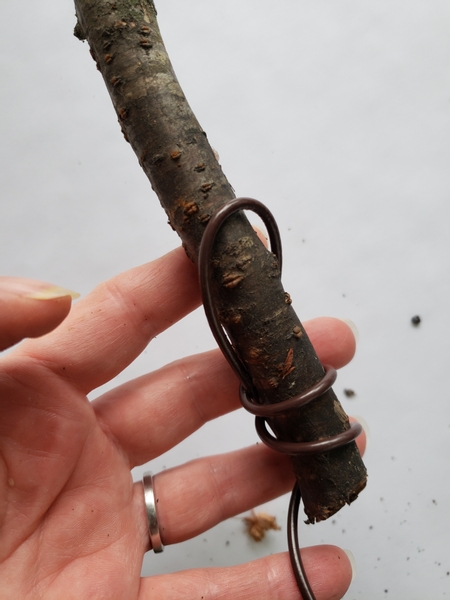
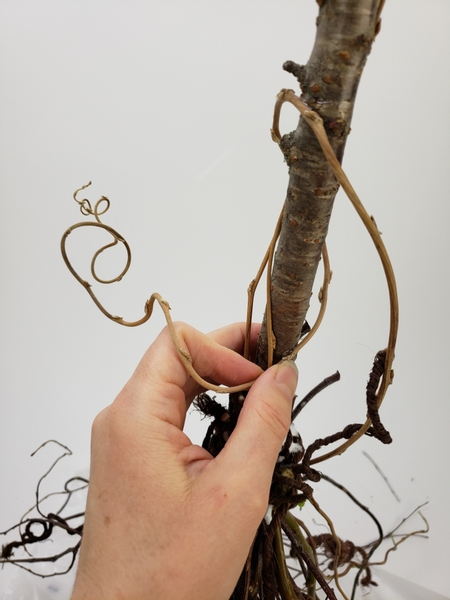
Match the fold end to the broom handle and wrap the longer part of the wire around the broom handle and the folded over section of the wire to secure.

Fold over the next wire

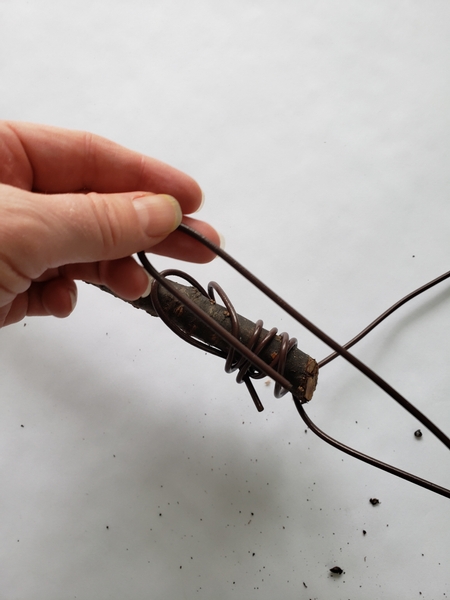
Fold over the next wire, match it to the broom stick and wrap around the stick and the first wire. Do the same with the third wire.

Space out the wires so that the broom stick is balanced upright on the wire legs

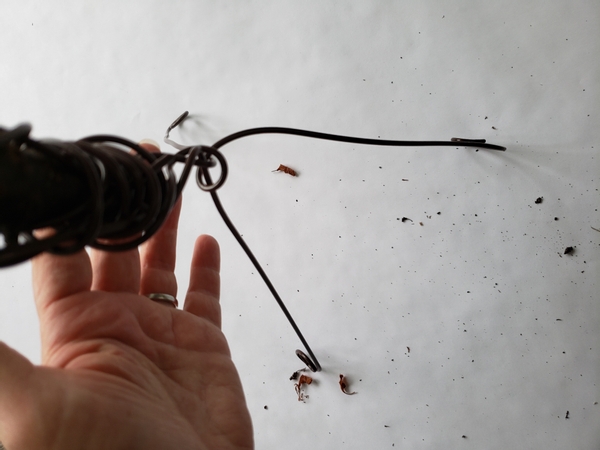
Space out the wires so that the broom stick is balanced upright on the wire legs.

Follow the besom Tutorial below and craft the bristles

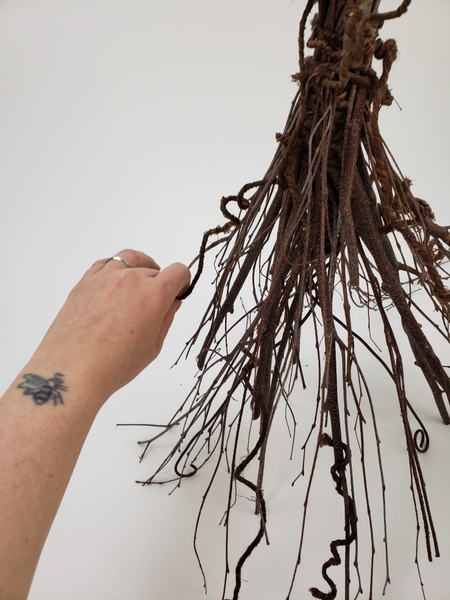
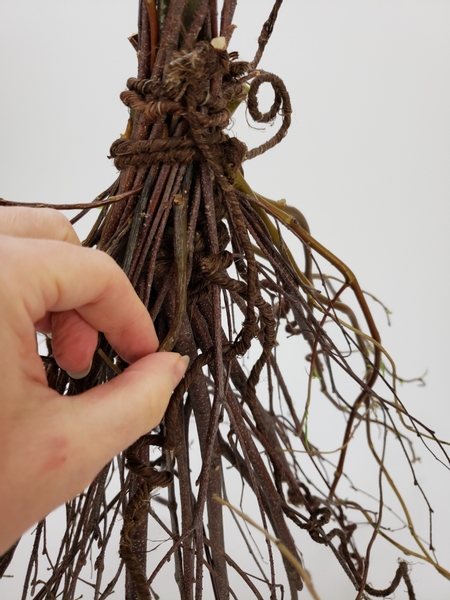
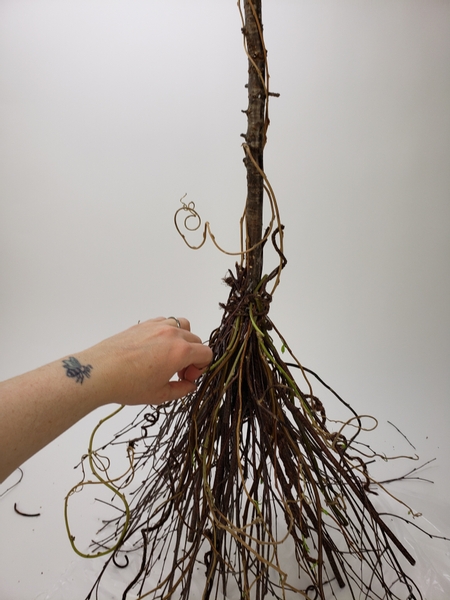
Follow the besom Tutorial below and craft the bristles around the broom stick. Make sure you drill above the wires.

And keep the besom balanced on the wires with a few more twigs to support

And keep the besom balanced on the wires with a few more twigs to support.

The decorative bits:
This week I discuss things to consider when you design a floral illusion design like this in a bit more detail in our email. Make sure to subscribe if you are not yet receiving yours. The button is below this post.

Add in a few wire tendrils and freshly cut twigs and vines

Decide on how you want your besom to look. Would you like it to look old and abandoned... as if it belonged to someone a long, long time ago? Or modern and comical? I wanted mine to look like it just came back from the flower market... but it is already ready to go flower shopping at any moment...

For this I added a few stems that curls like it just swept in.

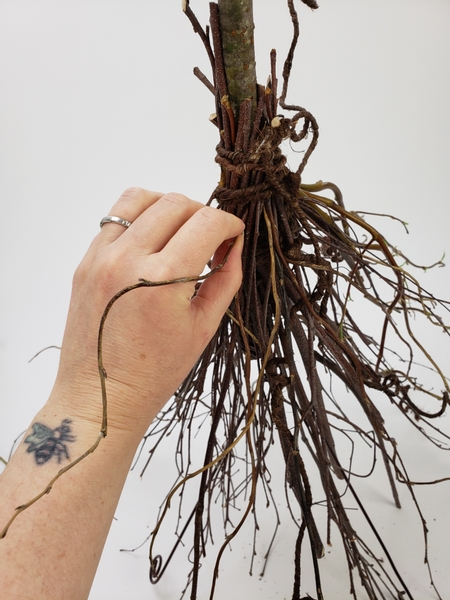
For this I added a few stems that curls like it just swept in...

Pour in some wood glue to secure them

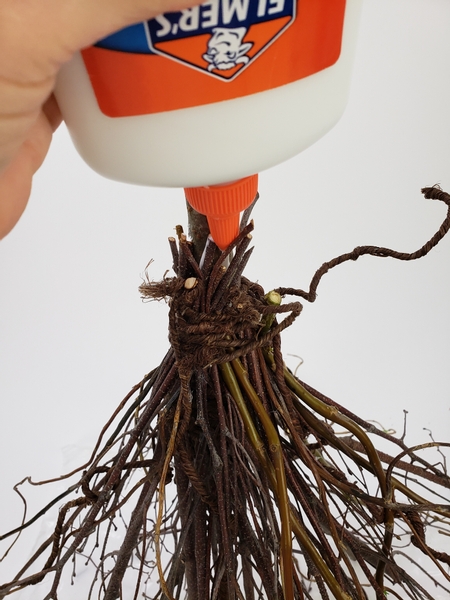
(... if you want to make sure the stems do not really fly away pour in some wood glue to secure them)

A few tendrils to go up the broomstick

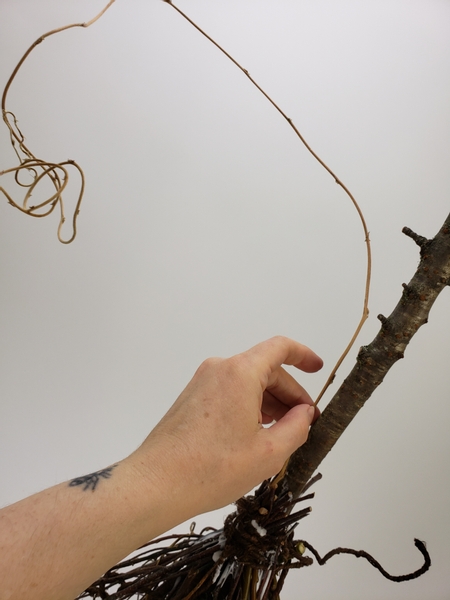
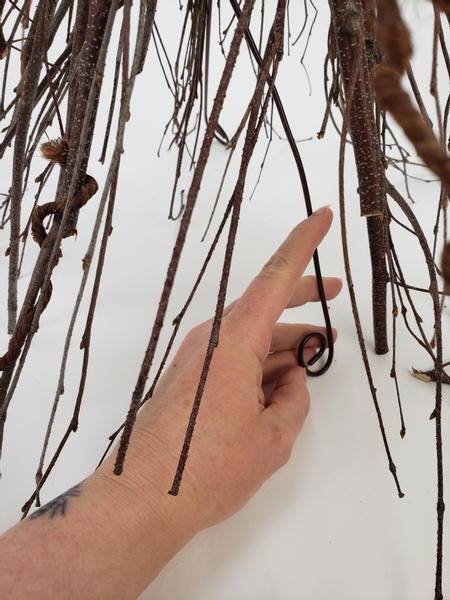
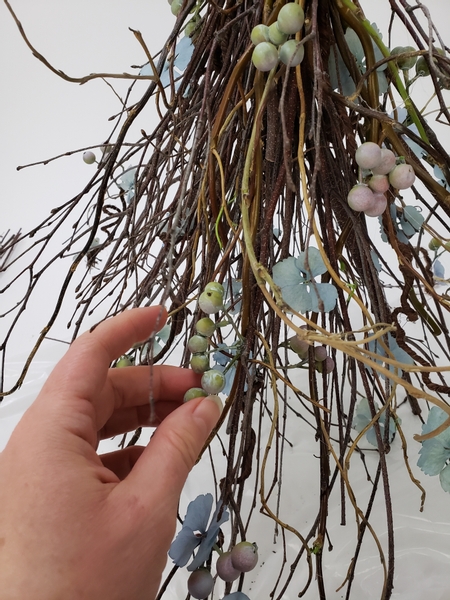
Add few vines to go up the broomstick ...

Secure the vines every here and there

(Secure the vines every here and there)

With the ends curving in the direction of the movement created by the bristle twigs

... with the ends curving in the direction of the movement created by the bristle twigs.

and add a few vines to the bristles

and add a few vines to the bristles.

I have a fun hint for you if you want to tame those bristles in this week's email.

a bit of leftovers from the shopping trip that is now part of the design

... and a bit of pretend leftovers from the shopping trip that is now part of the design. I also added cobwebs to make it look a bit... well... less cute.

(The cobwebs are actually a clever design technique- I explain more in the email...)

Design note: If you hold by the floral art design rule that Fresh Plant Material Must Predominate, which I do- remember that plant material must make up about 70% of your design. For most of my competition designs I aim for 100%. I sometimes dip into 80% if I have to travel to stage a design.

Book readers turn to page 110 for more information about preserving flowers and foliage. But to get you started I have included a Tutorial for preserving hydrangeas below the post as well.
For more information about my book: The Effortless Floral Craftsman

And a few dew drop crystals for sparkle

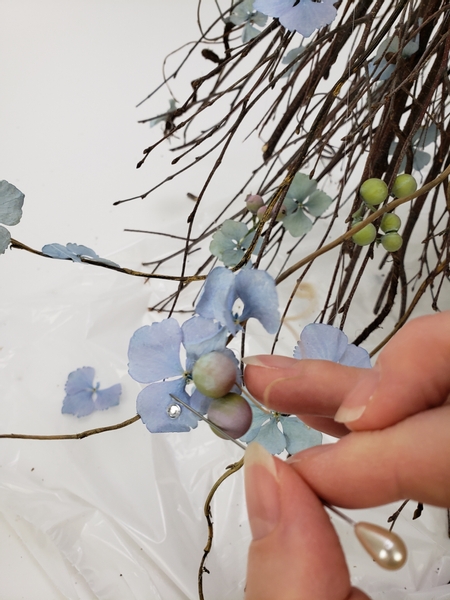
And a few dew drop crystals for sparkle...

And finally a few autumn leaves to pull the theme together

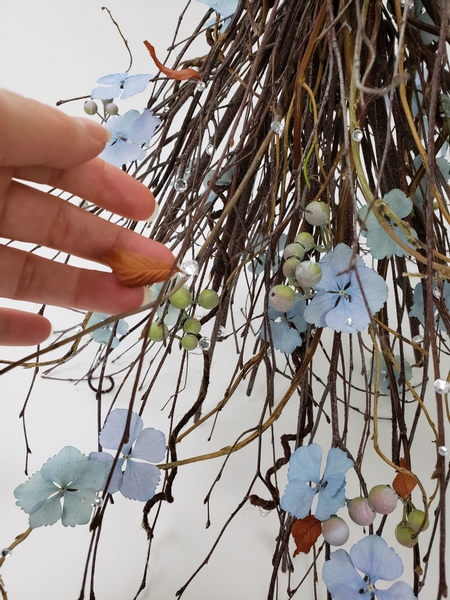
And finally a few autumn leaves to pull the theme together.

Every week I add a new design with related tutorials. Be sure to subscribe to receive an email notification with design inspiration.

Tutorials

28 October 2015 Besom Broom

The word ‘Besom’ derives from the old English ‘besma’ meaning ‘bundle of twigs’.

28 March 2011 Spinning a Hot Glue Spider Web or silk for a Floral Cocoon

How to spin (and remove) hot glue spider web or floral cocoon

24 July 2012 Blow away hot glue strands

When you glue a structure with hot glue there are always a few stray strands of glue stuck all over the design. Blow it away with a hairdryer.

22 May 2012 Bite and snap a sturdy twig

Break the sturdy twig on the scribe line.

30 May 2012 Drying Hydrangeas: Fast, Flat or Natural

Use all three methods to dry hydrangeas to get three very different textures to use in design work.

26 July 2011 Wire Tendrils

Curl the wire at irregular intervals to create a natural wire tendril similar to that of a passion fruit plant

3 October 2018 Inside Pod Designing

Snip open a Physalis pod to create a cavity for delicate floral details.

8 July 2015 Using a pin to place tiny dew drop crystals

It's sometimes difficult to place a tiny crystal or bead exactly where you want it.

30 October 2019 Bat Skeleton crafted from twigs

Eerie! Because you use what is there already in the twigs this skeleton looks rather... realistic!

16 October 2012 Taco-shaped twig armature

Make a half-moon shaped armature to fill with flowers

3 July 2012 Twig mushroom

Stack and wire a twig mushroom armature

2 October 2019 Cross hatch Twig Armature

Add a bit of shadow and dimension to a flat armature by using the sketch technique of cross hatching.

Favourite Flowers

Hydrangea

Hydrangea, when cultivated as a cut flower rather as a plant it is often revered to as Hortensia

Related Designs

20 October 2021 Flying Lessons

An easy get ahead with Halloween decoration that will last.

30 August 2023 Courage, now

A bit of a rethink as the season is getting ready to change. How can I give my design idea a fresh twist?

1 November 2023 That day after Halloween feeling

Time to cut down vines... and enjoy them a bit longer in a Halloween display.

3 October 2018 But what’s inside?

This week we are looking at the contents pages of my book... but more specifically at the sweet little pod design on the content page of my book.

28 October 2015 On Pumpkin Coloured Days

Create a besom broom to sweep up those Autumn leaves

30 October 2019 There once was a bat called Tequila, a Halloween story

An all plant zero waste, levitating, twig (with just a splatter of autumn leaves, a breath of spiderweb and float of roots) Halloween decoration with an eerie bat skeleton made...

16 October 2012 Bright, brighter… brightest!

Celebrate the bright colours of autumn with lilies and Chinese lanterns

3 July 2012 Twig-a-tude

Stack and wire twigs to create a twig mushroom with attitude for summer

29 September 2011 Pick-Up Sticks

A twig and stick design with sweet dumpling pumpkins and rosary vine (Ceropegia woodii). I also made a cherry twig and skeleton leaf Stick Insect

2 October 2013 Prickly

Build a twig porcupine armature for fall flowers

29 January 2014 Glued to stay just so

Wire and glue a twig armature

2 October 2019 Cross-hatch a Shadow Bright Autumn

A clever trick borrowed from art techniques to add dimension to a bright and colourful Autumn floral design.