Christine de Beer - effortless floral craftsman
Upside down and on it’s side glass display that plays with natural balance
- 12 August 2020
I adore designs that look easy enough to do if you don’t know enough about how it’s done. This is definitely one of those. It looks deceptively simple. It’s not. You need a gentle hand and definitely need to work with what is really, really there.
This design relies on characteristics you will find in the basic containers you probably already have in your design pantry. With the standard fishbowl vase being the star. And after that it is just finding the natural balance point of each design element and working with that.

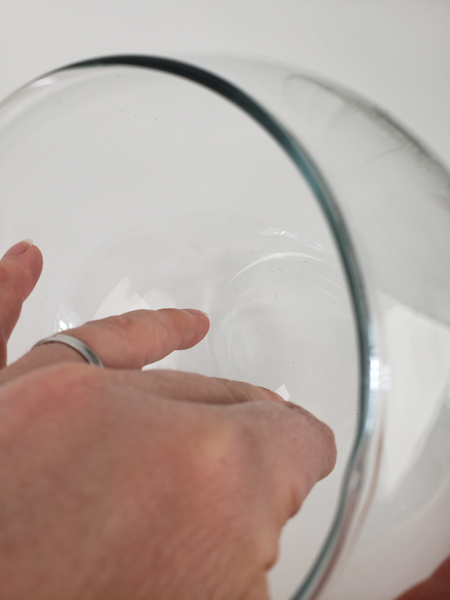
Place an oblong glass container upside down. Notice the edge around the bottom? It's going to help with the next step...
Design tip: Book readers turn to page 19 where I show you what I keep in my tool bag to protect surfaces from damage. It's a lifesaver when things spill... and a time-saver even when things go perfectly!
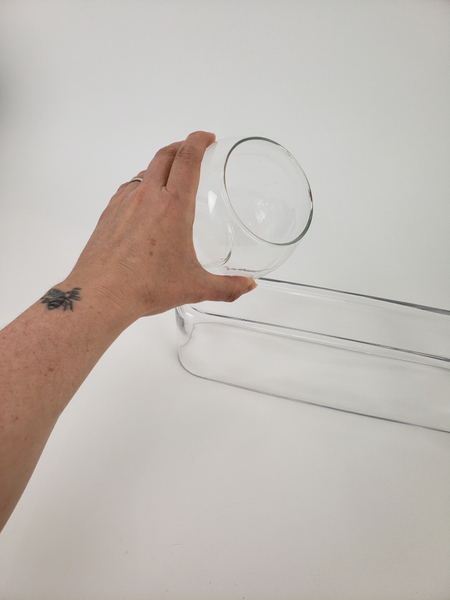
Balance a fishbowl vase on its side on top of the container...
See the design Tutorial below for more details on how to balance the design.
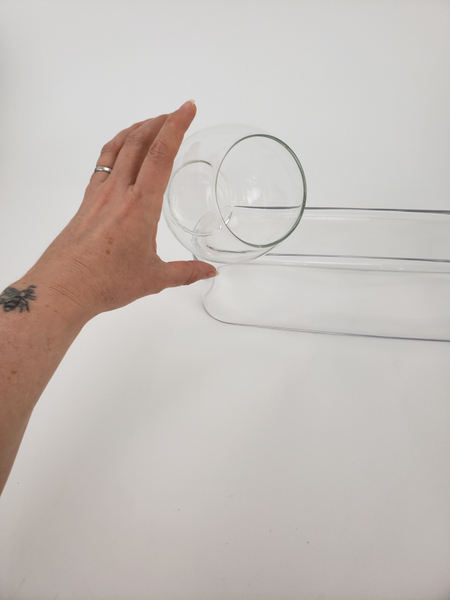
Release the vase so that it settles in a naturally balanced position.
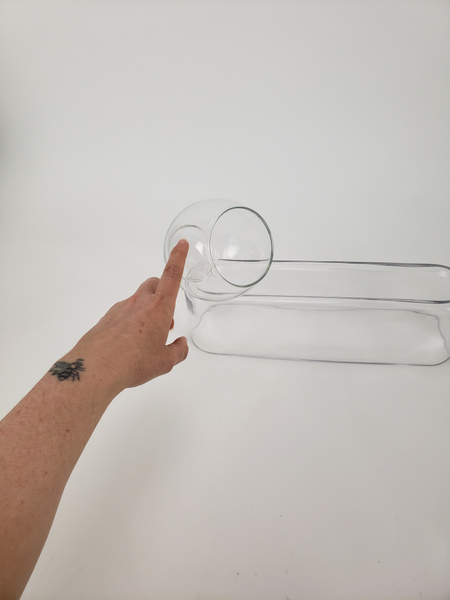
Tap it with your finger to test the stability. It's important that the vase, even though it is on it's side should settle in place. If you try to control the position it will not be stable. This is the moment to just let it be as it wants.
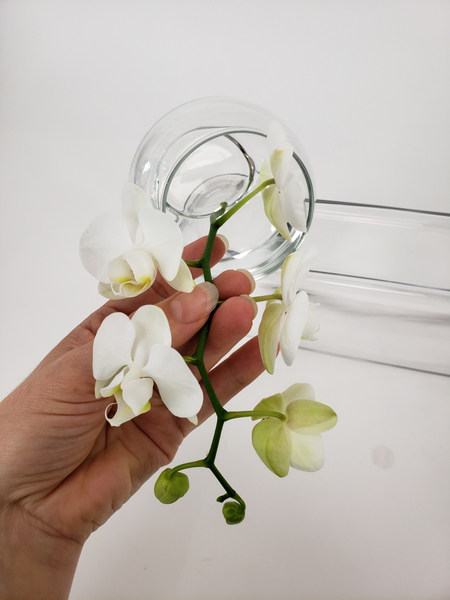
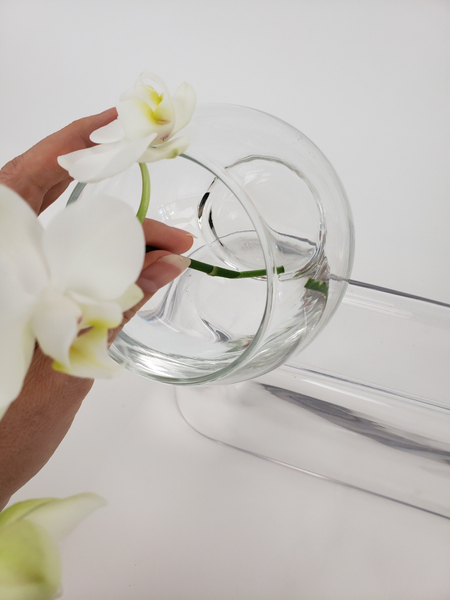
Next we place the flower. Because the orchid spike is top heavy and you will need to have something in the bottom for it to kick against and something in the top for it to hang on to. For my design I chose to make my "something" invisible... well... almost.
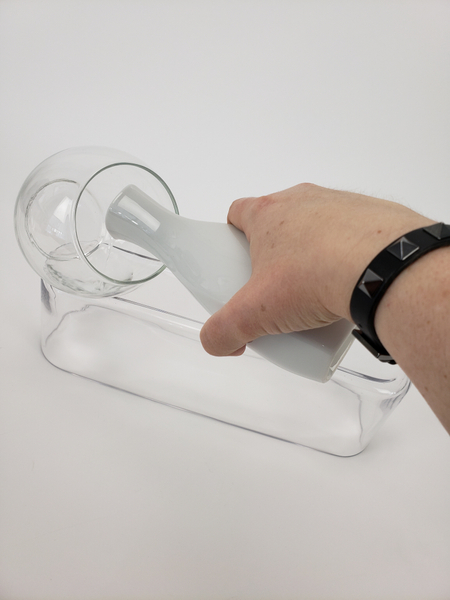
Start pouring water into the vase. The weight of the water makes the vase even more stable. Pour in just enough water to fill the bottom but not spill out.
Do you see the ring around the bottom of the vase? It is a slight dent. This will help keep the flower spike in place...
Place the spike deep into the vase so that the stem end is exactly in that little dented ring.
Be careful so that the vase don't topple and spill the water.
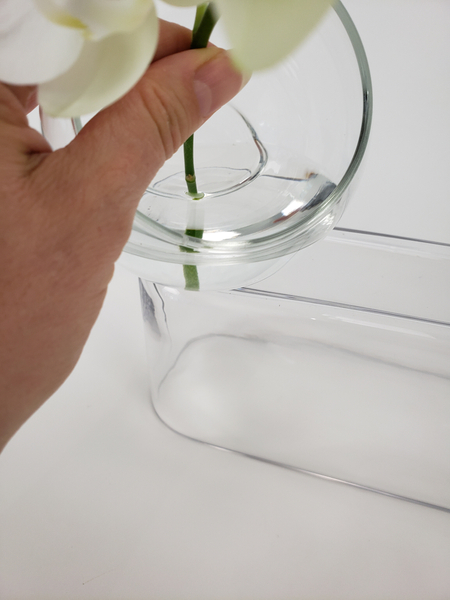
It is very slight so make sure you position it perfectly... your design relies on this for balance.
Are you subscribed to my weekly notification newsletter yet? This week I give you a bonus tip on how to be inspired by remaining curious... I also have a bonus tip for you for an easier alternative to balance the flower stem. The sign-up is below the post.
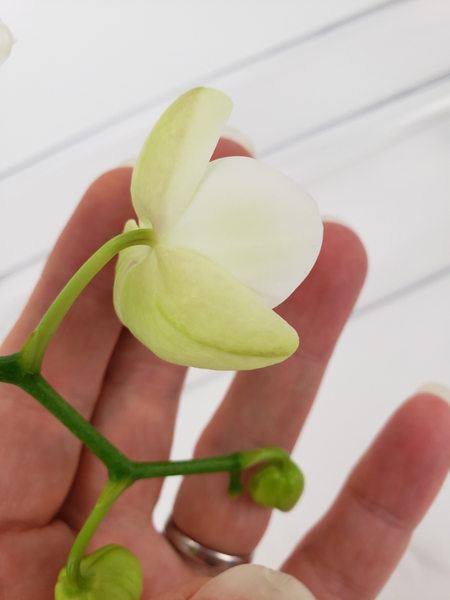
Have a look at the orchid stem... see there behind the throat is a curve in the stem?
Hook the stem over the top lip of the vase.
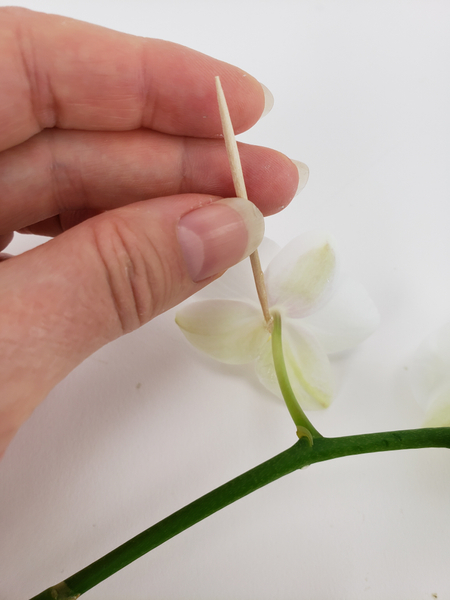
Design note: If you feel concerned that the flower is going to slip off (the firmer the flower the better the hold) apply the tiniest bit of glue to the flower so that is carries the weight of the spike.
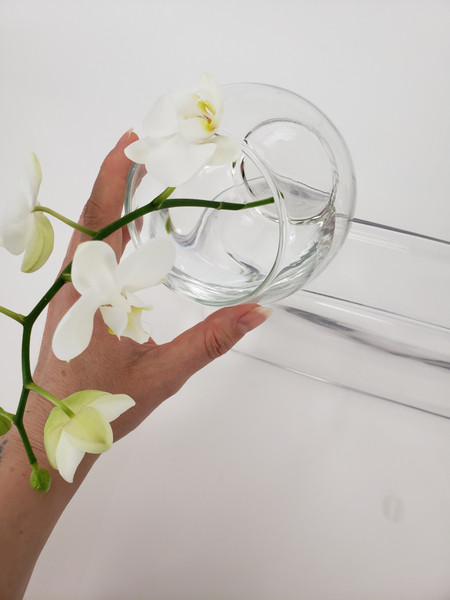
Slowly release the vase so that it again settles in a natural position.
For my design the vase needed to twist just a bit so that the flower is not at the top but slightly to the side. Each spike will be different. Balance the container and slowly adjust… release… and just… release... until you find where it naturally balances on its own.

Making sure the bottom end of the stem is kicking against the small round dent at the bottom...
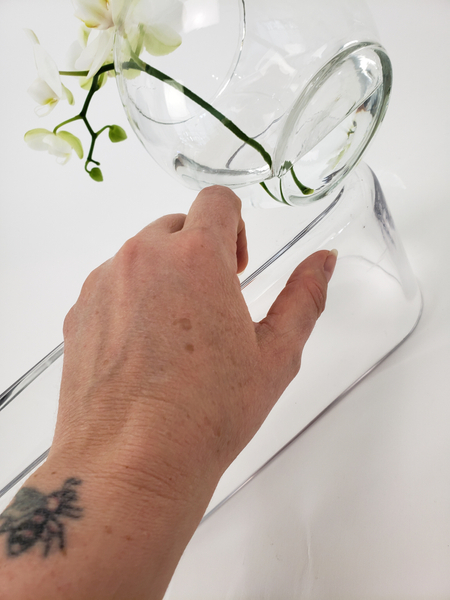
Design note: Go slow and make sure each step is stable before moving on. This design was so well balanced that I could turn it around on my design table to take the pictures without it toppling over or spilling all the water!
Sign up for my weekly newsletter
Every week I add a new design with related tutorials. Be sure to subscribe to receive an email notification with design inspiration.


