Christine de Beer - effortless floral craftsman
Crafting a stripped bark and sisal armature
- 28 November 2018
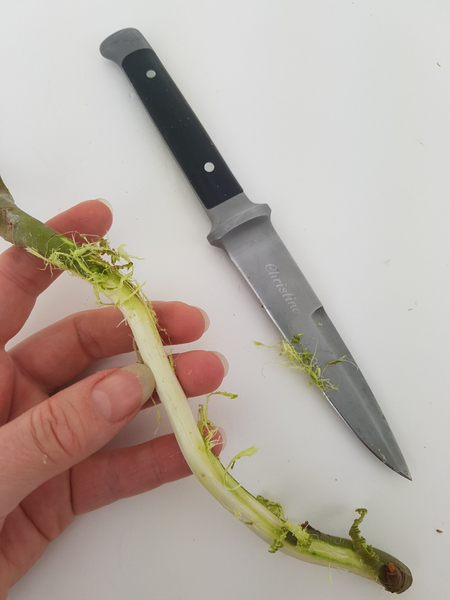
Strip the bark from willow twigs.
See the Tutorial below for more detailed instructions on how to strip bark from twigs.
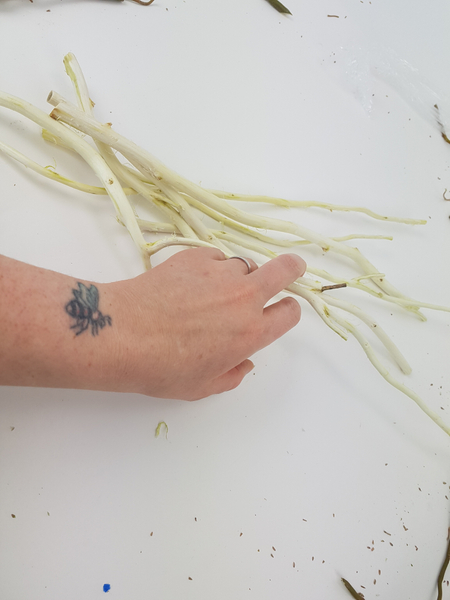
Place the stems on a working surface to see how they can fit together. You need two long twigs that curve in a way that they can overlap or one sturdy twig with a fork in it (as I used). And 6 more twigs to create the legs.
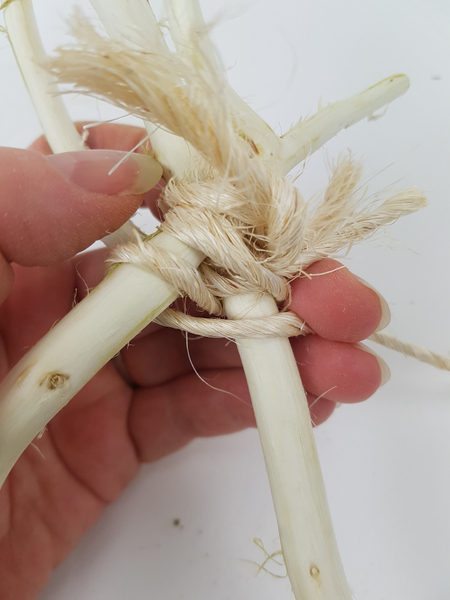
Starting with the legs:
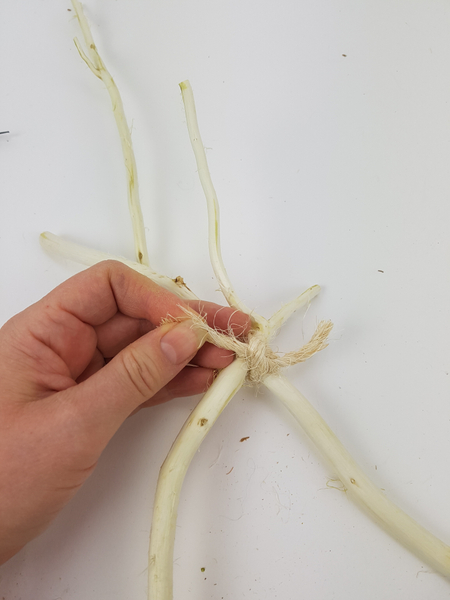
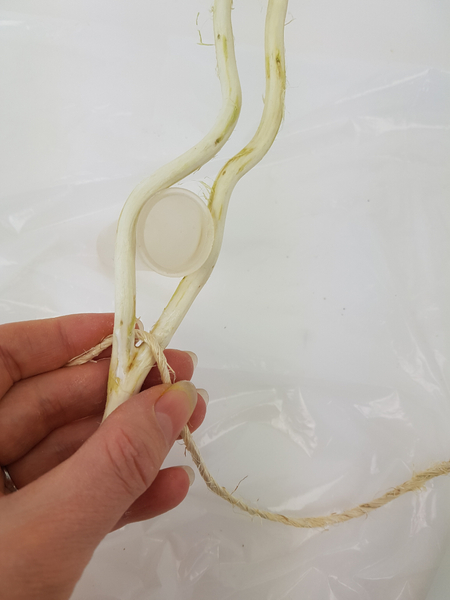
Tie two twigs to create an upside down"V".
Slip the end of a sisal rope through the knot to secure.
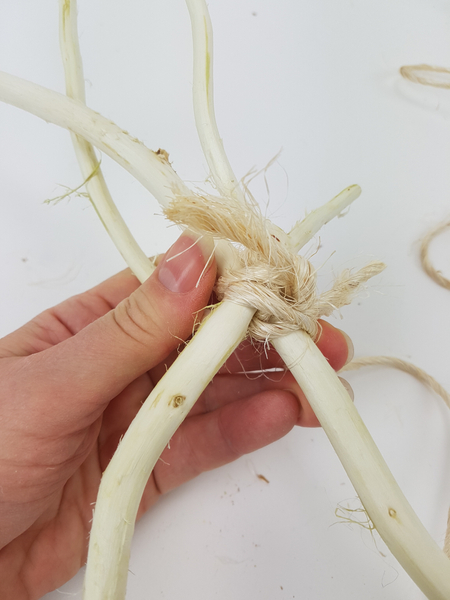
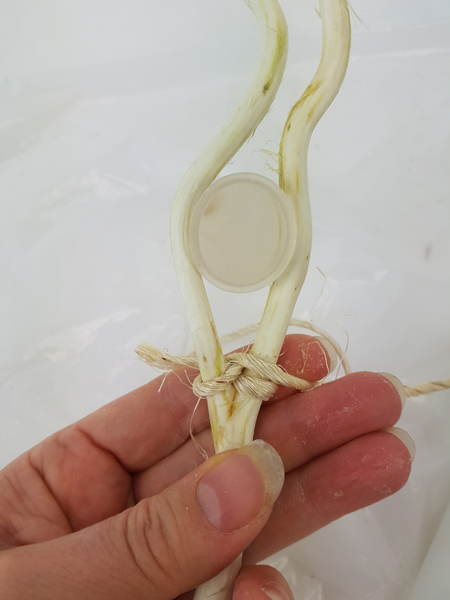
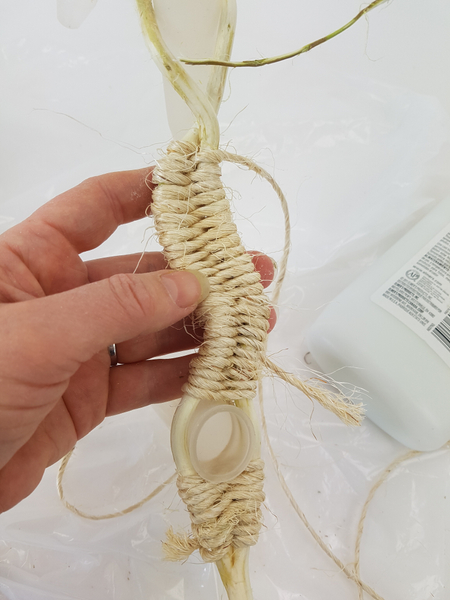
Start the winding pattern. Part of the charm of this crafted armature is the repeated pattern so make sure you wind it in the exact same way all the way through the design.
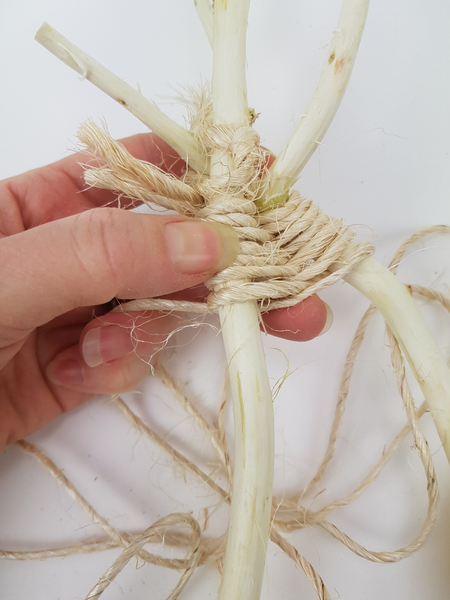
Wrap the twigs from the outside over and inside under.

Knot the rope to secure.

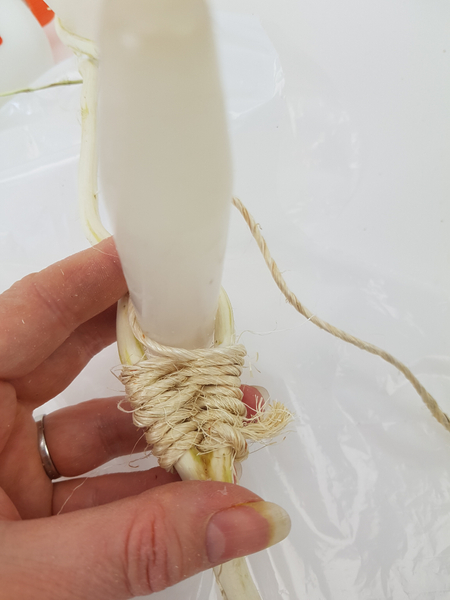
Tie a second pair of twigs.
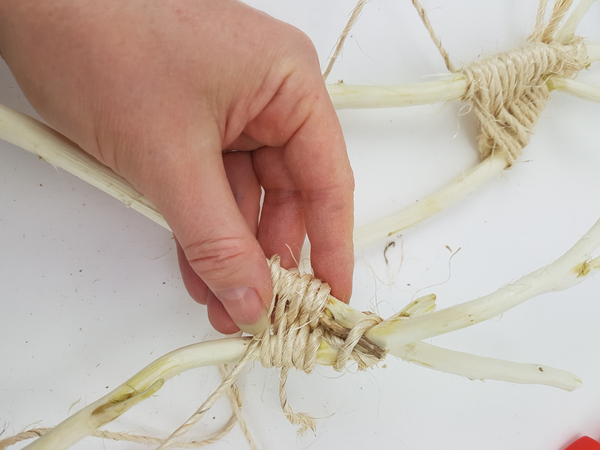
... and wind the sisal string around the twigs.
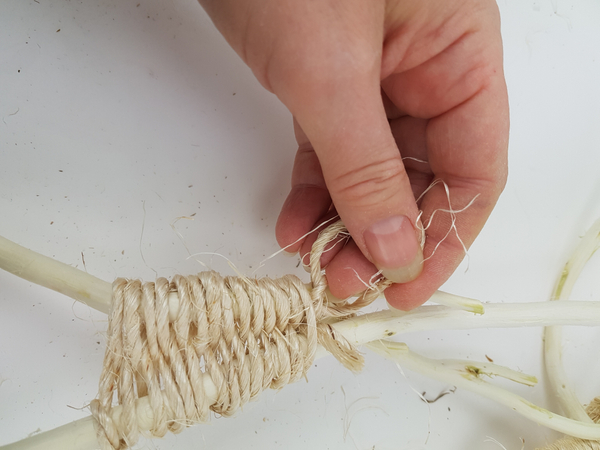
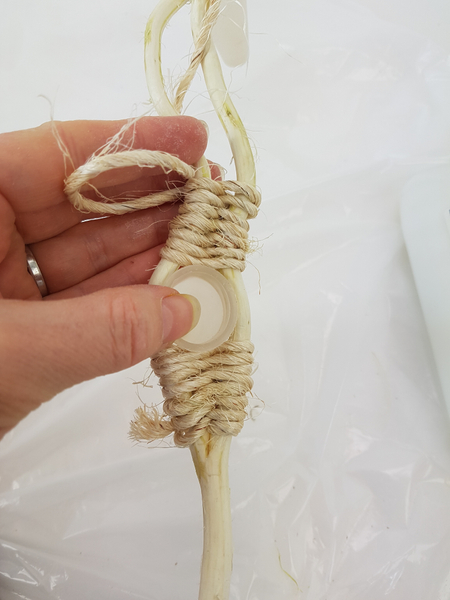
Knot the rope to secure at the end of the winding pattern.
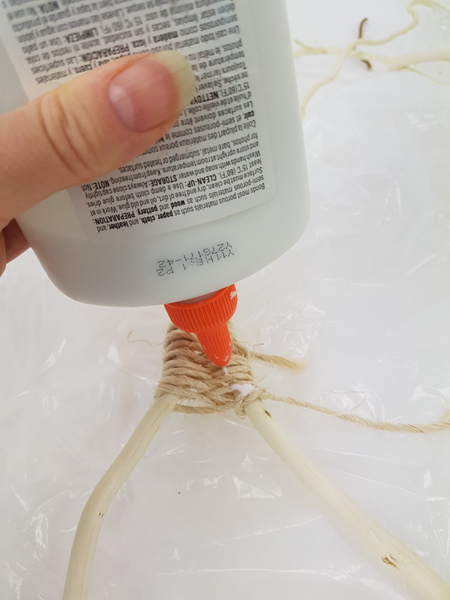
Place a small drop of glue on the knots.
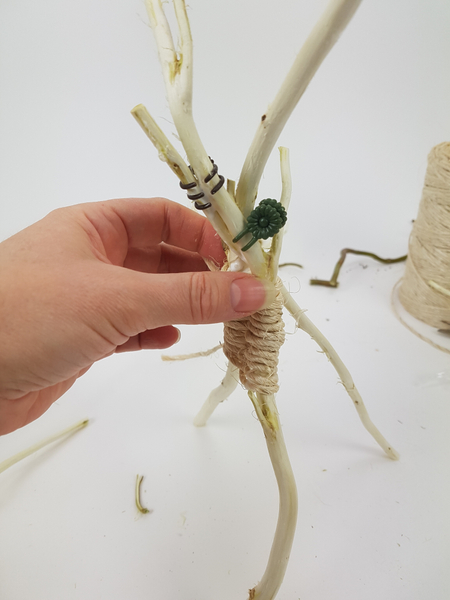
Turn the "V" upside down and glue in a third stem to make it stand upright. Keep the twig in place with butterfly clips. For more detailed instructions on how to use butterfly clips see the Tutorial below.
For more detailed instructions on how to craft a three legged armature see the Tutorial below.
For the horizontal part of the armature that supports the water tubes:
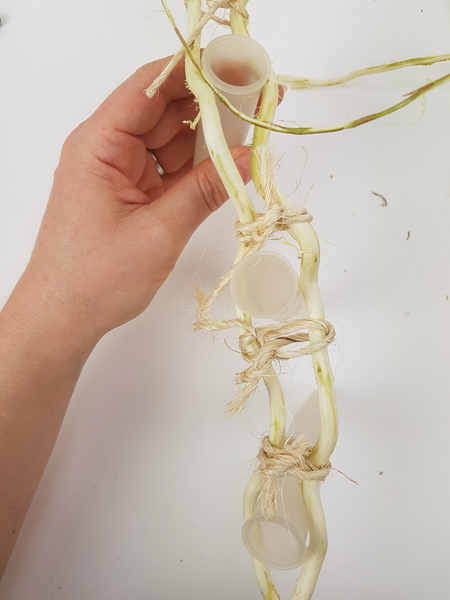
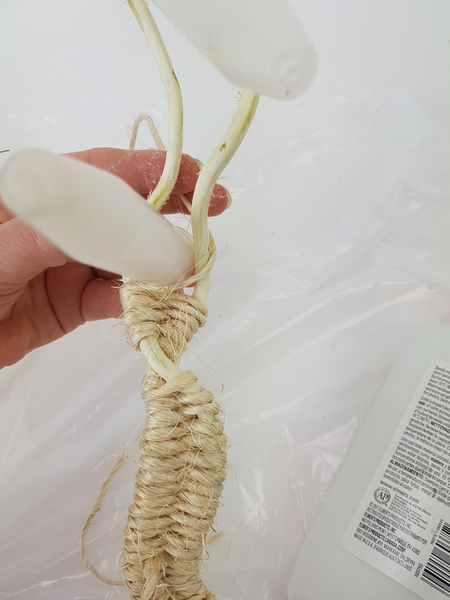
Match up two twigs to craft the water tube part of the armature. For my design I found a sturdy twig with a fork in it.
Space out the water tubes and tie it temporarily in place with a knot on both sides.
Start at one side to wind the rope around the two twigs. For my fork-in-the twig, twig I just need to wind. If you are matching two twigs, knot them, as you did with the legs.
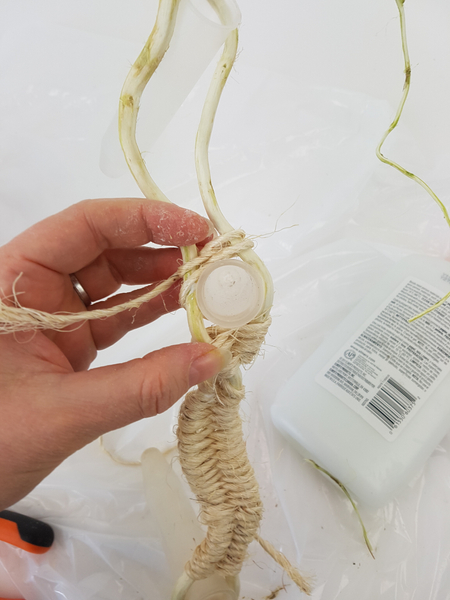
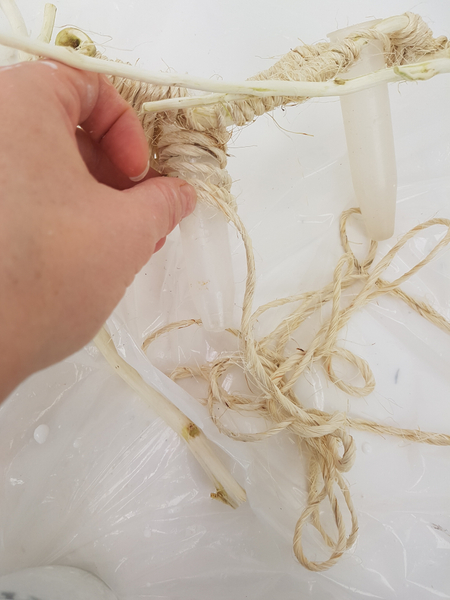
Start the winding pattern up to the first water tube.
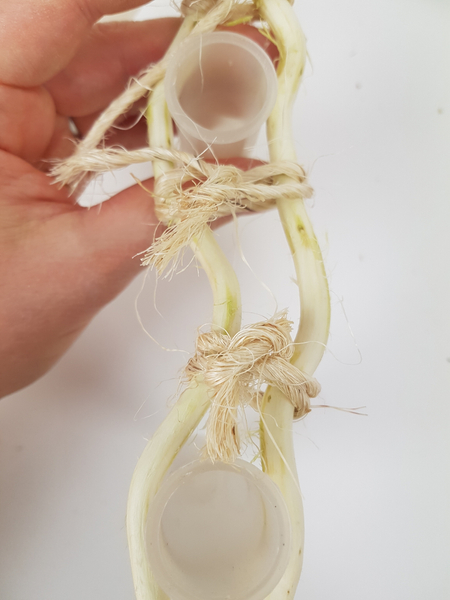
Add tiny drops of glue between the twig and the sisal to keep it set in place. Wind the rope around the water tube.
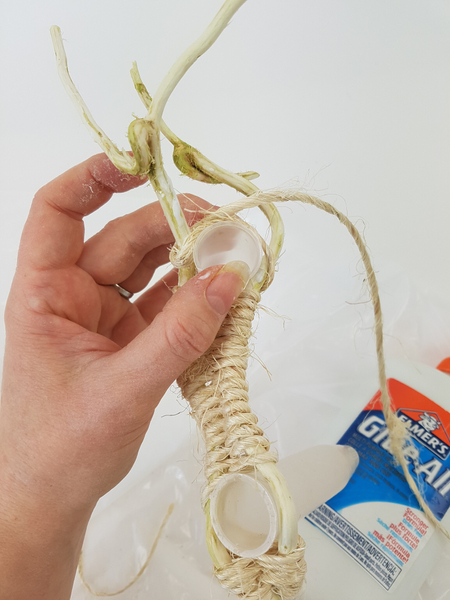
Continue the winding pattern to the next water tube.
Pull the two sides together to pinch the water tube in place.
Wind the sisal around the tube.
Keep adding tiny drops of glue. The wood glue dries clear and wont be seen once it is dry.
Add the last tube and continue the winding pattern.
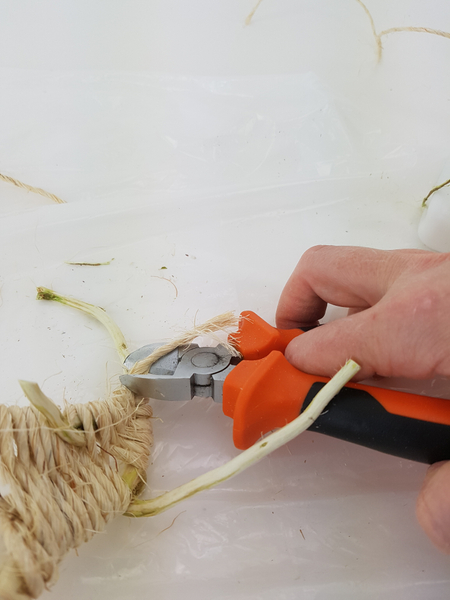
Knot the sisal. Place a small drop of glue on the knot and cut the dangling ends away.
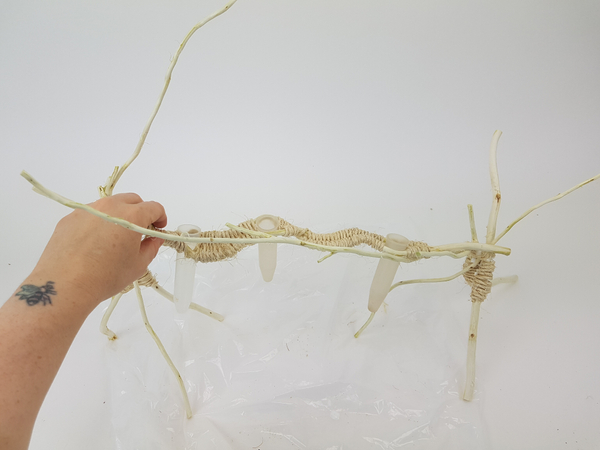
Rest the horizontal water tube twigs on the twig legs.
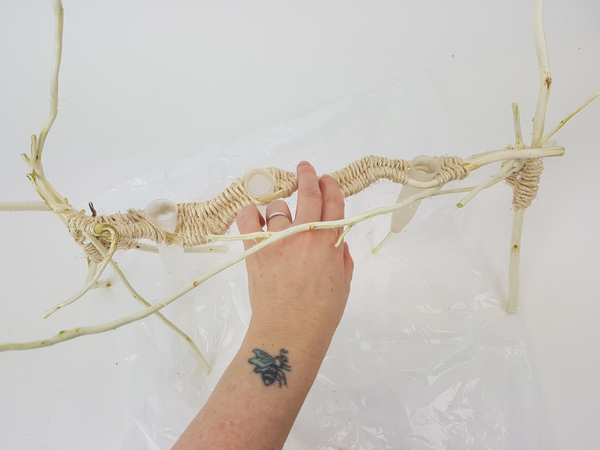
Press down on the armature to make sure it can carry the flowers.
For the water tubes:
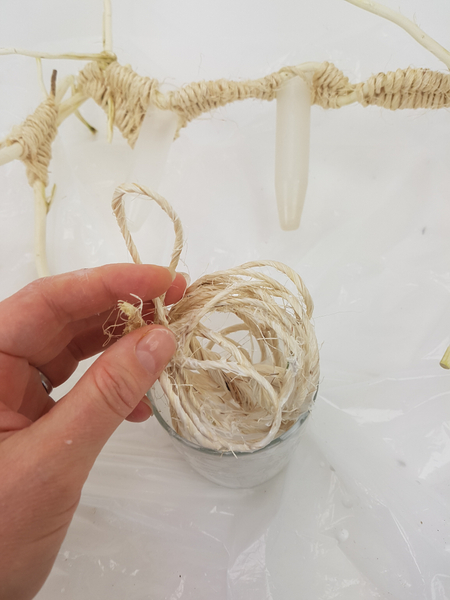
Dip sisal in a glue and water mixture.
... and wrap it around the water tubes to conceal.
Sign up for my weekly newsletter
Every week I add a new design with related tutorials. Be sure to subscribe to receive an email notification with design inspiration.


")


