Christine de Beer - effortless floral craftsman
Making a parasol
- 19 October 2011
- click to send Christine a smile
![Glue the first wooden slats of the parasol Glue the first wooden slats of the parasol](/images/2011/10/glue-the-first-wooden-slats-of-the-parasol-l.jpg?inside=600x600)
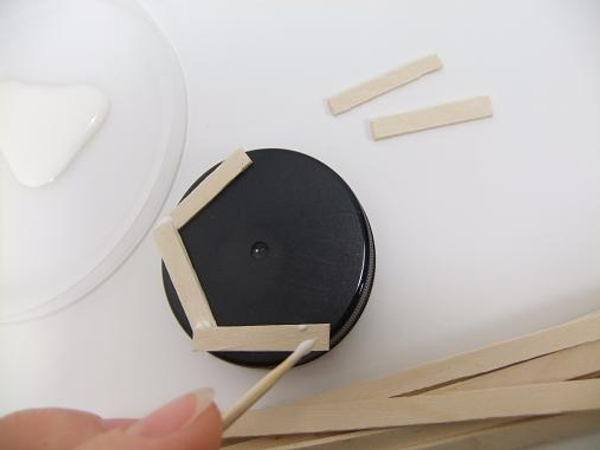
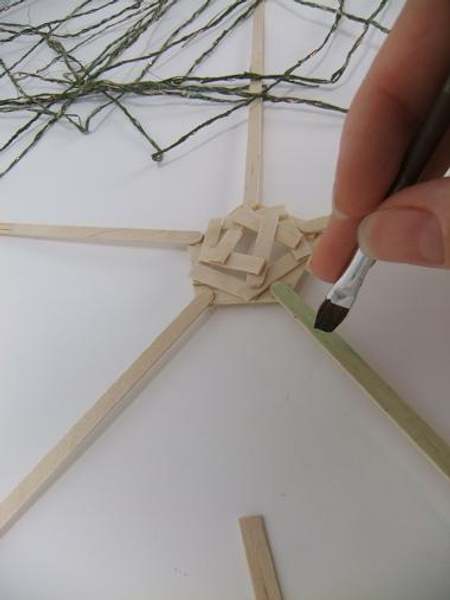
Cut short sections of wooden slats and start to glue them with wood glue into a circular shape.
![Continue adding wooden sections Continue adding wooden sections](/images/2011/10/continue-adding-wooden-sections-l.jpg?inside=600x600)
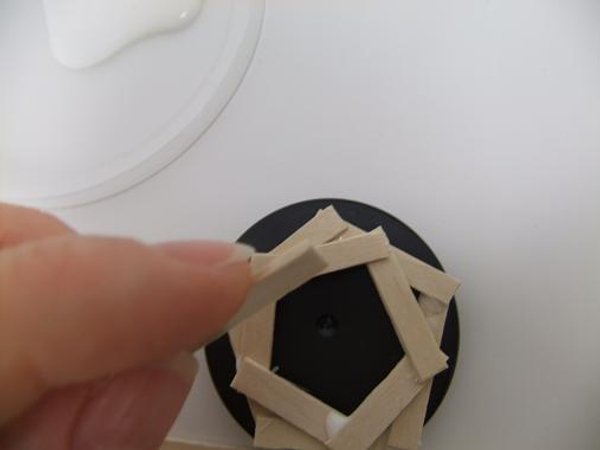
Continue adding a second layer to create a middle point for the parasol
![Middle section of the flower umbrella Middle section of the flower umbrella](/images/2011/10/middle-section-of-the-flower-umbrella-l.jpg?inside=600x600)
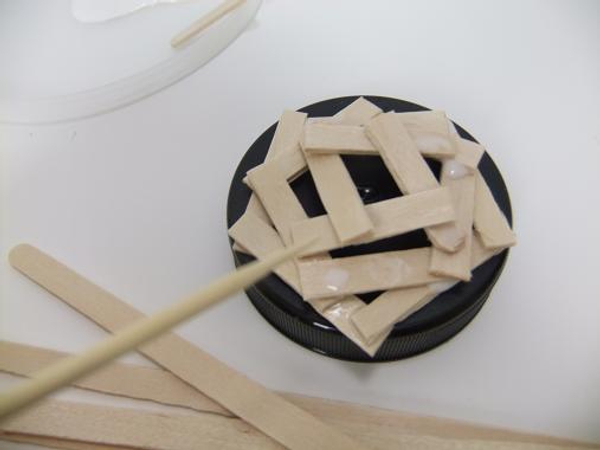
Finish the middle point with a decorative cross hatch
![Glue on 5 wooden peg supports for the floral parasol Glue on 5 wooden peg supports for the floral parasol](/images/2011/10/glue-on-5-wooden-peg-supports-for-the-floral-parasol-l.jpg?inside=600x600)
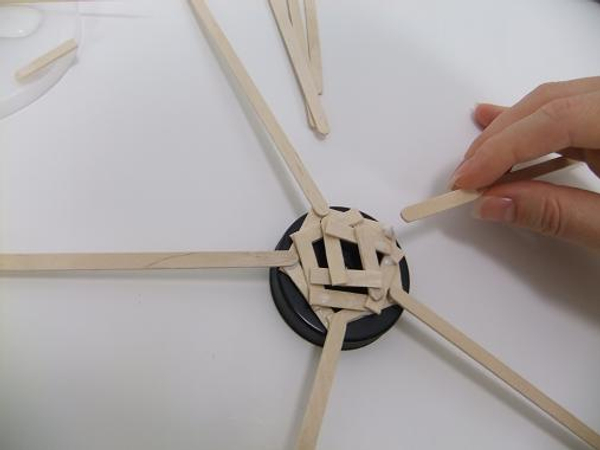
Glue on five wooden peg supports for the floral parasol
![Stain the wood green with spinach juice Stain the wood green with spinach juice](/images/2011/10/stain-the-wood-green-with-spinach-juice-p.jpg?inside=600x600)
Set the structure aside to dry completely before staining it green to blend in with the dried flax string
![Start weaving the ripped flax Start weaving the ripped flax](/images/2011/10/start-weaving-the-ripped-flax-l.jpg?inside=600x600)
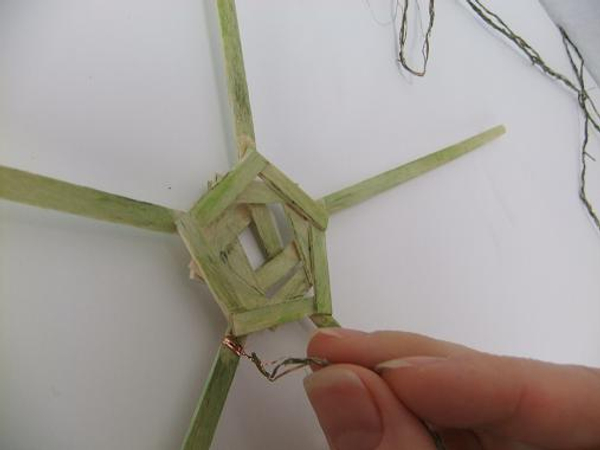
Start weaving the flax onto the parasol wood
![First weaving patterns is under and around the slat First weaving patterns is under and around the slat](/images/2011/10/first-weaving-patterns-is-under-and-around-the-slat-l.jpg?inside=600x600)
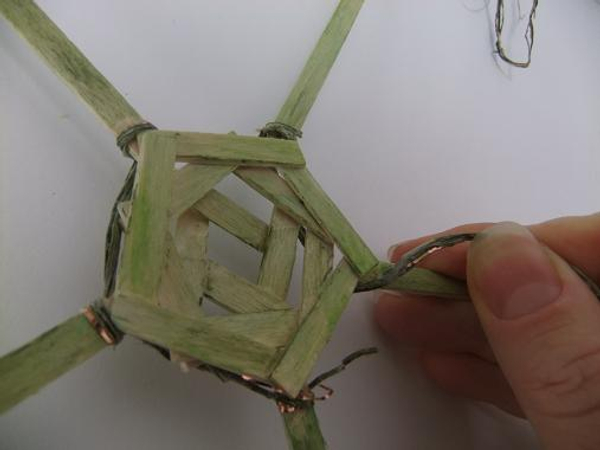
The first weaving pattern creates the inner circle. Weave under and then around the wood. Creating a flat weave with a cross at the back
![Continue the pattern with one third of the flax string Continue the pattern with one third of the flax string](/images/2011/10/continue-the-pattern-with-one-third-of-the-flax-string-l.jpg?inside=600x600)
Continue this weaving pattern for about a third of the flax string
![To create a curve in the parasol reverse the weave pattern To create a curve in the parasol reverse the weave pattern](/images/2011/10/to-create-a-curve-in-the-parasol-reverse-the-weave-pattern-l.jpg?inside=600x600)
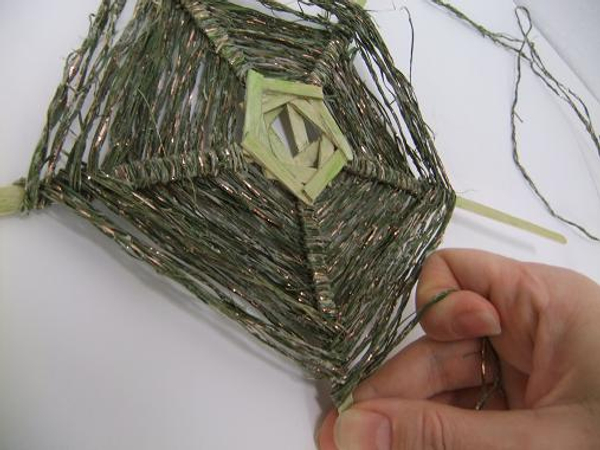
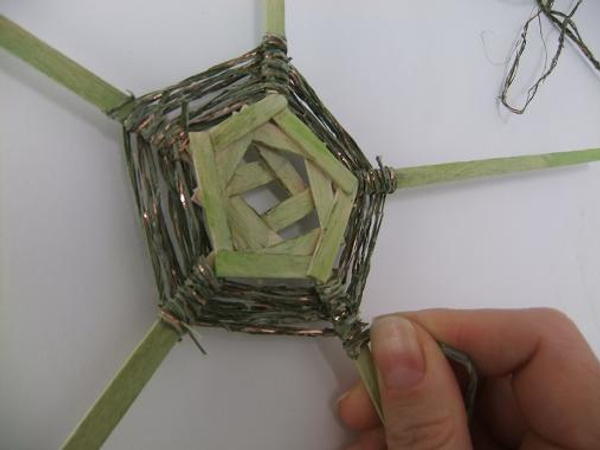
To create a curve or a dome in the parasol reverse the weaving pattern. Hook the string over the wood to cross over itself in front of the wood with a flat section at the back.
![Parasol from the back to show the test tubes filled with water for the flower material Parasol from the back to show the test tubes filled with water for the flower material](/images/2011/10/parasol-from-the-back-to-show-the-test-tubes-filled-with-water-for-the-flower-material-l.jpg?inside=600x600)
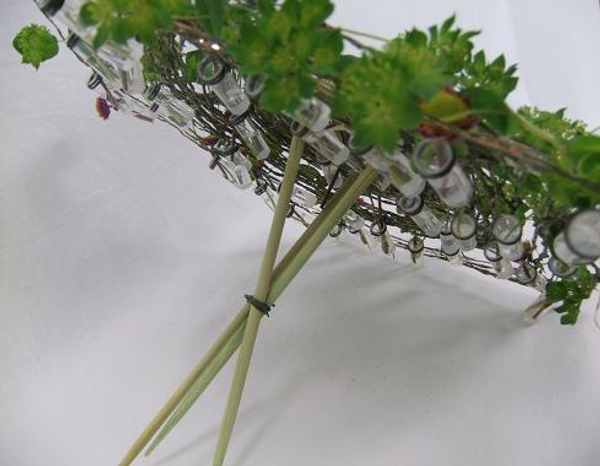
Add the chopsticks handle and wire in test tubes before designing with the plant material.
Sign up for my weekly newsletter
Every week I add a new design with related tutorials. Be sure to subscribe to receive an email notification with design inspiration.
Tutorials
Splitting the chopsticks or a wooden branch, such as a willow twig creates a natural (and glue-less!) clamp.
I wanted to make a thin and delicate fan with open spaced slats for weaving plant material through.
Related Designs
Glue a fantasy forest from Popsicle sticks, grape vine tendrils and willow tips
A visual breather from all the bright and festive designs to come when designing for Autumn.
The fan is made from 18 coffee stir sticks and dressed with a veil of grass, fall leaves and Viburnum berries