Christine de Beer - effortless floral craftsman
Wooly Stir Stick Bracelet
- 17 July 2013
- click to send Christine a smile
![Soak the stir stick in warm water Soak the stir stick in warm water](/images/2013/07/soak-the-stir-stick-in-warm-water-p.jpg?inside=600x600)
Soak the stir stick in warm water
![This makes the wood pliable and easier to bend This makes the wood pliable and easier to bend](/images/2013/07/this-makes-the-wood-pliable-and-easier-to-bend-p.jpg?inside=600x600)
This makes the wood pliable and easier to bend
![Place the tip of the wet stir stick into a cup Place the tip of the wet stir stick into a cup](/images/2013/07/place-the-tip-of-the-wet-stir-stick-into-a-cup-l.jpg?inside=600x600)
Place the tip of the wet stir stick into a cup
![Work your way around the cup so that the tick follow the curve. Work your way around the cup so that the tick follow the curve.](/images/2013/07/work-your-way-around-the-cup-so-that-the-tick-follow-the-curve-l.jpg?inside=600x600)
Gently bend and work your way around the cup so that the tick follow the curve
![Work slowly so that the twig does not snap Work slowly so that the twig does not snap](/images/2013/07/work-slowly-so-that-the-twig-does-not-snap-l.jpg?inside=600x600)
Work slowly so that the twig does not snap
![Continue to make as many stir stick bracelets as what you need Continue to make as many stir stick bracelets as what you need](/images/2013/07/continue-to-make-as-many-stir-stick-bracelets-as-what-you-need-p.jpg?inside=600x600)
Continue to make as many stir stick bracelets as what you need
![Set aside to dry Set aside to dry](/images/2013/07/set-aside-to-dry-l.jpg?inside=600x600)
Set aside to dry completely. This sets the stir stick into the new curved shape
To wrap the stir stick bracelet in wool:
![Paint a small drop of glue on the end of the curved stir stick. Paint a small drop of glue on the end of the curved stir stick.](/images/2013/07/paint-a-small-drop-of-glue-on-the-end-of-the-curved-stir-stick-l.jpg?inside=600x600)
Paint a small drop of glue on the end of the curved stir stick.
![Wrap the wool over the end of the stick Wrap the wool over the end of the stick](/images/2013/07/wrap-the-wool-over-the-end-of-the-stick-l.jpg?inside=600x600)
Wrap the wool over the end of the stick
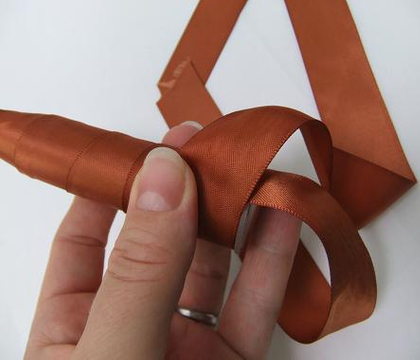
This is similar to the technique used to cover test tubes with ribbon. See Tutorial below
![Fold the wool to the side at a sharp angle Fold the wool to the side at a sharp angle](/images/2013/07/fold-the-wool-to-the-side-at-a-sharp-angle-l.jpg?inside=600x600)
Fold the wool to the side at a sharp angle
![And start to wrap the wool around the stir stick to cover the wood And start to wrap the wool around the stir stick to cover the wood](/images/2013/07/and-start-to-wrap-the-wool-around-the-stir-stick-to-cover-the-wood-l.jpg?inside=600x600)
And start to wrap the wool around the stir stick to cover the wood
![Continue to wrap Continue to wrap](/images/2013/07/continue-to-wrap-l.jpg?inside=600x600)
Continue to wrap...
... and wrap... and wrap. Add a few drops of glue to secure the wool to the wood as you go along.
![When you reach the other end of the stir stick fold the wool up When you reach the other end of the stir stick fold the wool up](/images/2013/07/when-you-reach-the-other-end-of-the-stir-stick-fold-the-wool-up-l.jpg?inside=600x600)
When you reach the other end of the stir stick place a bit of glue on the end and fold the wool up...
![Fold the wool over the stir stick. Fold the wool over the stir stick.](/images/2013/07/when-you-reach-the-other-end-of-the-stir-stick-fold-the-wool-up-l.jpg?inside=600x600)
... and over the stir stick
![Add a bit of glue and wrap the wool around the end of the stir stick Add a bit of glue and wrap the wool around the end of the stir stick](/images/2013/07/add-a-bit-of-glue-and-wrap-the-wool-around-the-end-of-the-stir-stick-l.jpg?inside=600x600)
Add a bit of glue and wrap the wool around the end of the stir stick
![When the end is covered knot the wool on itself When the end is covered knot the wool on itself](/images/2013/07/when-the-end-is-covered-knot-the-wool-on-itself-l.jpg?inside=600x600)
When the end is covered knot the wool on itself. Pull the knot tight and continue to wrap the stir stick all the way to the other side to give it a second layer of wool to cover the wood completely.
![When you reach the end knot the wool tightly When you reach the end knot the wool tightly](/images/2013/07/when-you-reach-the-end-knot-the-wool-tightly-l.jpg?inside=600x600)
When you reach the end knot the wool tightly...
![Place a drop of glue on the knot and cut the dangling wool bit short Place a drop of glue on the knot and cut the dangling wool bit short](/images/2013/07/place-a-drop-of-glue-on-the-knot-and-cut-the-dangling-wool-bit-short-l.jpg?inside=600x600)
Place a drop of glue on the knot and cut the dangling wool bit short
![Wrap and cover as many stir stick bracelets as needed. Wrap and cover as many stir stick bracelets as needed.](/images/2013/07/wrap-and-cover-as-many-stir-stick-bracelets-as-needed-l.jpg?inside=600x600)
Wrap and cover as many stir stick bracelets as needed.
![Set the covered bracelets aside for the glue to dry Set the covered bracelets aside for the glue to dry](/images/2013/07/set-the-covered-bralets-aside-for-the-glue-to-dry-l.jpg?inside=600x600)
Set the covered bracelets aside for the glue to dry completely
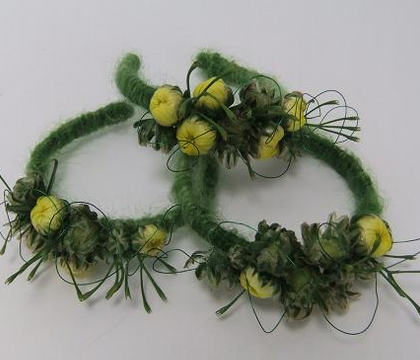
![Three wool covered stir stick bracelets ready to design with Three wool covered stir stick bracelets ready to design with](/images/2013/07/three-wool-covered-stir-stick-bracelets-ready-to-design-with-l.jpg?inside=600x600)
Three wool covered stir stick bracelets ready to design with
Sign up for my weekly newsletter
Every week I add a new design with related tutorials. Be sure to subscribe to receive an email notification with design inspiration.
Tutorials
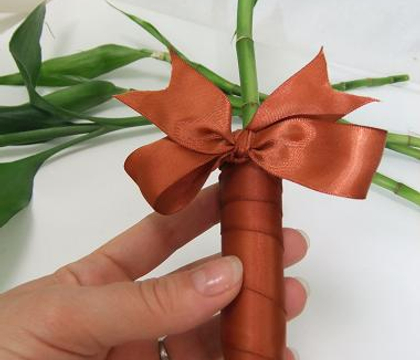
Use this technique to gift ribbon wrap a single stem or cover the stems of a bouquet with ribbon
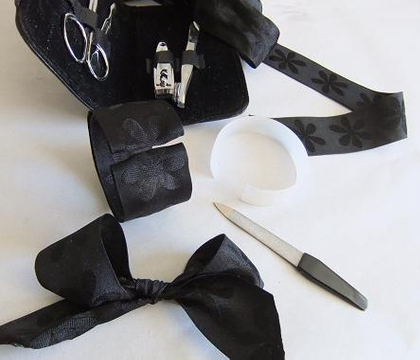
Cut the plastic, sand and wrap with ribbon
Related Designs
Bend a few stir sticks to cover with wool to make a few floral bracelets
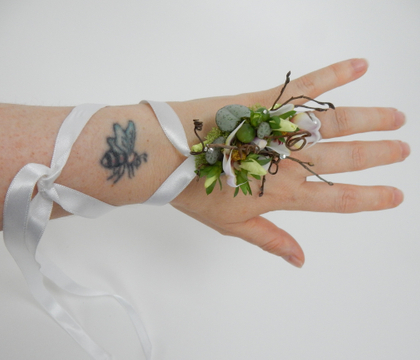
My article and body flowers design featured in DIY Weddings Magazine