Christine de Beer - effortless floral craftsman
Craft your own Quaking Feeler bug from Quaking grass
- 20 May 2026
Have a fun and flower filled World Bee Day, flower buddies
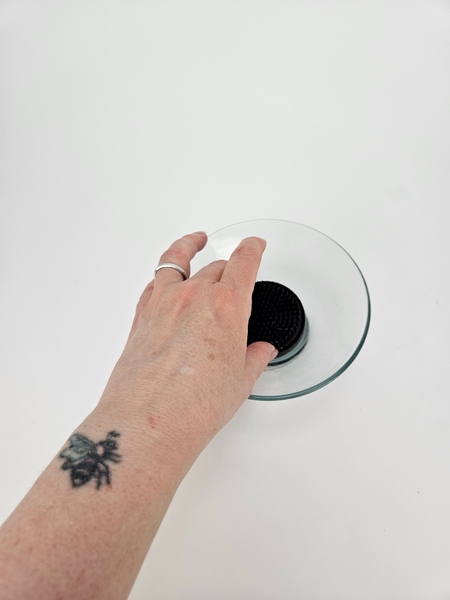
My mechanics are my tried and trusted Kenzan. I am keeping things minimal so that my flowers and tiny critters become the conversation.
For more information on how to secure a Kenzan see the Tutorials below.
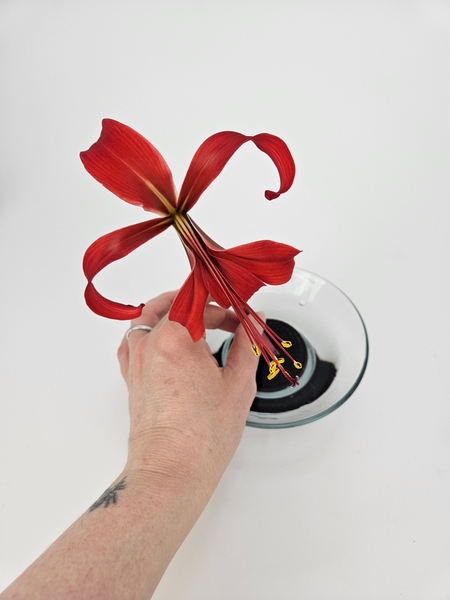
Spear the Sprekelia so that it is held firmly upright by the metal teeth of the Kenzan.
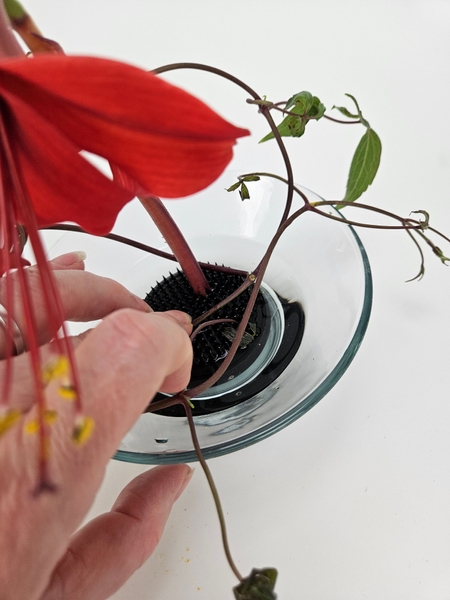
Spear a few burgundy stemmed (matches beautifully, right?) clematis vines horizontally into the teeth of the Kenzan...
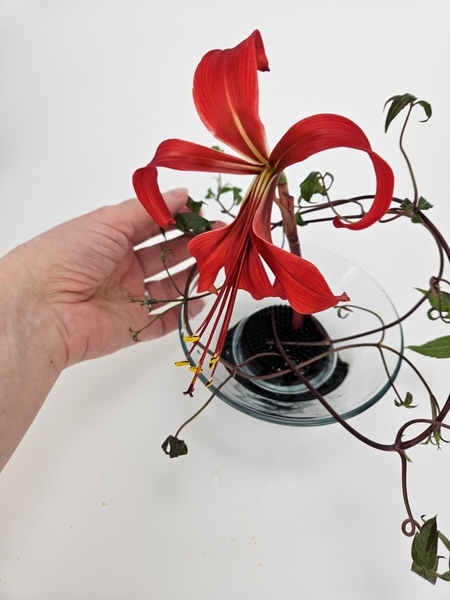
... so that you can drape the clematis vine around the flower to frame it as a wreath shaped nest.
Conceal the Kenzan with frosted glass chips.
Every Wednesday morning (Vancouver time), I send out a design note as an early glimpse at the newest Design and a few notes that I picked up creating the Tutorial that might be useful to you. This week, I tell you why I use frosted glass chips to conceal my Kenzan and how to keep them sparling clean to use again and again.
If you’re new here, you can sign up below this post. And if you’ve been receiving these notes for some time, I hope they feel like a welcome break in your busy week.
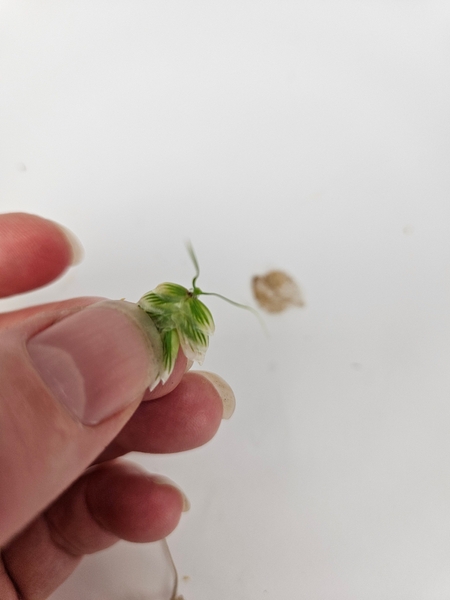
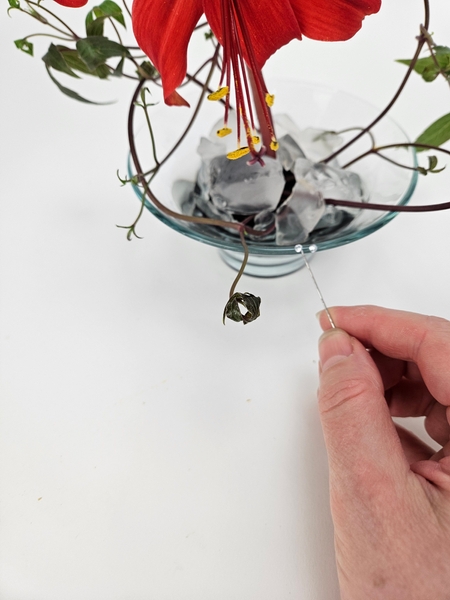
let's make our Quaking Feeler bug: Harvest one of the tall grassy wands topped with miniature green bracts to craft the critter body.
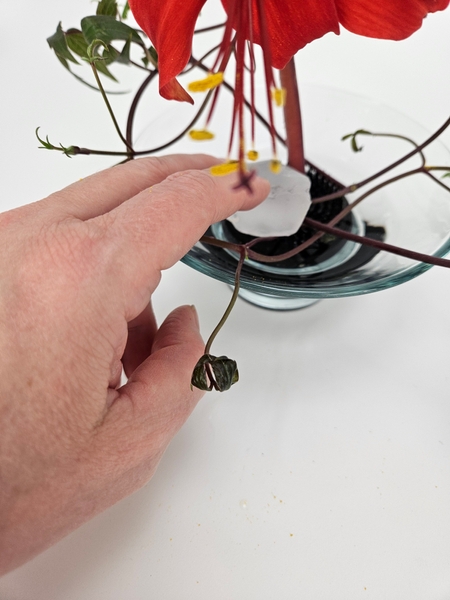
Cut a stem (you want the delicate fork where the seedheads dangle) for feelers. See where I cut it?

Use a tiny bit of floral glue to secure the feelers so that the fork extends just over the top of the quacking grass to shape the tiny bug-head for you.
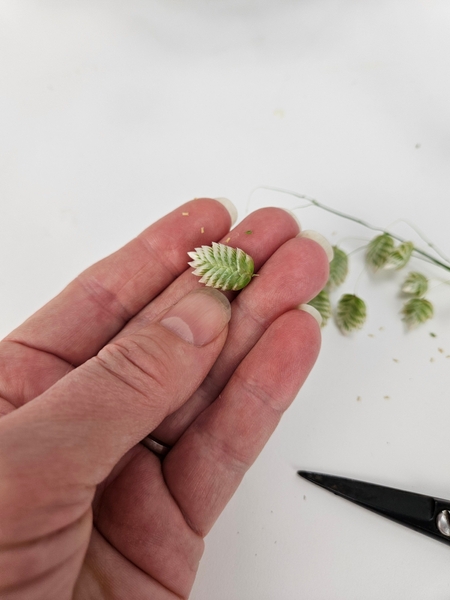
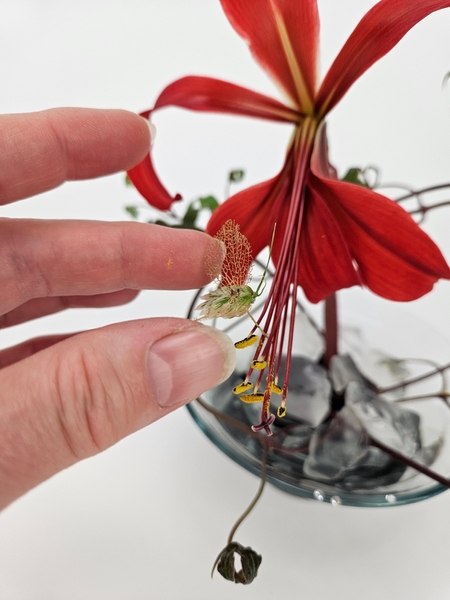
Forage you garden for dried petals or bracts for the wings. I am using some of last year's batch of skeleton hydrangea flowers.
Book readers turn to page 110 to read more about how I preserve flowers. You will find hints for making them pliable again if they are too brittle, how to dust the dried plant material and how to reshape them. Page all the way to page 120 where I show you in detail how to make skeleton hydrangeas. For more information about my book: The Effortless Floral Craftsman
If you struggle to make skeleton hydrangeas I have a tip for you: bake baking soda to change it into washing soda. That is the secret ingredient! To get you started you can find a detailed Tutorial below this post.
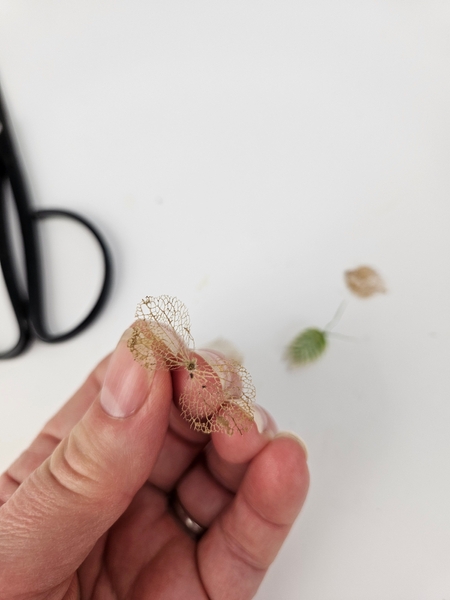
Carefully cut away two of the sepals from the stem.
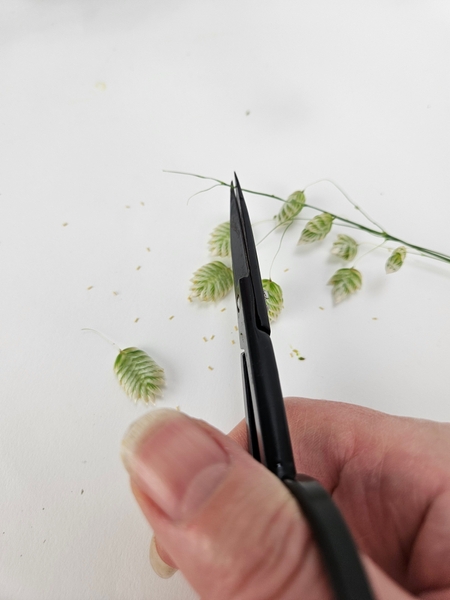
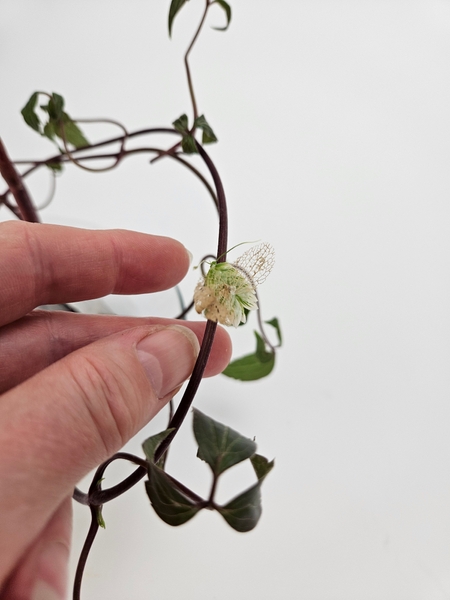
Split open the quacking grass bract...
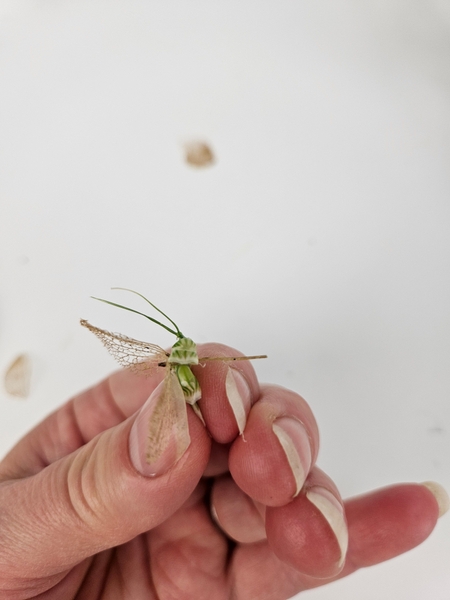
... and slip the hydrangea stem through the seed.
Close the seed bract back over the thin stem and you have a tiny support to balance the bug on in your design.
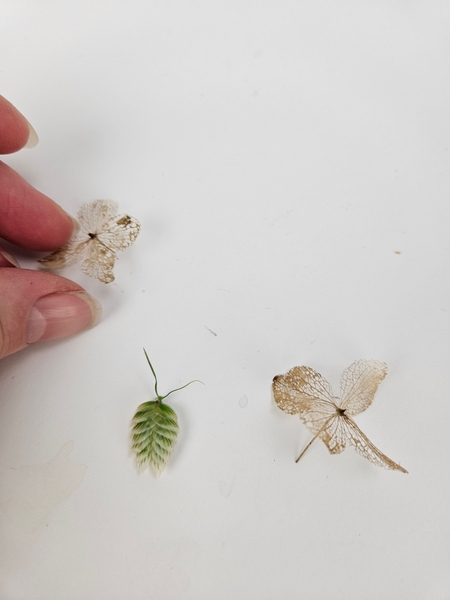
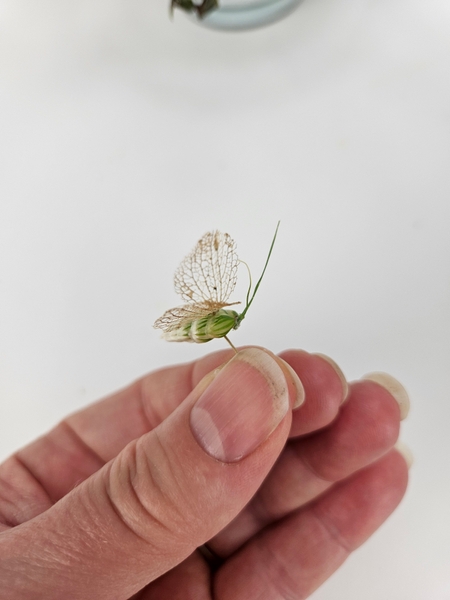
And there we have it... a Quaking Feeler bug is born.
Add a few sparkling dew drop crystals to the design for spring sparkle...
And glue in the tiny quacking grass bugs to hover on there little stem support...
Or sit flat and cozy by gluing it directly to a stem.
Design note: I am a firm believer that the more permanent the plant material the more attention you should give to adding life. Notice the tiny little wings? Instead of simply letting them settle in flat as they would be if I used the hydrangea sepals as they grow from the stem I manipulated the tiny sepals ever so gently to flutter upwards. I do this with body heat, simply by holding the sepals between my fingers for a few seconds and then lifting them slightly. This way the bugs look like they just landed here to explore the flower. Tiny detail... but it makes all the difference! I have added to Tutorial for you below if you want to see how to adjust the sepals.
Sign up for my weekly newsletter
Every week I add a new design with related tutorials. Be sure to subscribe to receive an email notification with design inspiration.
