On my online workbook this week: Brewing some inspiration
Dear
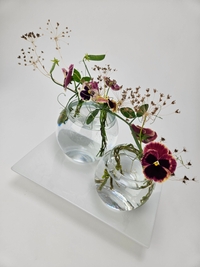
This week's inspiration is … these pretty imperfect days that feels like a bridge between seasons.
This week my tip is about getting a “perfect” willow knot.
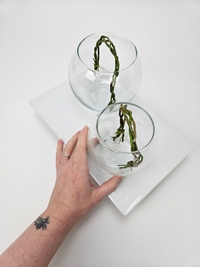
Years ago I used to make my baskets soooo perfect and when I said I made this basket design people assumed I mean I made the design in the (bought) basket. Now my woven floral objects are kinda imperfect… by design. I like it to be so obviously not a bought woven object but rather something woven especially for this floral design. So I went for the one thing basket weavers said "Don't do". I weave and braid with freshly harvested, (cut from my balcony garden coppice) “green” rods. It is easy to weave and braid with for floral designs. And you really do need... easy... to make a knot! But well worth the extra effort because it will be visible in the glass container.
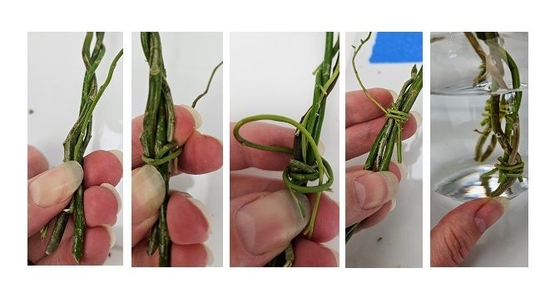
To make the knot: Latch the one side with the first wrap so that the stem is secure (see the pictures above) and you can focus on the tricky part of making the knot without the wrapped part coming undone. Hold a generous amount of stem under your thumb so that you do not have to struggle. Wrap the stem around the bundle and wrap it over the stem end several times (at least twice) to secure it in place.
And then wrap the last stem loosely around the bundle to give you a bit of slack to knot the stem. Catch the stem through the slack and pull it tighter to secure. If it snaps try again but this time soak the stem in warm water before making the knot.
This is the biggest drawback when using “green” stems, while lovely and pliable it is more inclined to bend at an angle or snap than to curve elegantly as it would if it was dried and then re-soaked.
Using rods straight from the garden definitely has its limitations. Green willow designs will also often be more brittle and can loosen as it dries. Fine for floral objects but for baskets you will need to dry and rehydrate the rods.
Enjoy!
Every good wish,
Christine