On my online workbook this week: Turn, tuck, test… and refine
Dear
This week’s inspiration is a few design lessons from the birds in the cherry trees outside my design room window.
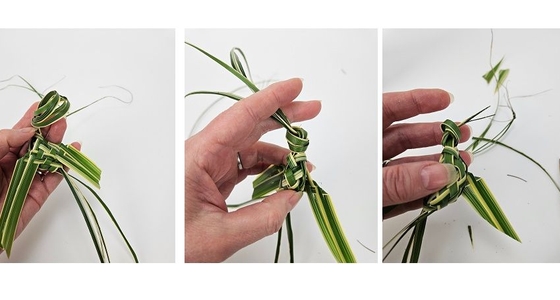
My design note for you is a slight beak-tweak. How you tuck in and knot the bird's head adds so much personality... and can change how the bird holds the grass up in the design. Also, the beak direction will support the grass that you slip through the beak in a completely different way depending whether you tuck the knot over or under. See the pictures above.
First try an overhand knot to shape the head and beak. Before you cut the beak to place the bird in your design, slip the grass into the beak to see if it gives you the result you want when you position the grass and bird into the design.
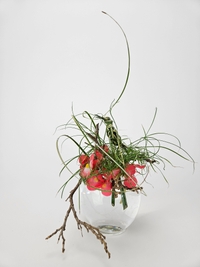
You might not need as much of a “lift” as I did for my design, maybe you want more of a swoop. I needed this one blade of grass to extend far beyond the rest to adjust the design dimensions.
If your grass drapes in the wrong direction in the beak, untie the knot and tie it again, this time folding it under and through. Notice the difference?
When you are confident you have the direction figured out, secure the head with the knot and cut the tail feathers, beak and wings to the size you want.
Enjoy!
Every good wish,
Christine
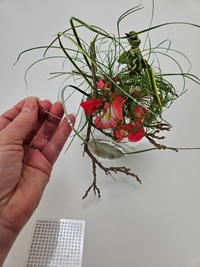
ps: When you make this bird let me know (on a scale of 1-10) how difficult it is for you to cut those tail feathers. Bet its a 10 difficult! It looks so amazing just left long and draped (see the design linked below this week's post) that the temptation is always there to just let it be, right?