On my online workbook this week: Spot on!
Dear
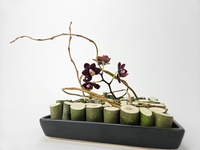
This week's inspiration is falling in love with these tiny, tiny, mini miniature tiny orchids with the most adorable spotted lip… and then spotting the perfect willow side branch in the bundle to frame it with.
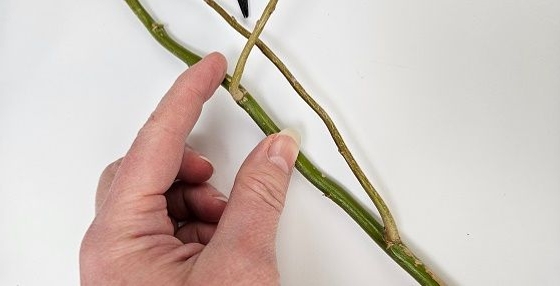
... and that is my tip for this week: Find the perfect side branches to do the hard work for you. The perfect side branch is one that grows more horizontal (see the picture above) rather than up. If the branch points up it will lift the small stump of the willow branch out of the armature when you try to curve it. You will need to do a whole lot of twig manipulation to coax it to point more horizontally and there is always a risk that the side branch breaks off when you try to bend it. So yes, go through the willow tips and find the perfect side branches first.
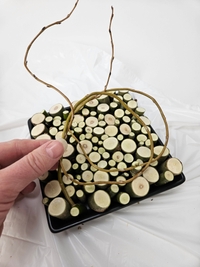
After inspecting the curly willow branch and finding the two perfect side branches, cut them short. Cut just above the side branch with the stump side as long as the other stumps in the armature. I show you where in the picture above. Knot the side branches in a decorative granny knot. Experiment whether to curve the branch over or under to see how the branch curves. Whatever looks nicest for your design. Place the one that knots in the most horizontal position first. Tap it down with your finger into position and slip it into the split twig to keep it in place in the armature. And rest the other side branch knot over that to finish the armature.
Sounds easy but it is a bit tricky. It can be really frustrating when that little twig lifts out taking with it half of the cut stems that you have so carefully positioned.
Enjoy!
Every good wish,
Christine
ps: I have a Tutorial for you below the post on how to manipulate a twig if you need to adjust your side branch to become the perfect branch.