On my online workbook this week: … any day now
Dear
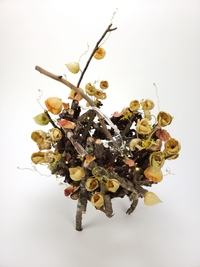
This week's inspiration is a Shortest Autumn Ever!
Storm season came rather dramatically this year to my corner of British Columbia and took with it every single autumn leaf. Yes, even those pretty ones I was admiring and planning to use in this design.
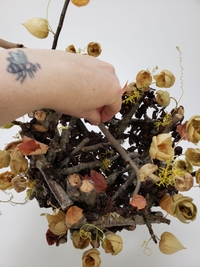
My tip for you this week is about building up an armature using thinned wood glue. I have mixed feelings about this technique. It feels like it should be a super quick design solution. And once dry it should be all done. But maybe I have too high expectations because it is never as perfect as I want it. I always have to go back in and re-glue sections.
So I see the thinned glue as my foundation, a starting point. And I see the bits that fall off as “bonus panels” to add in once dry.
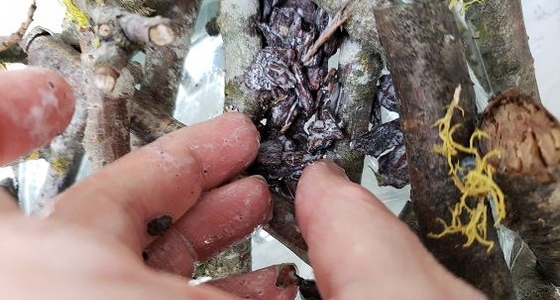
Place the armature on a plastic sheet while you craft it and let any bits that drop dry on the plastic sheet in clumps. Make sure the chips have something secure to glue to when placing them. Especially in a design like this where it is going to be removed from a form. Make sure you have a few layers of chips and that the layers extend from stick to stick. Even overlap as in the picture above. You might have to build up sections with several layers. Also make sure everything is really secure, and really dry before removing it from the form. Be brave when you remove it. You will need to use force on something rather delicate. You will need to break it from the plastic without breaking the armature!
Keep any of the small, glued sections that drop onto the plastic sheet so that you can add it back into the armature once the basic structure is dry to build up like a puzzle. I glue these back into the armature with hot glue once everything is dry.
Enjoy!
Every good wish,
Christine
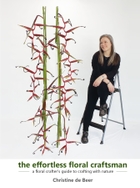
Ps: if you would prefer to skip the thinned glue technique completely when crafting this design have a look at another option in my book on page 40. For more information about my book: The Effortless Floral Craftsman