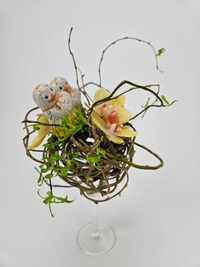
On my online workbook this week: Spring Roll
Dear
This week's inspiration is the perfume of Spring that encourages us to get our creative wiggle on.
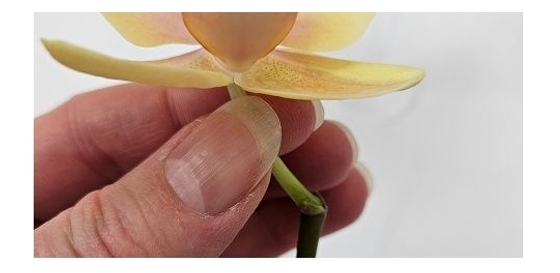
My tip for you this week is about cutting your flowers from the spike so that you have more options to find interesting ways to position the orchids.
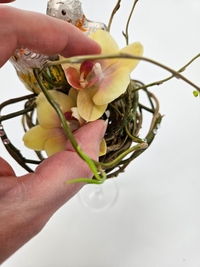
If you simply snip the flower from the spike you end up with a rather short stem that makes it really difficult to place the flower into the position that makes the design welcoming. And I want to quickly digress and explain what I mean with “welcoming”... whenever you add anything into a design like a critter or a bug or chick or even a flower with a face make sure it never, ever looks like it is desperately trying to escape. Make it comfortable and give it something to interact with. Give it a reason why it is in the design. It is a tiny detail but we do pick up on it when we look at designs. It is a message we send just by being mindful of the placement.
… anyway… when you cut the orchid from the spike, cut the stem (see the picture above) and not just the flower. The spike stem gives you a much needed lift to position the flower deep into the armature so that it will not appear so depressed or sunken or stuck on. That tiny little stem can even add a bit of movement.
And also, as a second reason why I suggest cutting the spike stem into sections rather than just snipping off the individual orchids is for conditioning. A general rule whenever you are making a decision of where to cut any stem when conditioning, cut it where the stem becomes darker. The darker section of stems will condition better than the lighter part. Next time you look at a bunch of tulips, for instance, lift it up and have a look at the stem ends. You will clearly see where to cut it… right above the white part where the flower stem was pulled from the bulb.
Enjoy!
Every good wish,
Christine