On my online workbook this week: In the little gap
Dear
This week's inspiration is taking time.
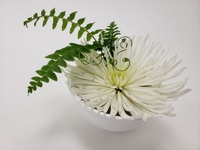
This design reminded me of a Tulip design I did way back when my floral journey started. Isn’t it fun to recognise glimpses of what your own effortless style (loads more about this in my book) developed into in those early, early arrangements you did as a beginner designer?
My tip for you this week is for fixing the placement if you find your ferns topple over. Just moving it slightly more to the centre of the petal where it is at its widest, firmest will do the trick.
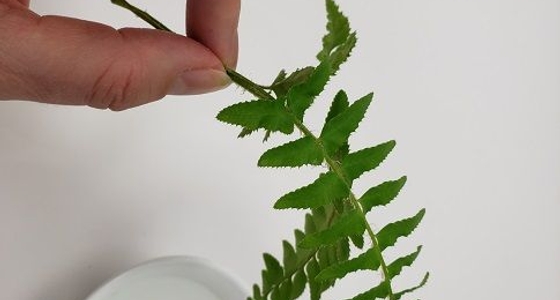
To determine where to slip in the ferns between the petals so that they remain perfectly upright, cup your hand into an open “C” and slowly pull the flower from the top through to the bottom of your hand. Take care not to bruise the petals but pay special attention on how the petals curve. Start off with an open hand and close it slightly around the flower to feel the petals. You will immediately feel how and where a fully conditioned, fresh bloom will easily hold up the ferns. The tip of the petals curve easily but just a little more to the middle is the ideal place- try to see if you can feel where the petals are thicker.
Slip the flower into the small container so that the petals curve slightly (at that place you just noticed) where it rests on the edge. If it is a really large bloom you can even place it at a jaunty angle, like I did. The important part is to slightly curve the petals so that they pinch together.
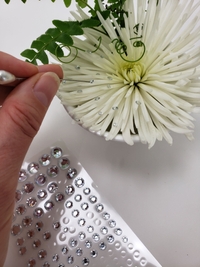
Gently slip the ferns between the petals so that their stem ends rest on the bottom of the container in the water and the fern is then kept in position by the petals.
If you still find it difficult to keep the fern upright, bundle all the stems and insert them at once. This way they are easier to pinch in place and as you get more confident you can experiment with slimmer stems to balance.
Enjoy!
Every good wish,
Christine