On my online workbook this week: And that’s when inspiration toad us to hop to it
Dear
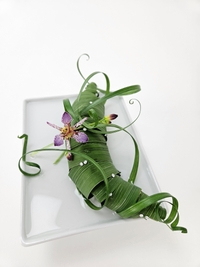
This week’s inspiration is this toad-ally awesome toad lily. I so wanted to see what these flowers look like so I actually doubled up (when you garden in a tiny space doubling up is a huge investment of resources!) and planted the rhizomes in both my balcony gardens… and they both flowered and flowered… and flowered.
My tip for you this week is about the part of your design that is easy to overlook… but will spoil the look of your entire design if you do. What goes on around the design (the stems, the water quality, the attention to craftsmanship) can give the viewer a bit of space to notice or discourages him to try to notice.
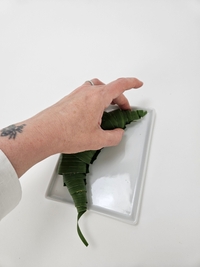
The thing is that if you don’t design the stems that fall below the water line they can add clutter and spoil the neat appearance of your carefully styled design.
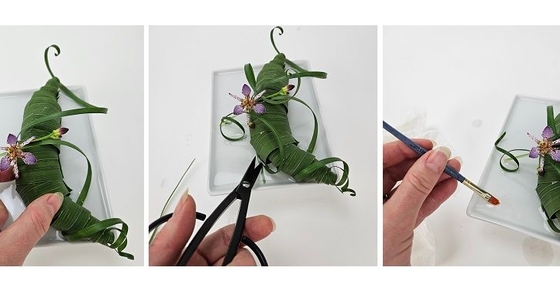
Instinct tells you to place the grass in the water first and then position the curled tip. But this can create awkward curves that are difficult to control. Instead, when designing with loosely twirling grasses make sure to position the twirling tip part first in the design. Get it exactly where you want it and allow the cut end to dangle. When you are happy with how it looks in the design, drape the other side, the cut end down into the design and place that so that it ends under water. This part of the grass is also easier to thread through the armature to keep it exactly in place below the waterline if you need to because it is less floppy. If the cut end is longer than you require, reach into the design (see the picture above) and neatly cut away any extra stem allowance that you do not need. This way you have more than enough grass to design with and the stem is neatly concealed where you do not want to see it but it will still continue to hydrate.
You might have to clean up any debris left from cutting the grass to make sure the water is sparkling clear. I find the quickest way to do this is with a paint brush. The bristles of the brush lifts away even the tiniest debris with no fuss. You can find a more detailed Tutorial on how to do this below this week’s post.
Enjoy!
Every good wish,
Christine